SAML: Configuring Okta
This guide walks you through configuring Okta as a SAML SSO identity provider (IdP) for Pulumi Cloud.
Creating the Okta application
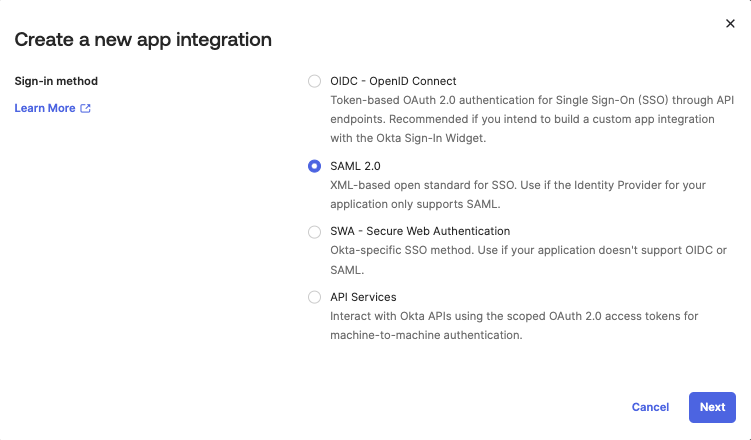
The first step is to create a new Okta Application Integration. Of the various “sign-in methods” available, choose SAML 2.0.
Configuring the application
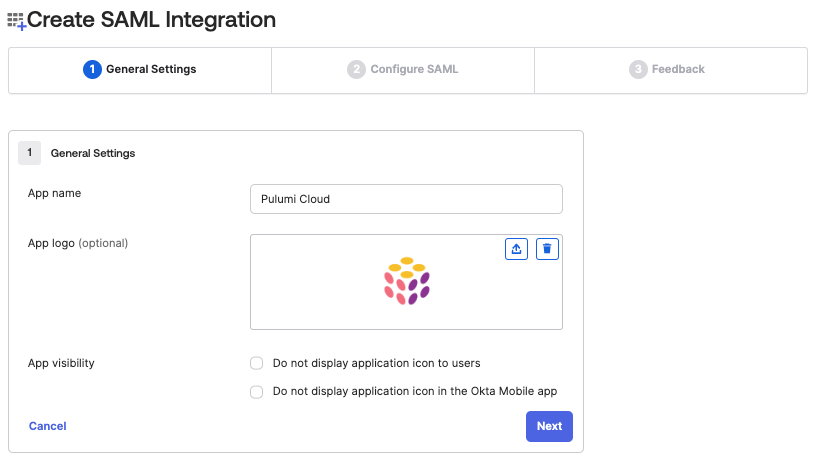
Next you will be guided through a wizard to configure the Okta application. The first step is to give it a name—Pulumi Cloud for example—and an icon.
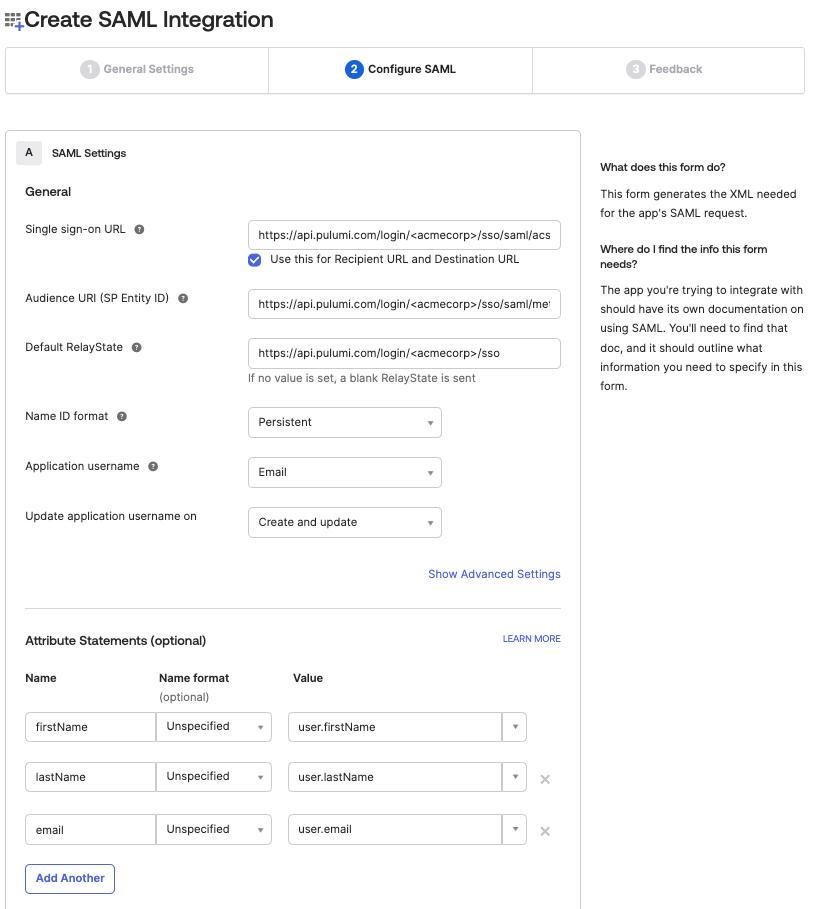
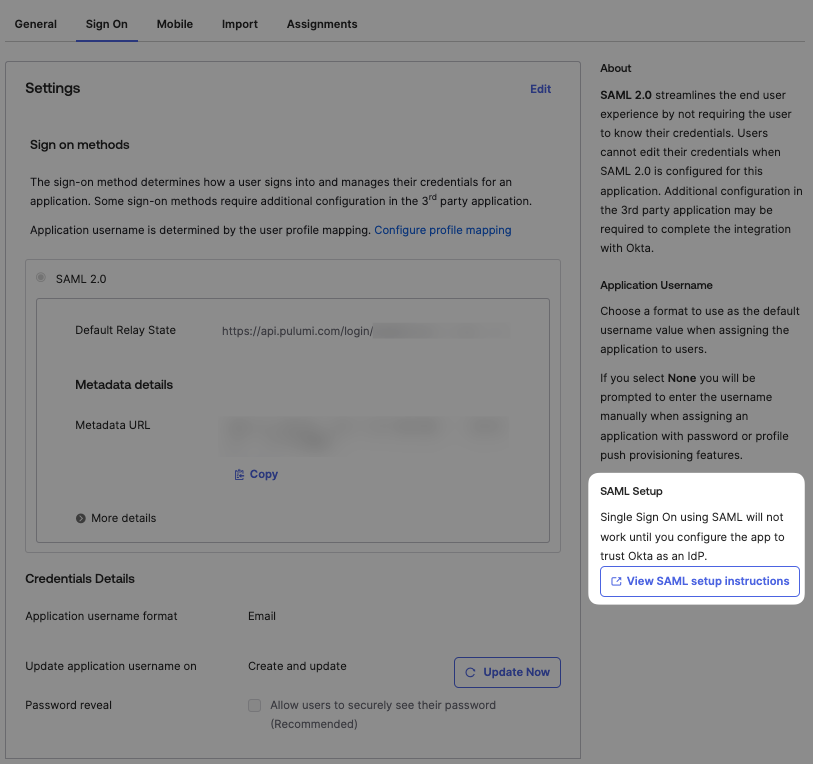
The next step is to configure the SAML application’s settings.
<orgName> with your actual organization name.| SAML Setting | Value |
|---|---|
| Single Sign-on URL | https://api.pulumi.com/login/<orgName>/sso/saml/acs |
| Audience URI | https://api.pulumi.com/login/<orgName>/sso/saml/metadata |
| Default Relay State | https://api.pulumi.com/login/<orgName>/sso |
| Name ID Format | Persistent |
| App username | Email |
In addition, you can optionally provide two attribute statements so that users who sign in with their Okta credentials will have proper user names.
| Attribute | Value |
|---|---|
| firstName | user.firstName |
| lastName | user.lastName |
If you plan on using SCIM, you will need to provide the above attributes, in addition to the email attribute.
| Attribute | Value |
|---|---|
| user.email |
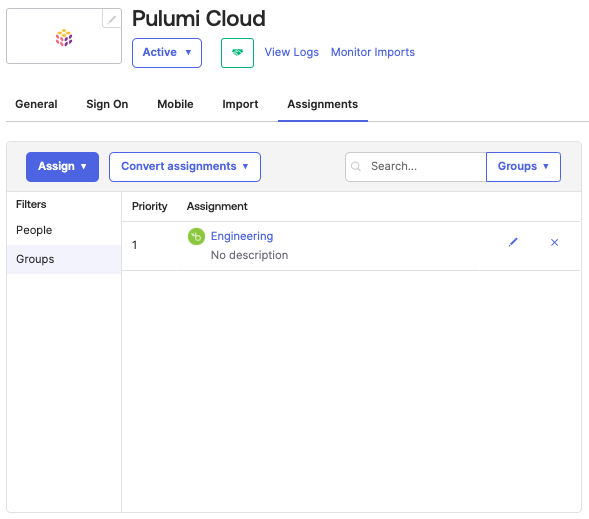
User assignments
After the Pulumi SAML application has been created in Okta, the next step is to assign users to it. This will grant specific users or groups access to sign into Pulumi with their Okta-provided credentials.
To assign users or groups to the application, navigate to the Assignments tab on the application page.
Configuring your Pulumi organization
To configure Pulumi Cloud with details on your new Okta-based SAML application, you need to obtain the IdP metadata document from Okta and then provide it to Pulumi.
First, navigate to the Sign On tab on the application page and click the “View SAML setup instructions” link in the right column.
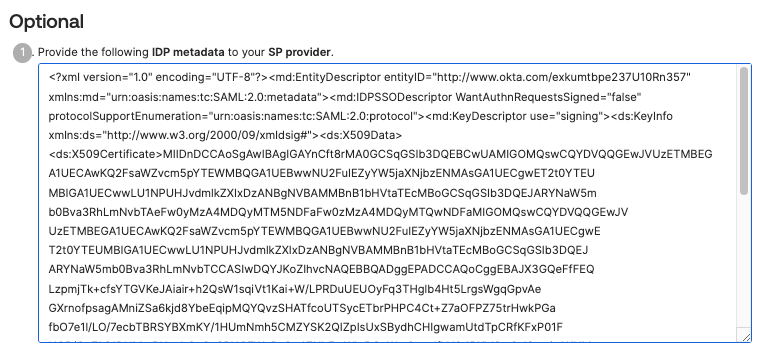
Next, scroll to the bottom of the setup instructions and select the value in the large text box with the heading “Provide the following IDP metadata to your SP provider”. That’s the full SAML Identity Provider SSO descriptor, which contains all of the settings Pulumi needs to verify a user’s identity.
With the block of XML text in your clipboard:
- Sign in to Pulumi Cloud and navigate to your organization.
- Select Settings > Access Management.
- Select the Other tab.
- In the Membership Requirements section, select Change requirements.
- Select SAML SSO and then Next.
- Paste the IdP metadata descriptor into the text area.
- Select Apply changes.
Configuring session lifetime
The Pulumi Cloud uses the SessionNotOnOrAfter attribute in the AuthnStatement element to configure the session lifetime. To configure this in Okta, you must use a SAML assertion inline hook.
The JSON payload the inline hook sends to Okta should contain the following:
{
  "commands": [
    {
      "type": "com.okta.assertion.patch",
      "value": [
        {
          "op": "add",
          "path": "/authentication/sessionLifetime",
          "value": 21600 // Lifetime in seconds
        }
      ]
    }
  ]
}
Signing in to Pulumi using Okta
Members of your Okta application can now sign in to Pulumi. Navigate to https://app.pulumi.com/signin/sso/ and enter the name of your Pulumi organization.
Troubleshooting
For help resolving SAML SSO configuration issues, see the SAML SSO troubleshooting guide or contact support.