Host a Static Website on Amazon S3
20 minIn this tutorial, you will provision raw AWS resources with Pulumi to host a static website on Amazon S3. First, you will create a Pulumi program that uploads the files from a local www directory to an S3 bucket. Then, you will configure the bucket to serve those files as a website and attach a bucket policy that makes the objects publicly readable.
Along the way, you will see how Pulumi models the relationships between resources with Outputs and the apply method, and how those relationships let Pulumi create your infrastructure in the correct order.
- How to create an S3 bucket and upload files to it as bucket objects
- How to configure an S3 bucket to serve a static website
- How to attach a bucket policy that makes objects publicly readable
- How Pulumi tracks dependencies between resources with Outputs and
apply
- A Pulumi Cloud account and an access token
- The Pulumi CLI
- An Amazon Web Services account
- The AWS CLI
- Node.js installed
In this tutorial, you will provision raw resources in AWS using the @pulumi/aws package. First, you will create a Pulumi program that uploads files from the www directory to S3. Then, you will configure the bucket to serve a website. This tutorial uses JavaScript, but you can also run through this example in Python.
Deploy the app#
Step 1: Create a new project from a template#
Create a project directory, s3website, and change into it. Run pulumi new javascript --name myproject to create a new project using the JavaScript template. Replace myproject with your desired project name.
mkdir s3website && cd s3websitepulumi new javascript --name myprojectStep 2: Create a bucket and upload files#
Open up index.js using your preferred text editor and add the following code. This creates a new S3 bucket, then iterates over the files in the www folder to create an S3 Object for each file.
const aws = require("@pulumi/aws");const pulumi = require("@pulumi/pulumi");const mime = require("mime");const fs = require("fs");const path = require("path");
// Create an S3 bucketlet siteBucket = new aws.s3.Bucket("s3-website-bucket");
const addFolderContents = (siteDir, prefix) => {  for (let item of fs.readdirSync(siteDir)) {    let filePath = path.join(siteDir, item);    let isDir = fs.lstatSync(filePath).isDirectory();
    // This handles adding subfolders and their content    if (isDir) {      const newPrefix = prefix ? path.join(prefix, item) : item;      addFolderContents(filePath, newPrefix);      continue;    }
    let itemPath = prefix ? path.join(prefix, item) : item;    itemPath = itemPath.replace(/\\/g,'/');             // convert Windows paths to something S3 will recognize
    let object = new aws.s3.BucketObject(itemPath, {      bucket: bucket,      source: new pulumi.asset.FileAsset(filePath),     // use FileAsset to point to a file      contentType: mime.getType(filePath) || undefined, // set the MIME type of the file    });  }}
addFolderContents("www"); // base directory for content files
exports.bucketName = siteBucket.bucket; // create a stack export for bucket name
Notice how you are using the @pulumi/aws npm package to create an Amazon S3 bucket with aws.s3.Bucket. This uses the s3 module and the Bucket resource for the package. For each file in www, an aws.s3.BucketObject gets created, using the helper pulumi.asset.FileAsset to reference a local file.
In order to serve the files to a browser, the content type for each S3 object must be set. For this, the NPM mime package is used. Just like a regular Node program, Pulumi programs can use any Node.js package.
Step 3: Create your website files#
Create a subfolder of s3website called www. Download favicon.png and save it to www.

Also save the following as index.html:
<html> <head> <title>Hello S3</title><meta charset="UTF-8"> <link rel="shortcut icon" href="/favicon.png" type="image/png"> </head> <body> <p>Hello, world!</p><p>Made with ❤️ with <a href="https://pulumi.com">Pulumi</a></p> </body></html>Step 4: Install npm dependencies#
Add and install the NPM dependencies:
npm install --save @pulumi/aws mimeStep 5: Set your AWS region#
Configure the AWS region to deploy to, such as us-west-2.
pulumi config set aws:region us-west-2Notice how a new file, Pulumi.website-testing.yaml, got created in the root directory for your project next to your Pulumi.yaml project file. See Defining and setting stack settings for more information about this file.
Step 6: Preview and deploy your resources#
To preview your Pulumi program, run pulumi up. The command shows a preview of the resources that will be created and prompts you to proceed with the deployment. Select yes to create a stack component, a Bucket and two S3 Objects (one for each file in the www folder).
Step 7: View your stack resources#
Pulumi Cloud#
To see the full details of the deployment and the resources that are now part of the stack, open the update link in a browser. You can see the bucket that was created in the Resources tab.
Pulumi CLI#
To see the name of the bucket that was created, run pulumi stack output. Note that an extra 7-digit identifier is appended to the name. All Pulumi resources add this identifier automatically, so that you don’t have to manually create unique names.
pulumi stack outputCurrent stack outputs (1): OUTPUT VALUE bucketName s3-website-bucket-8533d8bTo see that the S3 bucket objects exist, you can either use the AWS Console (which is accessible from the Pulumi Cloud) or the AWS CLI:
aws s3 ls $(pulumi stack output bucketName)2019-09-26 17:12:22 13731 favicon.png2019-09-26 17:12:22 264 index.htmlStep 8: Add S3 website support#
Next, configure the S3 bucket to serve the files on a browser. To do this, you use the aws.s3.Bucket.website property and attach an aws.s3.BucketPolicy object.
Change the declaration of siteBucket to specify an indexDocument:
...// Update your siteBucket declaration to thislet siteBucket = new aws.s3.Bucket("s3-website-bucket", { website: { indexDocument: "index.html", },});...Add the following code, which defines the S3 public read policy, applies it to the bucket, and defines a new stack output:
// Create an S3 Bucket Policy to allow public read of all objects in bucket// This reusable function can be pulled out into its own modulefunction publicReadPolicyForBucket(bucketName) {  return JSON.stringify({    Version: "2012-10-17",    Statement: [{      Effect: "Allow",      Principal: "*",      Action: [        "s3:GetObject"      ],      Resource: [        `arn:aws:s3:::${bucketName}/*` // policy refers to bucket name explicitly      ]    }]  })}
// Set the access policy for the bucket so all objects are readablelet bucketPolicy = new aws.s3.BucketPolicy("bucketPolicy", {  bucket: siteBucket.bucket, // depends on siteBucket -- see explanation below  policy: siteBucket.bucket.apply(publicReadPolicyForBucket)          // transform the siteBucket.bucket output property -- see explanation below});
exports.websiteUrl = siteBucket.websiteEndpoint; // output the endpoint as a stack output
To make all objects in the bucket publicly readable, you’ll need to create a BucketPolicy object. The definition of bucketPolicy illustrates how Pulumi tracks dependencies between resources. The property aws.s3.Bucket.bucket is an output property of type pulumi.Output—a marker class that encodes the relationship between resources in a Pulumi program. An object of type Output can be passed directly to the inputs of a resource constructor, such as the bucket property.
For the policy property, the IAM policy must include the target bucket name. Since the value of output properties are not known until the underlying resource is created (such as the generated name for the S3 bucket), you need to use the apply method of pulumi.Output rather than directly calling publicReadPolicyForBucket.
Whenever you need to create a dependency between resources, use the output property of one resource as the input to another one. Pulumi uses this information to create physical resources in the correct order.
Step 9: Run your update#
Run pulumi up, which shows the change to update the Bucket resource and create a new BucketPolicy resource. Select yes to confirm the changes. You should see an output similar to the following:
pulumi up...
Type Name Status Info pulumi:pulumi:Stack s3-website-dev~ ├─ aws:s3:Bucket s3-website-bucket updated [diff: +website]+ └─ aws:s3:BucketPolicy bucketPolicy created
Outputs: bucketName: "s3-website-bucket-8533d8b" + websiteUrl: "s3-website-bucket-8533d8b.s3-website-us-west-2.amazonaws.com"
Resources: + 1 created ~ 1 updated 2 changes. 3 unchangedStep 10: View your static website#
Open the site URL in a browser to see both the rendered HTML and the favicon:
pulumi stack output websiteUrls3-website-bucket-8533d8b.s3-website-us-west-2.amazonaws.com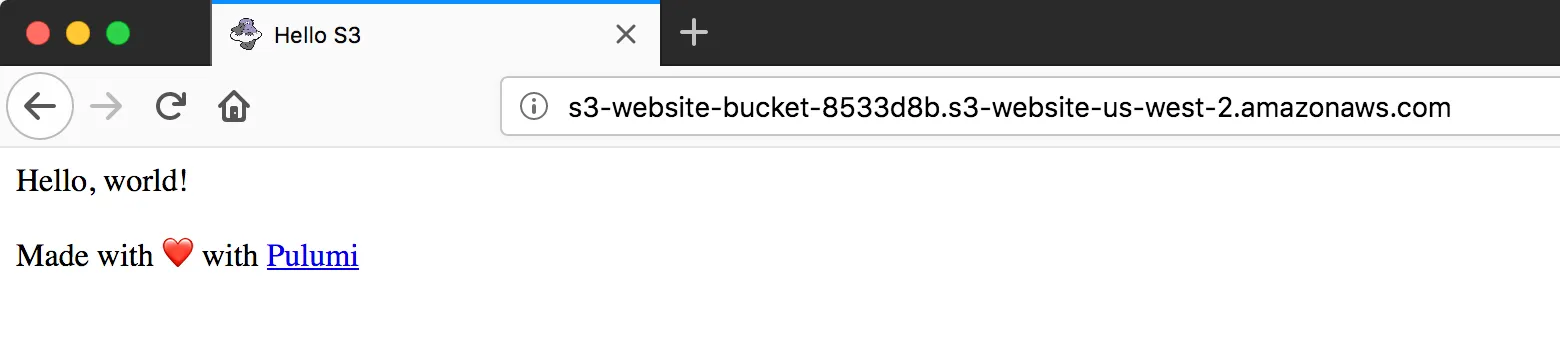
Clean up#
Before moving on, tear down the resources that are part of your stack to avoid incurring any charges. Run pulumi destroy to remove all of the resources, confirming that you’d like to proceed when prompted. Once the resources are removed, you can delete the stack itself by running pulumi stack rm.
Summary#
In this tutorial, you used the @pulumi/aws package for fine-grained control over AWS resources.
You also learned how to work with the Pulumi CLI. To recap:
- Run
pulumi new javascript --name myprojectto create a new project using a JavaScript template. - Run
pulumi upto preview and update your infrastructure. - Run
pulumi destroyto clean up your resources. - Run
pulumi stack rmto delete your stack.
Next steps#
Related
AWS SQS to Lambda with Pulumi: Serverless Queue Example

Build a Video Thumbnailer on AWS
