SCIM: Configuring Microsoft Entra ID
This document outlines the steps required to configure automatic provisioning/deprovisioning of your users in Pulumi using SCIM 2.0.
Please note that some advanced SCIM features aren’t supported yet. For more information, see Known Limitations.
Prerequisites
- Your organization must already be configured to use SAML SSO with Pulumi.
- You must be an admin of your Pulumi organization.
- (Optional, but highly recommended) You should have more than one admin for your Pulumi organization.
Enabling Automatic Provisioning
- Navigate to the Microsoft Entra ID application where you have configured Single Sign On using SAML with Pulumi.
- Select Enterprise Applications and select the app in which you configured Single Sign On with Pulumi earlier.
- Select the Provisioning feature, and change the value of Provisioning Mode to Automatic.
Admin Credentials
Under the Admin Credentials section of the Provisioning feature, fill out the form as follows:
- Tenant URL:
https://api.pulumi.com/scim/v2/{orgName}, where{orgName}must be replaced with your organization’s login name (not display name). If you do not know this, navigate to your SAML settings and look at the SSO URL. It will have your organization’s login name in the URL. - Secret Token: You will use a token from the Pulumi Cloud as the authorization bearer token. To generate a token, navigate to your org in the Pulumi Cloud, select Settings, then Access Management, and then in the SCIM section, generate a new token if you have never generated one for your org or regenerate it if you have already done so in the past.
Select Test Connection. You should get a success notification once the connection is successful.
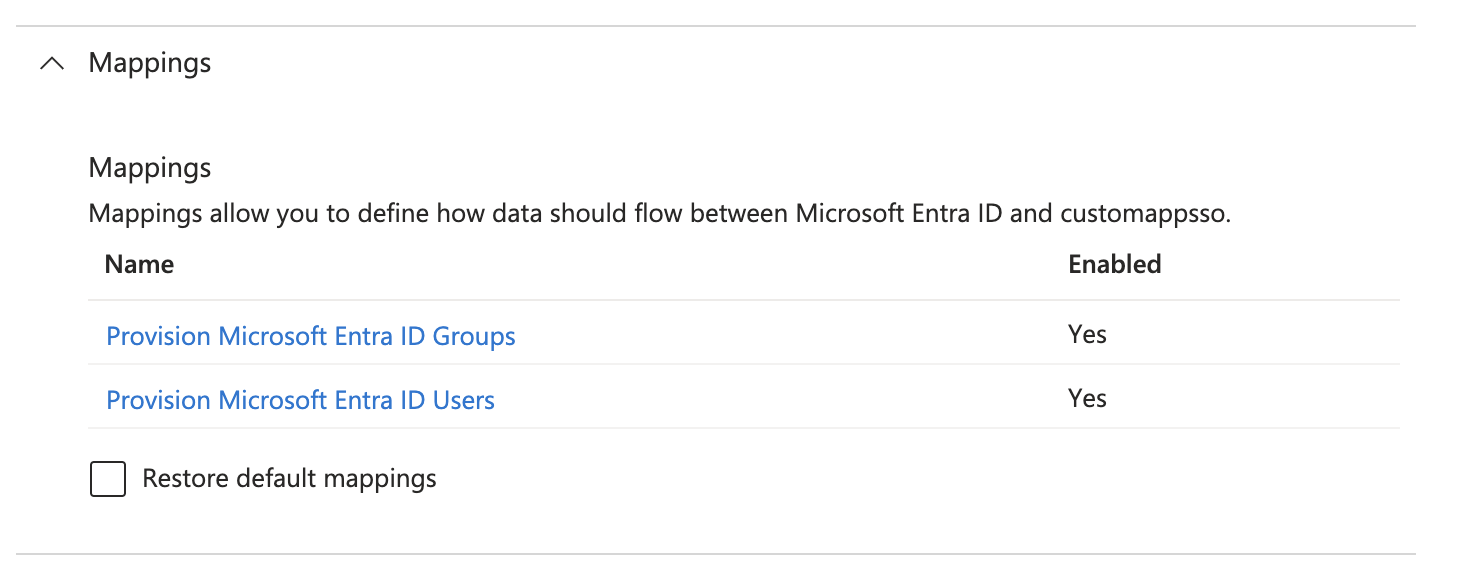
Mappings
Make sure the Provision Microsoft Entra ID Users mapping is enabled.
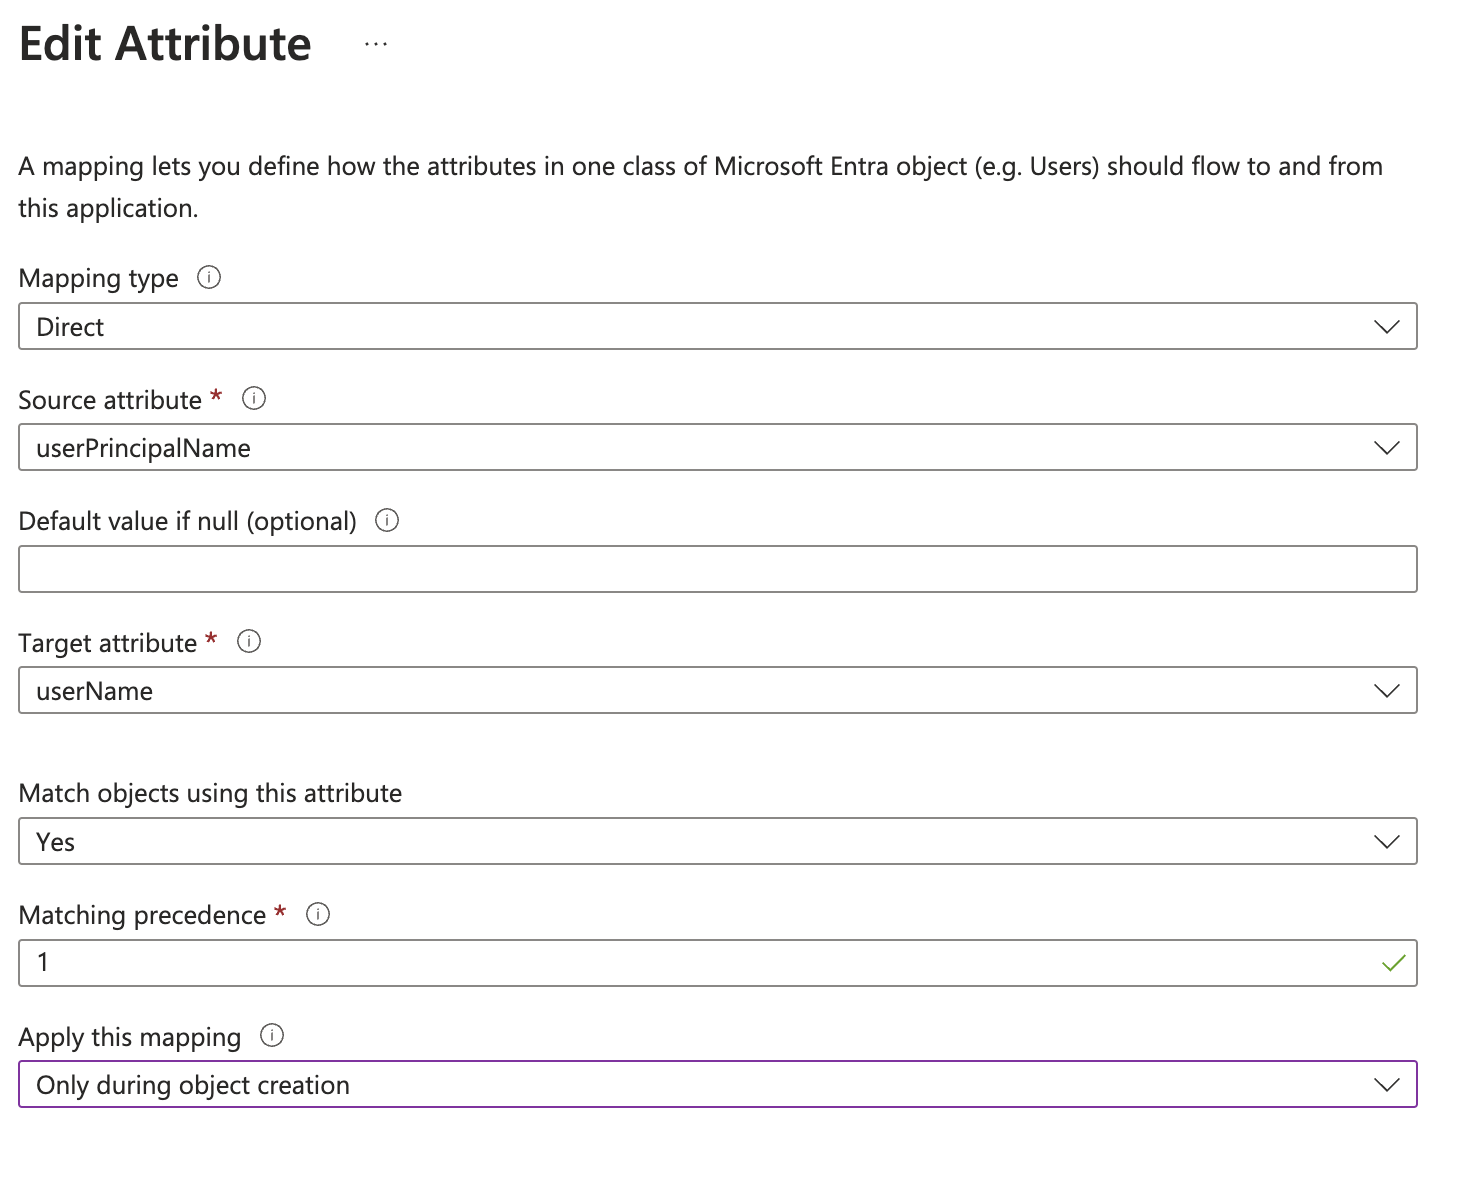
Adjust User Attribute Mappings
Update the mapping for userName so that is applied Only during object creation. In the Mappings expansion panel, click Provision Microsoft Entra ID Users and then click on the corresponding attribute mapping as shown below.
In the configuration window, change the value of the Apply this mapping drop-down to Only during object creation.
Make sure the mapping for the userName attribute is sourced from userPrincipalName, as indicated by the Source attribute drop-down.
The mapping should now be updated as shown below:
Remove Unused Attributes
Delete all attributes except for the following using the Delete button:
- userName
- active
- displayName
- emails[type eq “work”].value
- name.givenName
- name.familyName
Set The Emails Attribute To Required
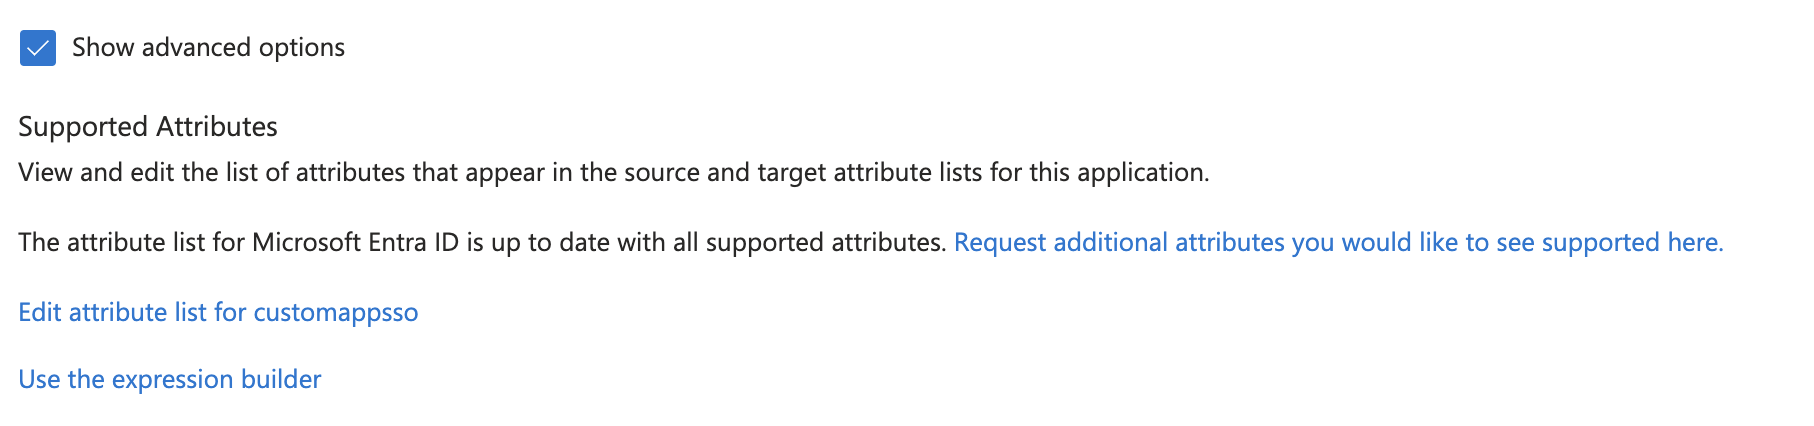
In the user attribute mappings editor, scroll-down and click the Show advanced options checkbox and then the Edit attribute list for customappsso link.
Check the required checkbox for the emails attribute, and click Save.

You are now done with the Mappings configuration. Click Save and close the child windows/blades until you get back to the main Provisioning window where you can see the Provisioning Status drop-down.
Enable Group Provisioning
To enable the provisioning of Entra ID groups to Pulumi Cloud, select Edit Provisioning and then select the Provision Microsoft Entra ID Groups setting under the Mappings expansion panel and switch the Enabled setting to Yes.
Update Group Attribute Mappings
Scroll-down to the Attribute Mappings section while you are editing the group provisioning setup and remove the mapping
between objectId and externalId. Click Save once you are done.
Enable Provisioning
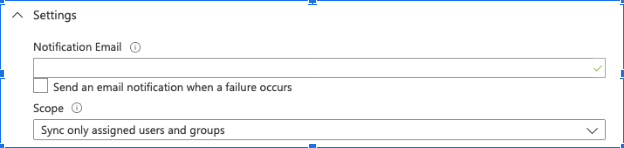
Under the Settings expansion panel, the Scope drop-down should be set to Sync only assigned users and groups. This ensures that only the users who are assigned to this application are synced with Pulumi, and not everyone in your Entra ID account.
Set the Provisioning Status to On and then click Save.
Assign Users and/or Groups
You must assign users to the Entra ID enterprise application to have them provisioned with an account in Pulumi. Click on the Users and groups feature in the left nav, and assign users and/or groups to the application by searching for them.
Review the Provisioning logs to ensure there were no errors while provisioning the users. It may take a few minutes for logs to appear. If there were validation errors, you can correct them and try again, or contact Pulumi for support.
Known Limitations
Some SCIM features are currently not supported:
- Secondary emails
- Password sync
- Bulk importing
Thank you for your feedback!
If you have a question about how to use Pulumi, reach out in Community Slack.
Open an issue on GitHub to report a problem or suggest an improvement.
