SAML: Configuring Google Workspace
This guide walks you through configuring your Google Workspace (formerly known as G Suite) service as a SAML SSO identity provider (IDP) for the Pulumi Cloud.
Prerequisites
Creating the SAML Application
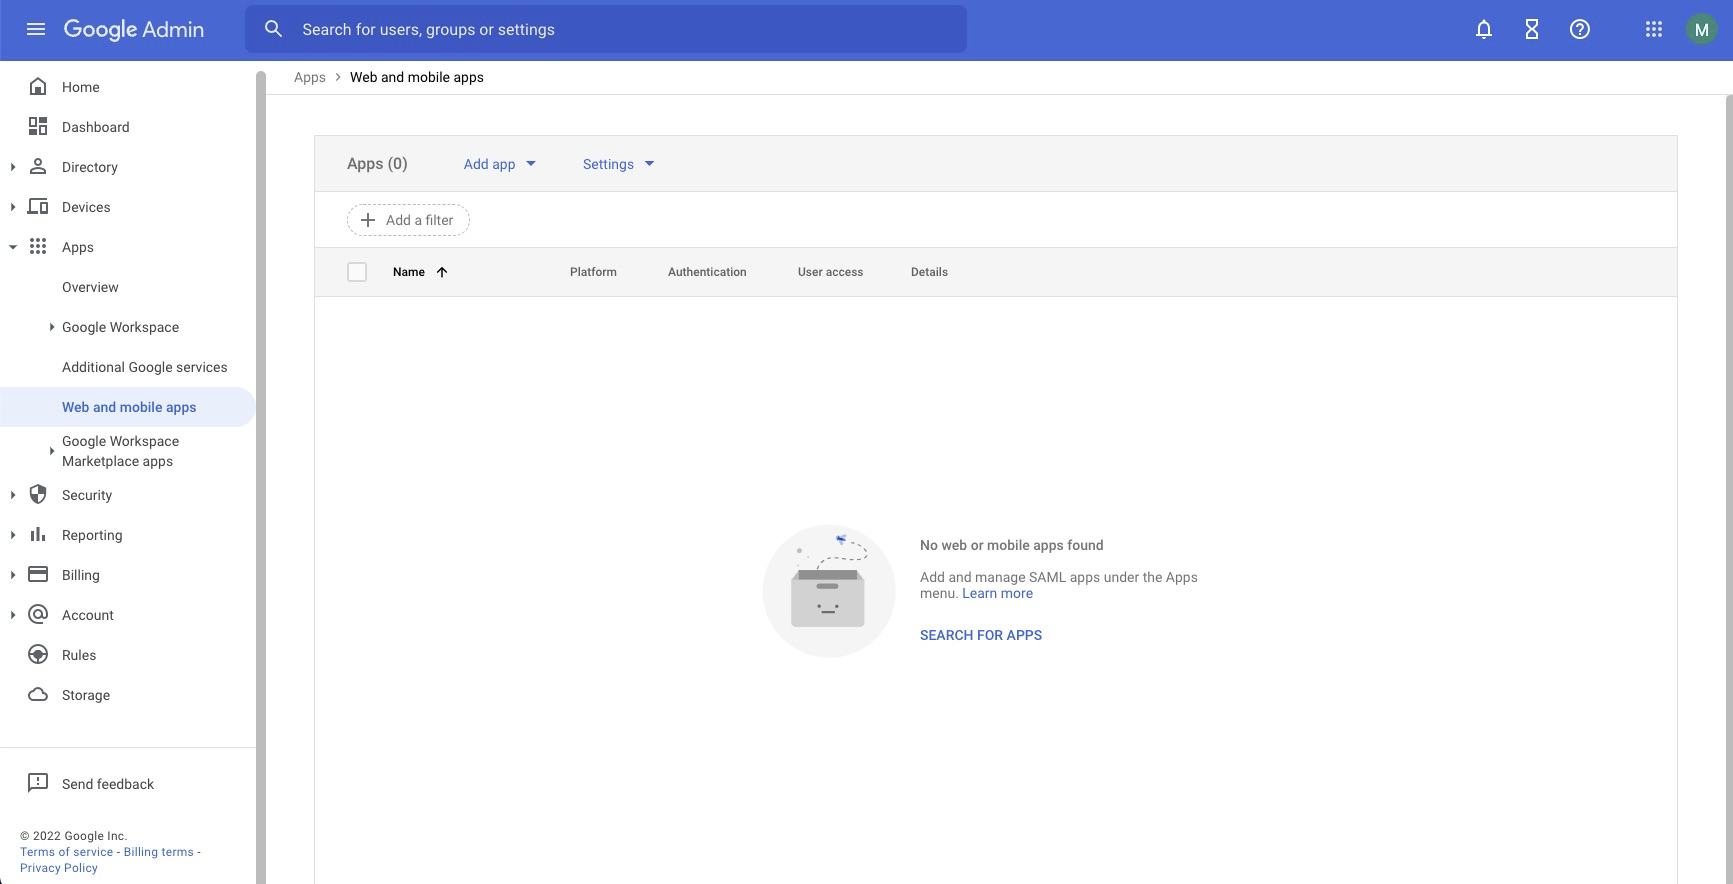
In the administrator console for your Google Workspace domain, open the flyout menu in the upper-left corner and choose Apps > Web and mobile apps.
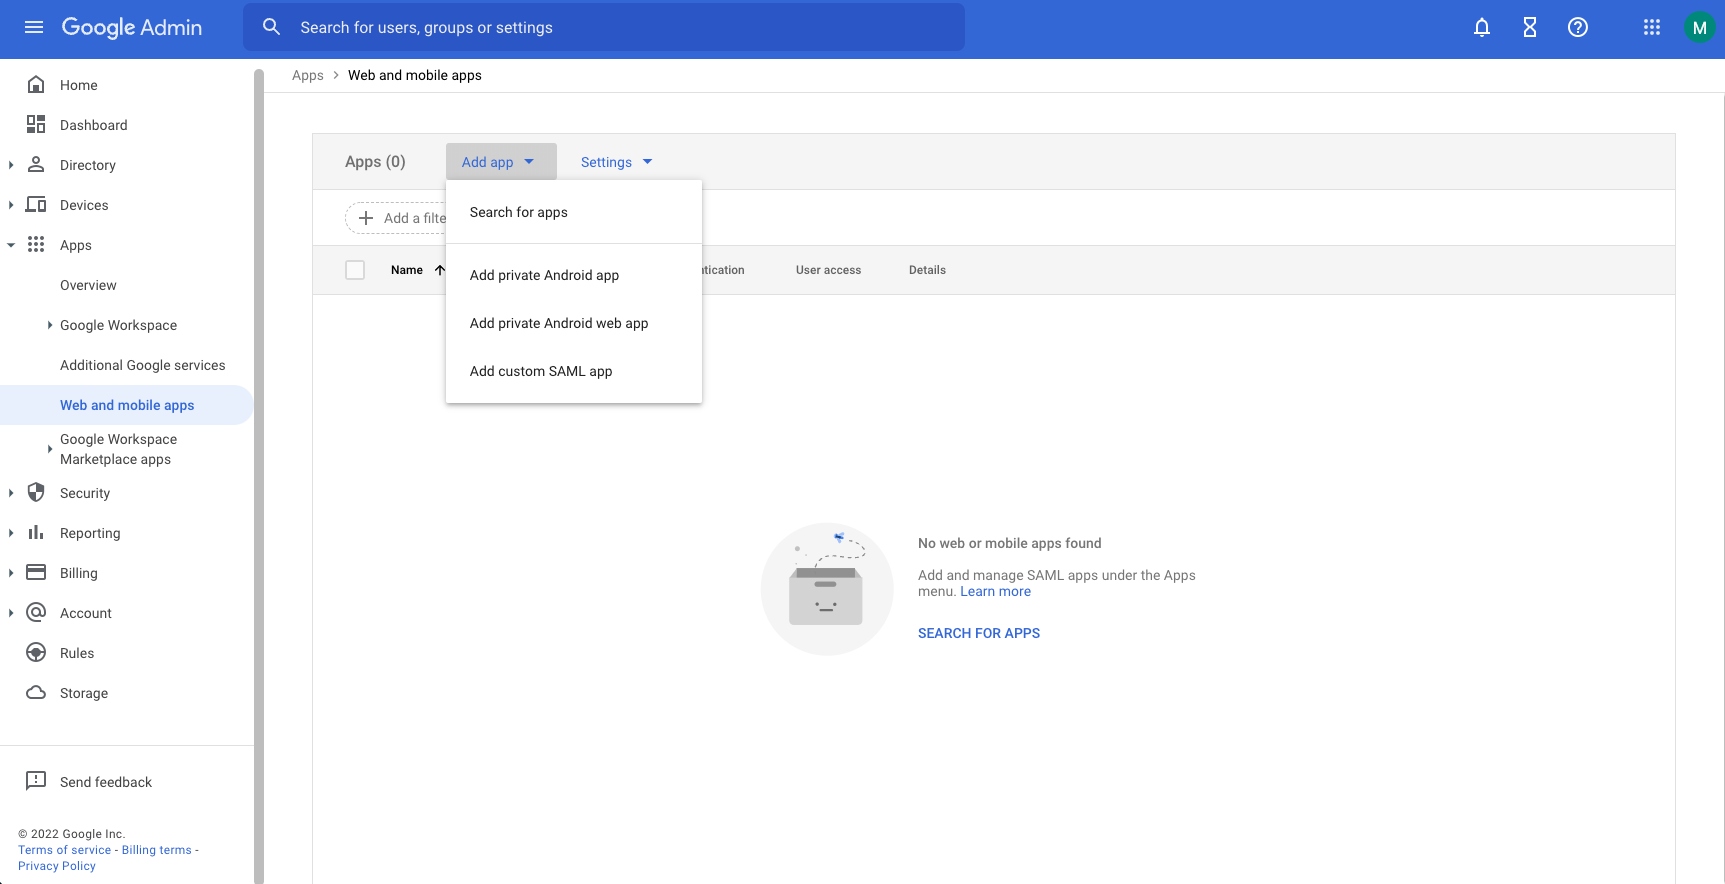
Select Add app > Add custom SAML app to create a new SAML application.
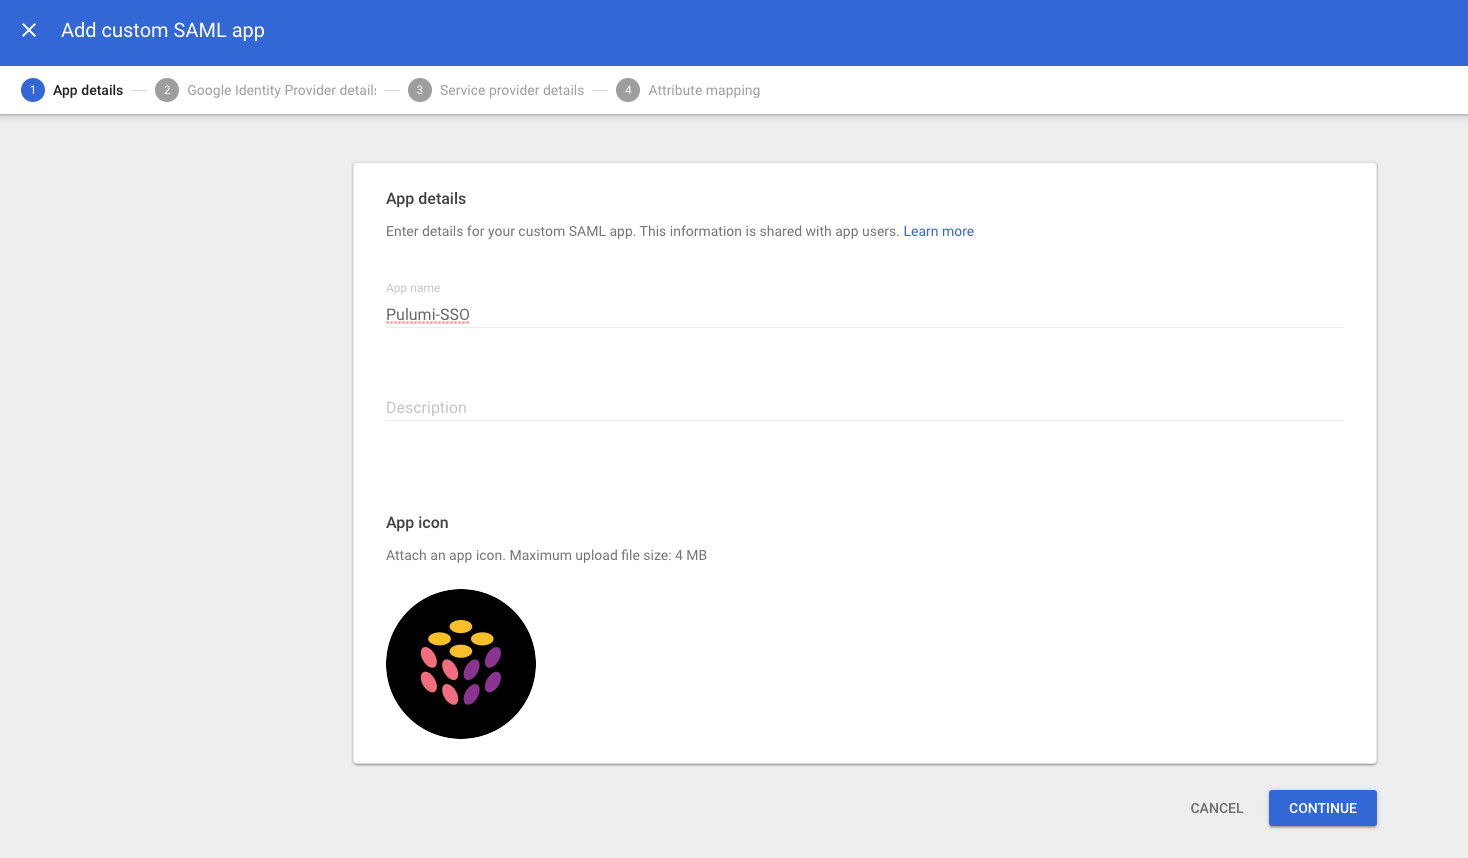
In the first step, give the SAML app a name (e.g., Pulumi-SSO), and optionally add an App Icon, and select Continue. Pulumi Logos has PNG logos available.
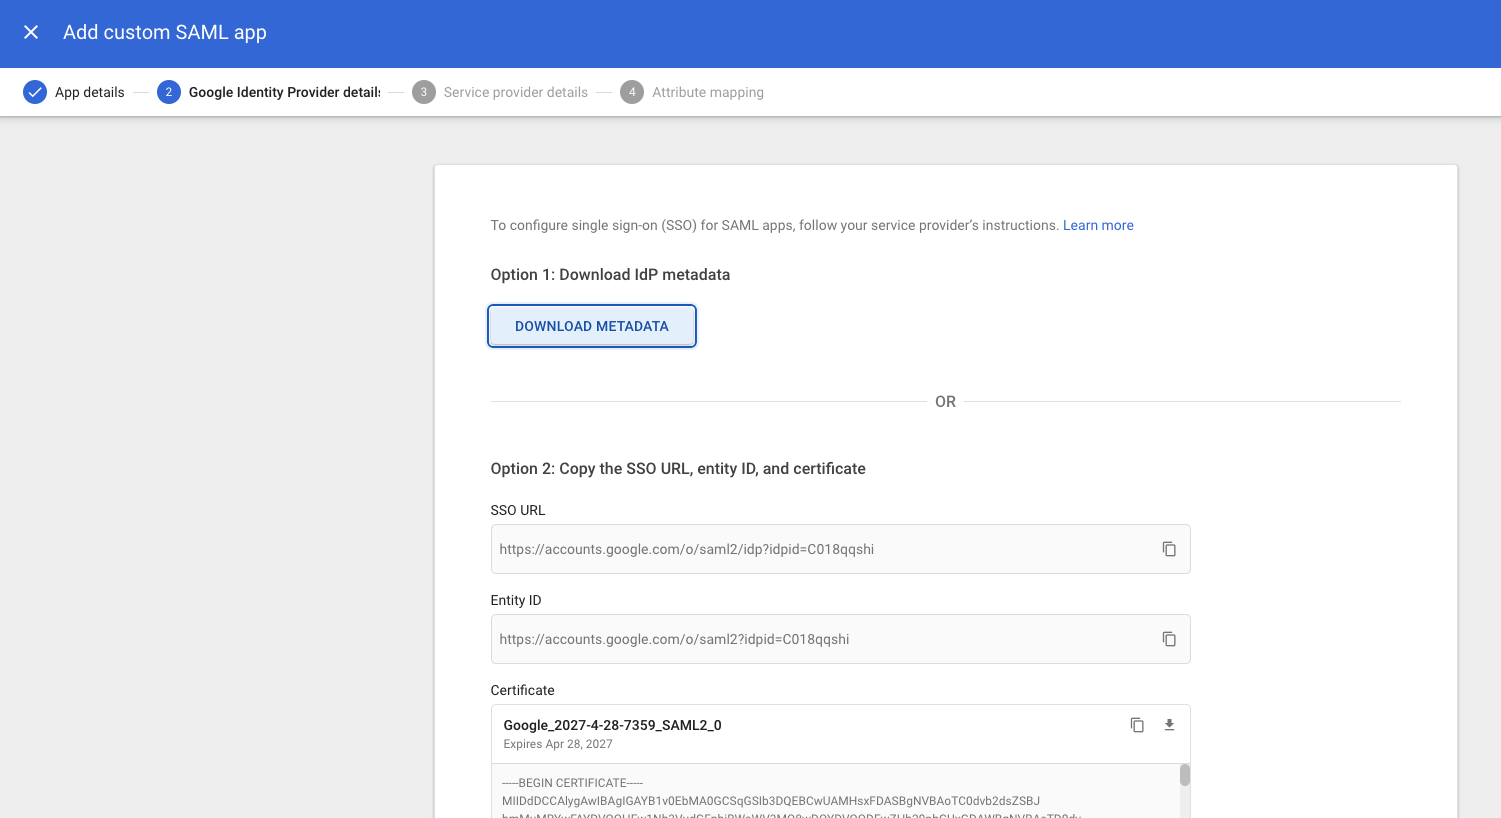
Next, choose Option 1: Download Metadata to download an XML document that identifies and describes your Google Workspace domain as a SAML identity provider. You will need this document to complete the process of configuring your Pulumi organization. For now, note the location of the downloaded file, then select Continue to continue.
In step 3, for the required ACS URL and Entity ID and Start URL fields, enter the fully-qualified URLs of the
acsandmetadataandssoendpoints of the Pulumi API, adjusted for your Pulumi organization name.The values you need to use are dependent upon your Pulumi organization name. Be sure to replace
acmecorpwith your actual organization name.SAML Setting Value ACS URL https://api.pulumi.com/login/<acmecorp>/sso/saml/acsEntity ID https://api.pulumi.com/login/<acmecorp>/sso/saml/metadataStart URL https://api.pulumi.com/login/<acmecorp>/ssoName ID Format EMAILorPERSISTENT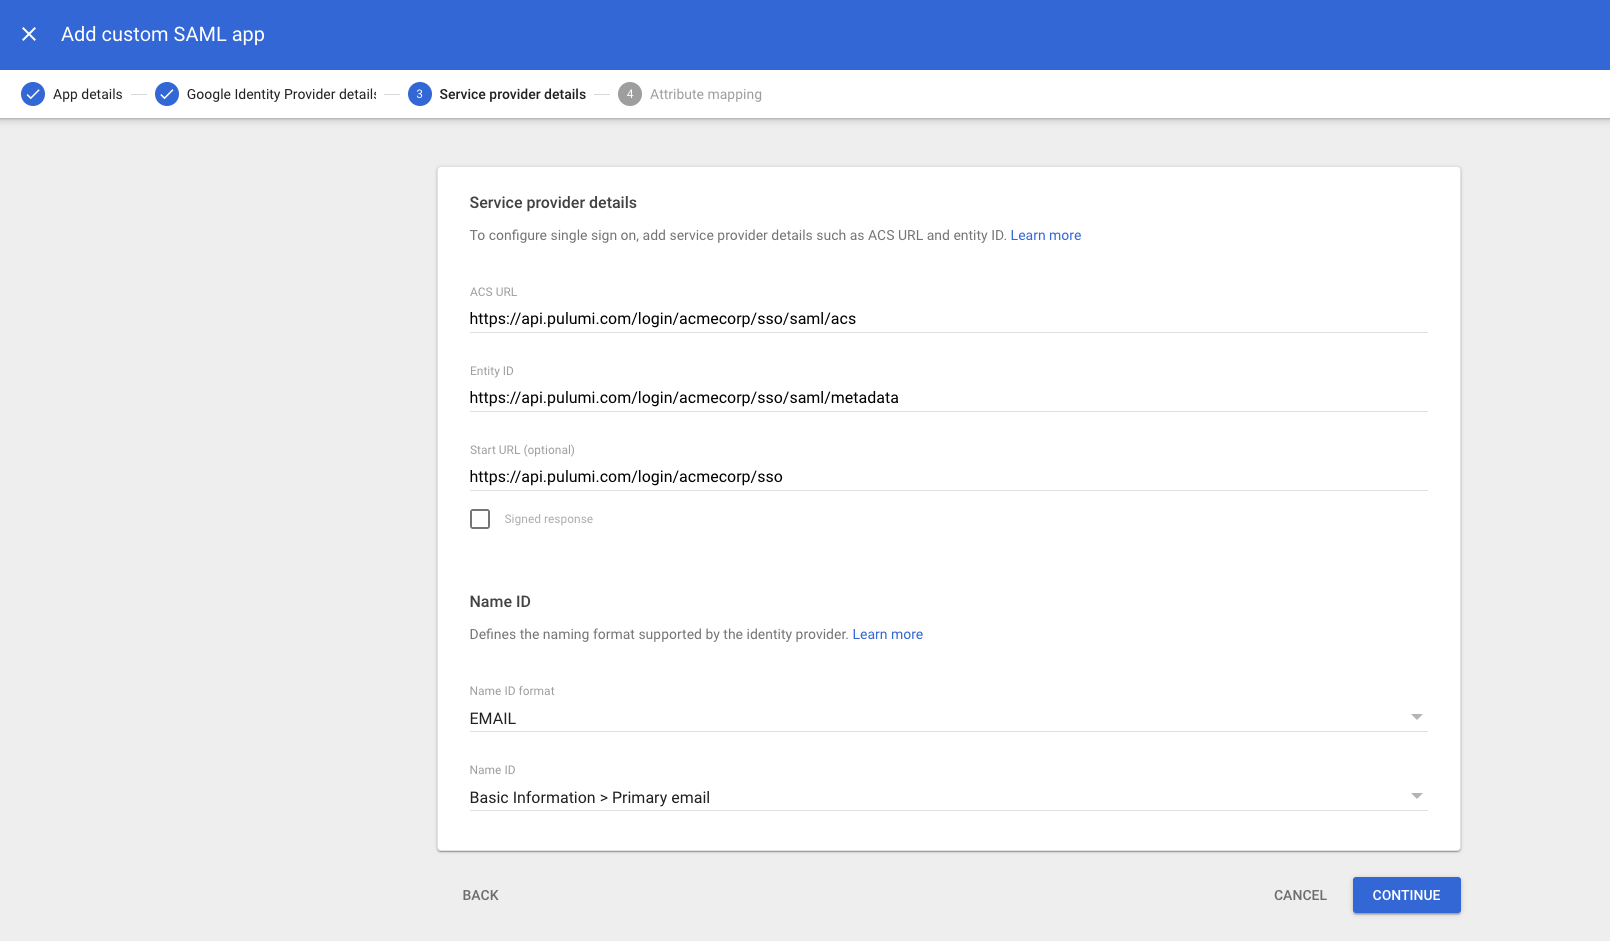
Set
Name ID formatto EMAIL or PERSISTENT. Leave the other fields as their default values, then select Continue.Important: Do not change the value of Name ID Format value once your users have started using Pulumi—not even switching its value between
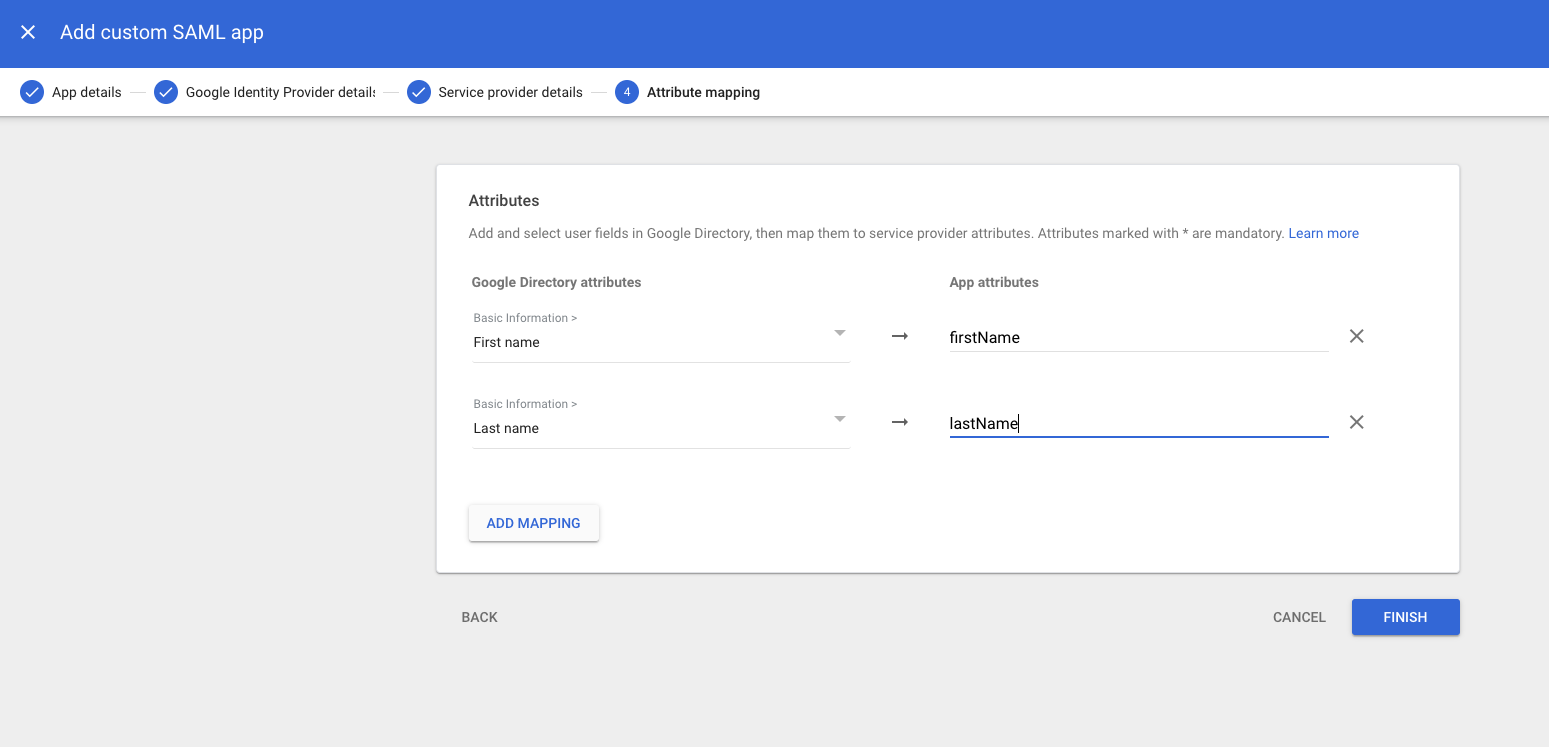
EMAILorPERSISTENT.The final step—attribute mapping—is optional, but you may wish to specify proper first and last names for your Pulumi users, based on their Google account profiles. The Pulumi Cloud expects to receive these fields as
firstNameandlastName, respectively.Once you add them, select Finish.
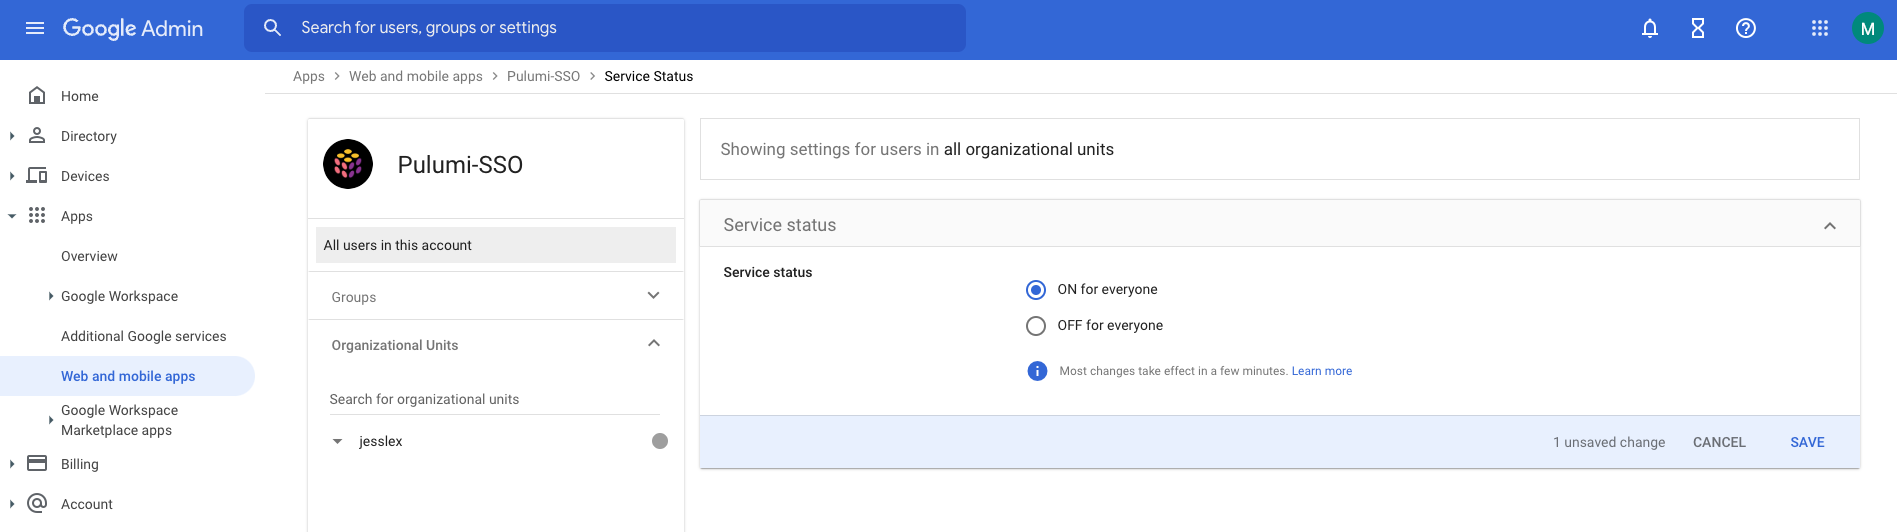
On the next screen, enable your newly created SAML application for your Google domain users by selecting the down arrow in the User access panel:
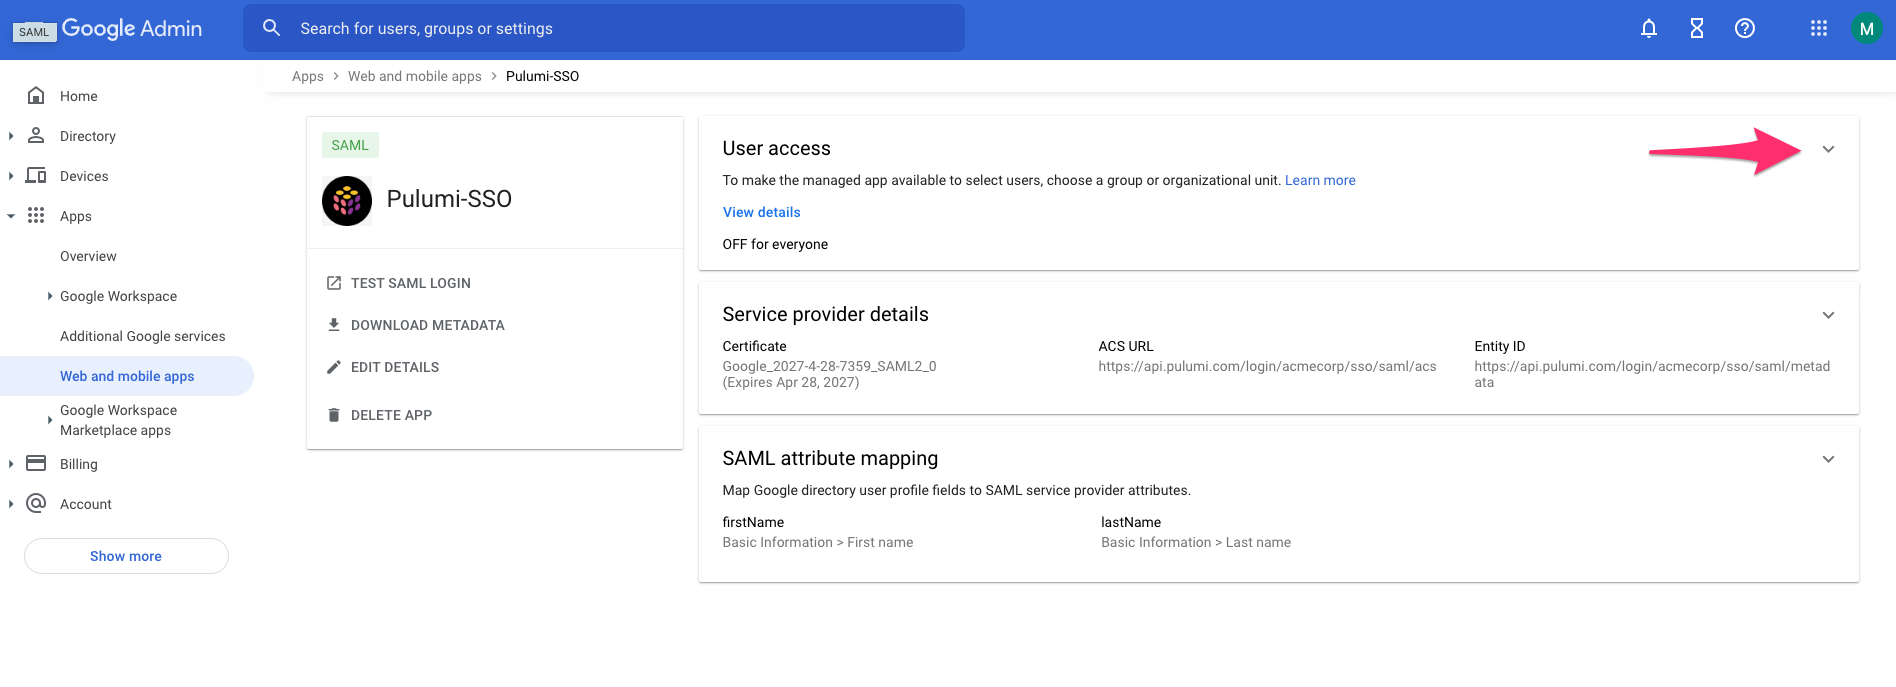
Select ON for everyone and Save.
At this point, you’re done configuring Google Workspace, and can move on to completing SAML SSO setup in the Pulumi Cloud.
Configuring Your Pulumi Organization
The final step in the process consists of associating your Pulumi organization with your SSO identity provider.
Sign in to the Pulumi Cloud where your SAML organization resides, then navigate to the Settings tab for that organization.
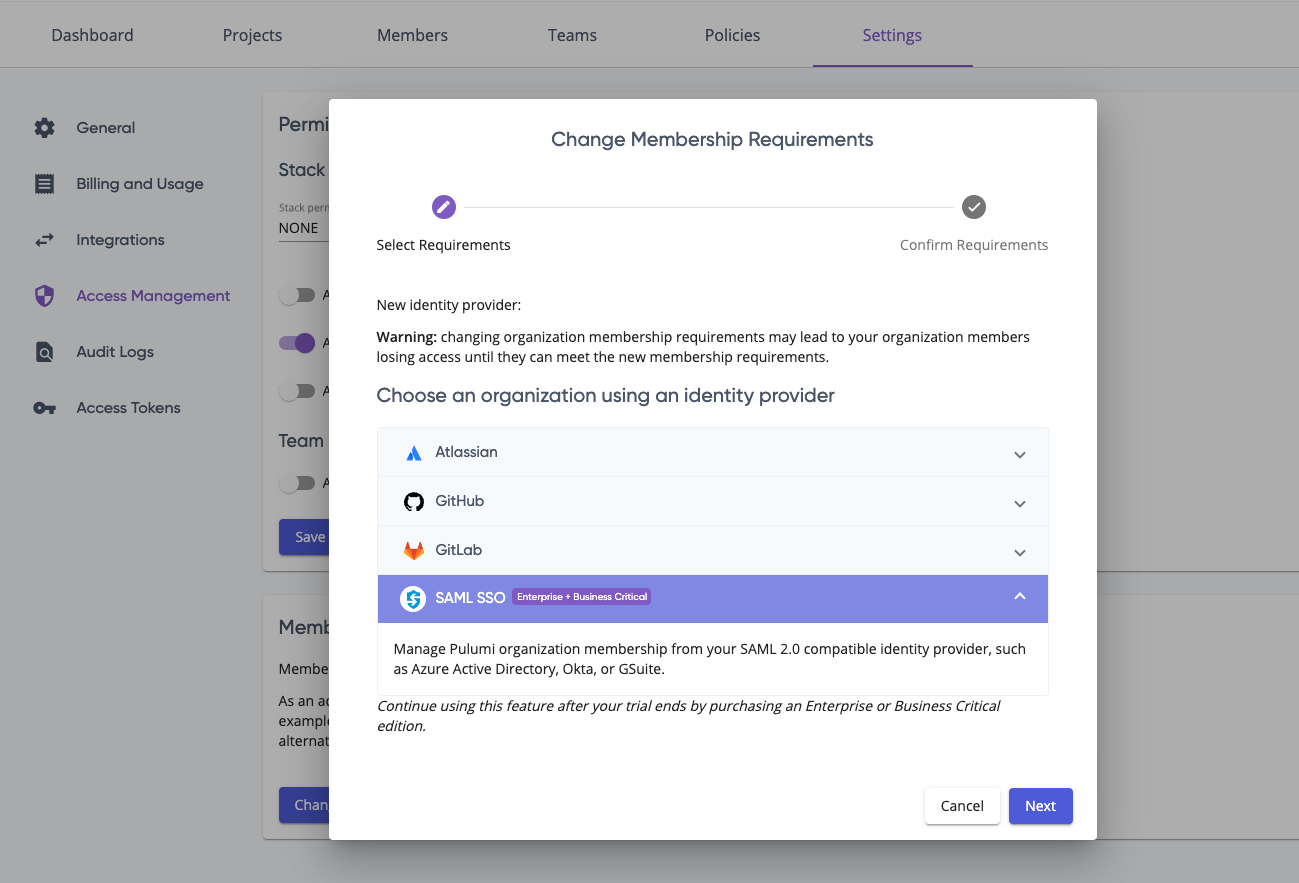
Select Access Management and then Change requirements.
Select SAML SSO and Next
Paste the full contents of the XML IDP document you have previously downloaded into the text box.
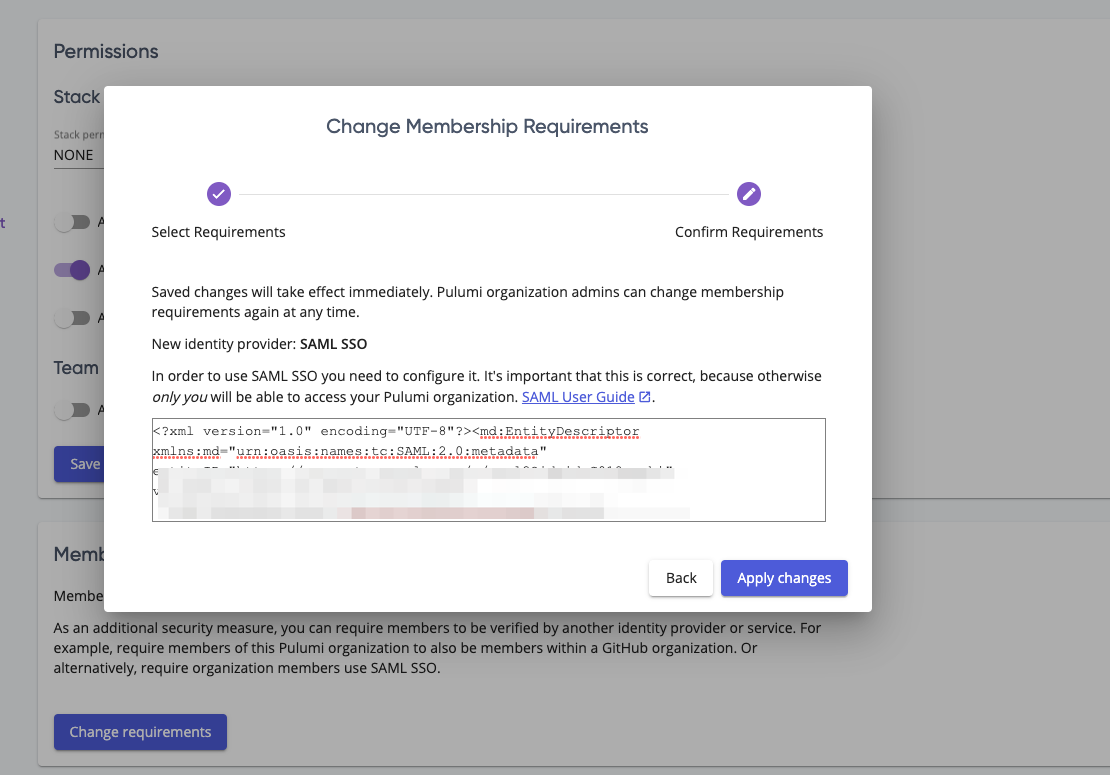
Select Apply changes and refresh your browser page to see the SAML SSO settings.
Your Pulumi organization is now configured to use Google as a SAML SSO identity provider.
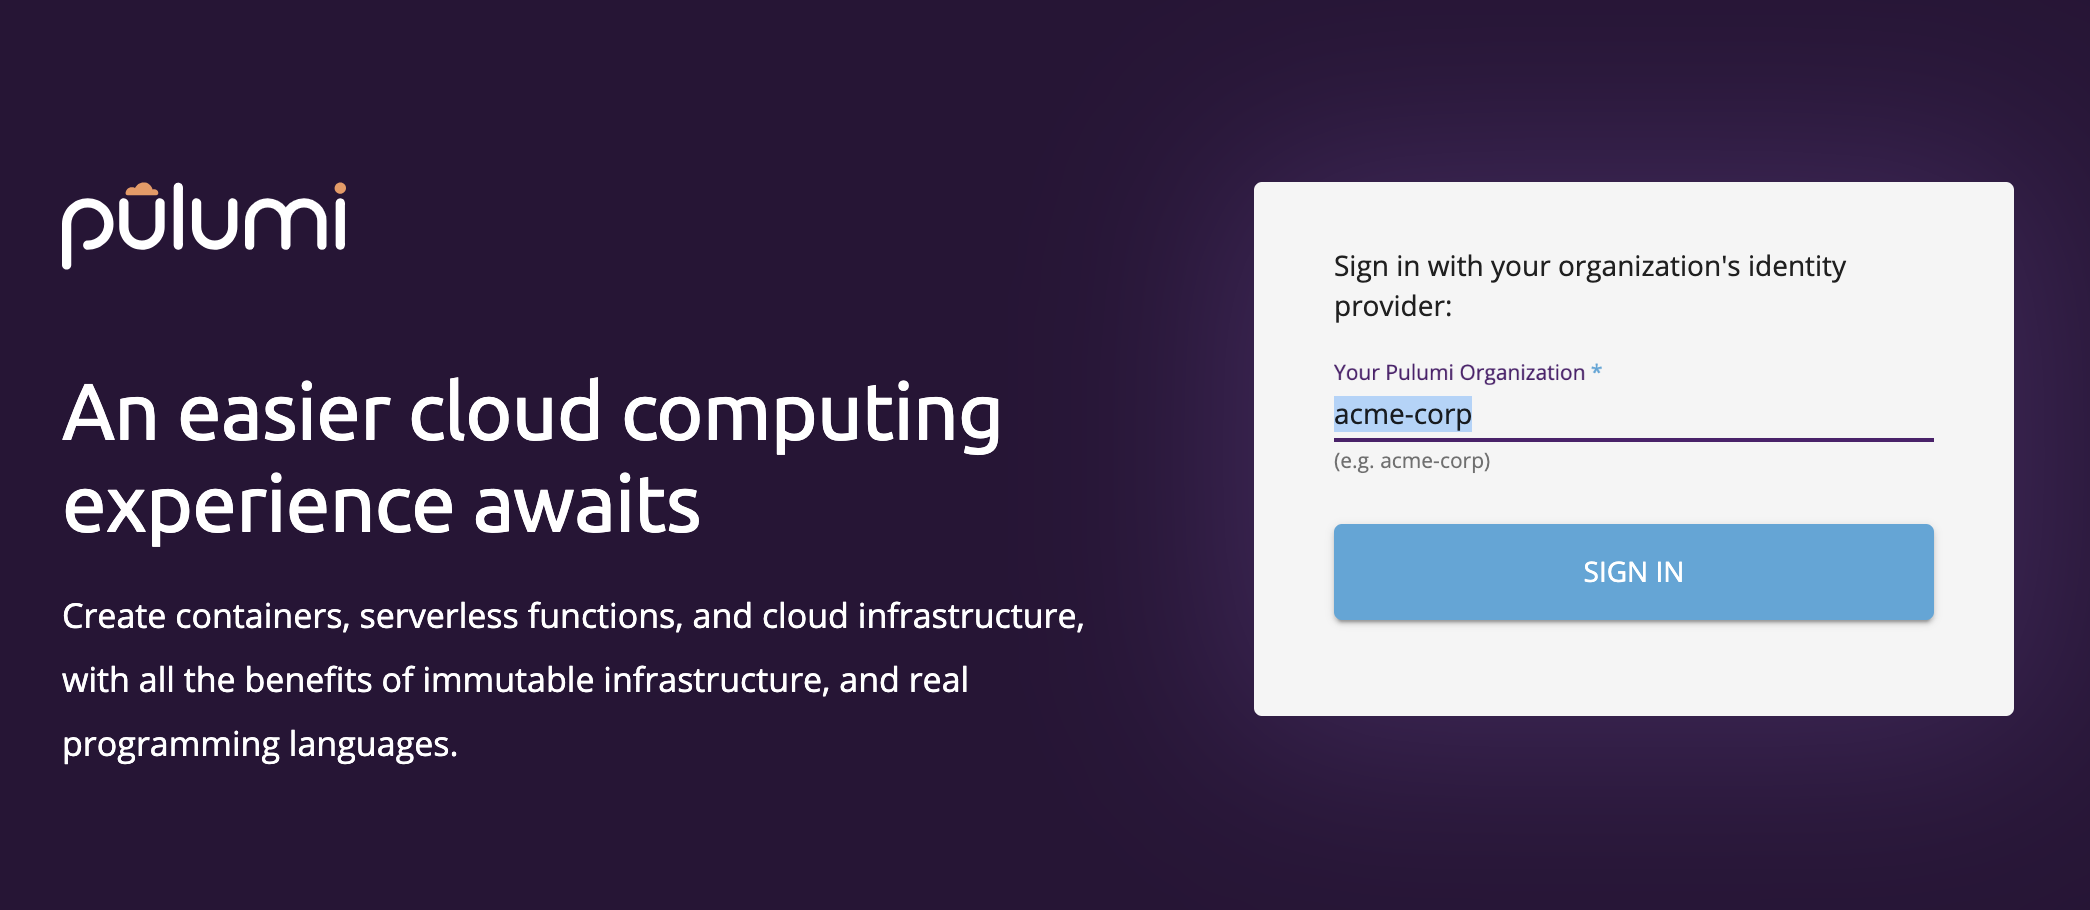
Signing in to Pulumi with Google
Members of your Google Workspace can now sign into Pulumi. Navigate to https://app.pulumi.com/signin/sso/ and enter the name of your Pulumi organization.
Troubleshooting
Google Workspace SAML troubleshooting page: SAML app error messages
If you need additional assistance, contact us.
Thank you for your feedback!
If you have a question about how to use Pulumi, reach out in Community Slack.
Open an issue on GitHub to report a problem or suggest an improvement.
