SAML: Configuring Microsoft Entra ID
This guide walks you through configuring Microsoft Entra ID as a SAML SSO identity provider (IDP) for the Pulumi Cloud.
Prerequisites
Configuring Microsoft Entra ID
Add an application to your Entra ID tenant
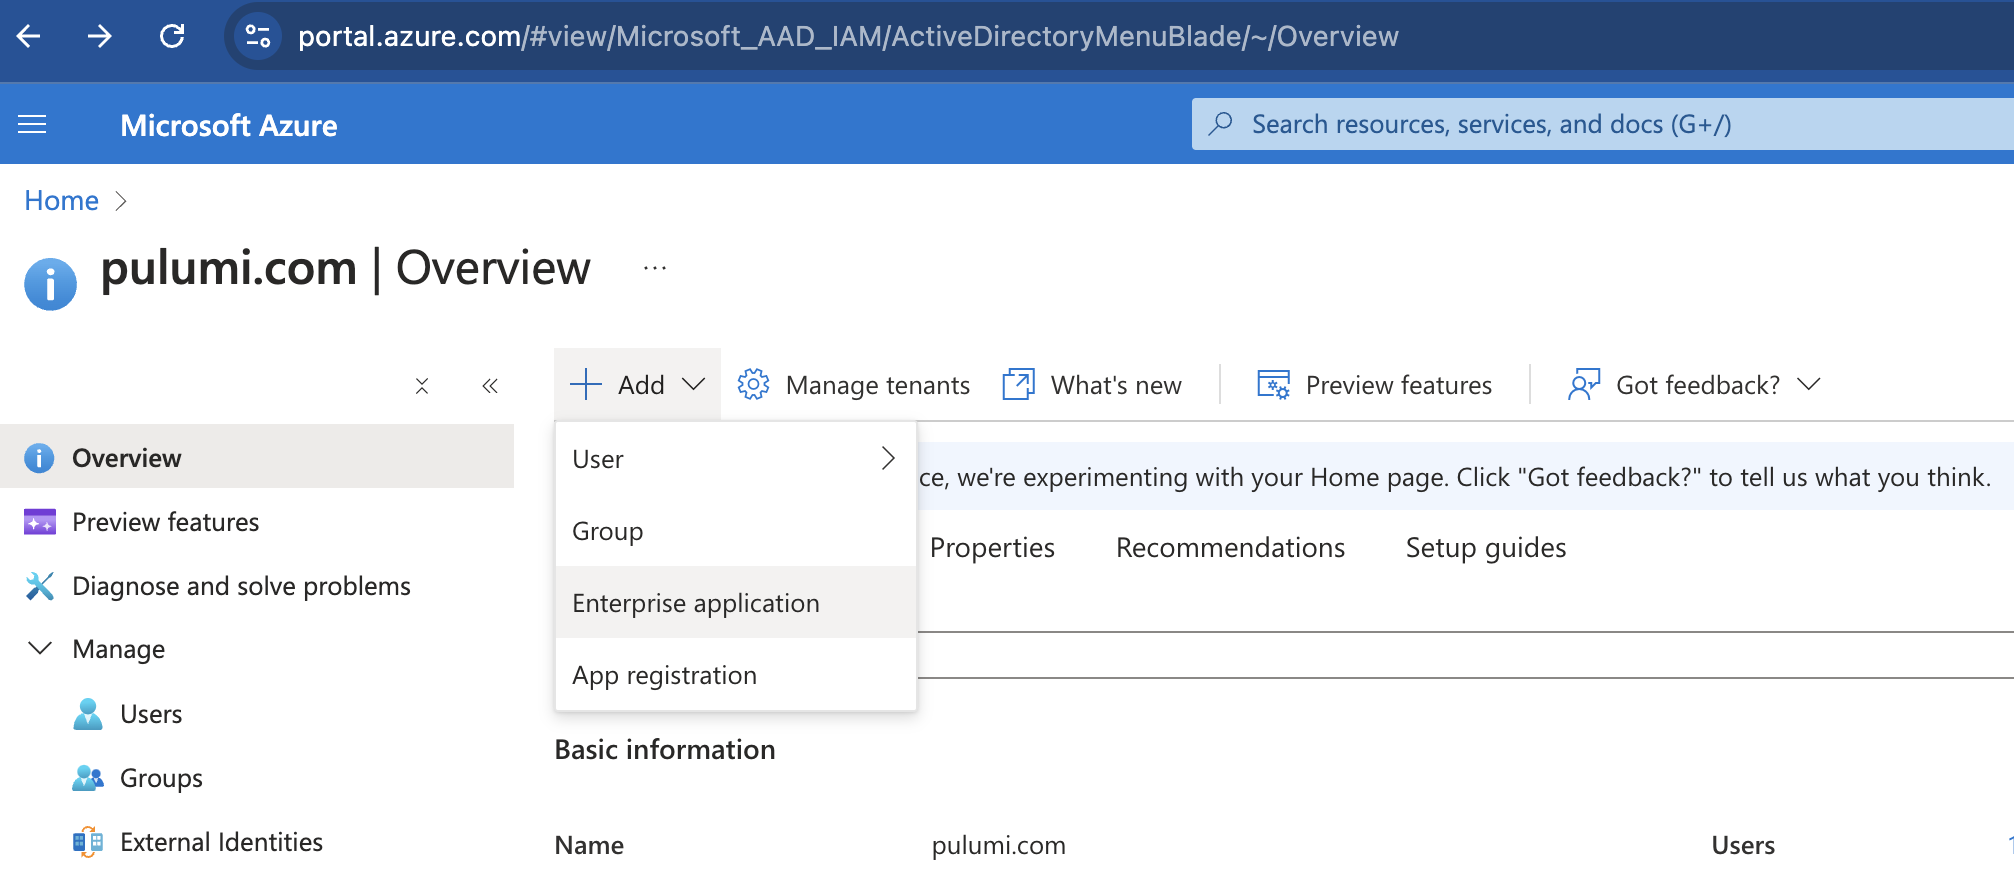
In the Azure portal, on the left navigation panel, select Microsoft Entra ID.
Select Add then in the dropdown, select Enterprise application. It will take you to the Microsoft Entra Gallery.
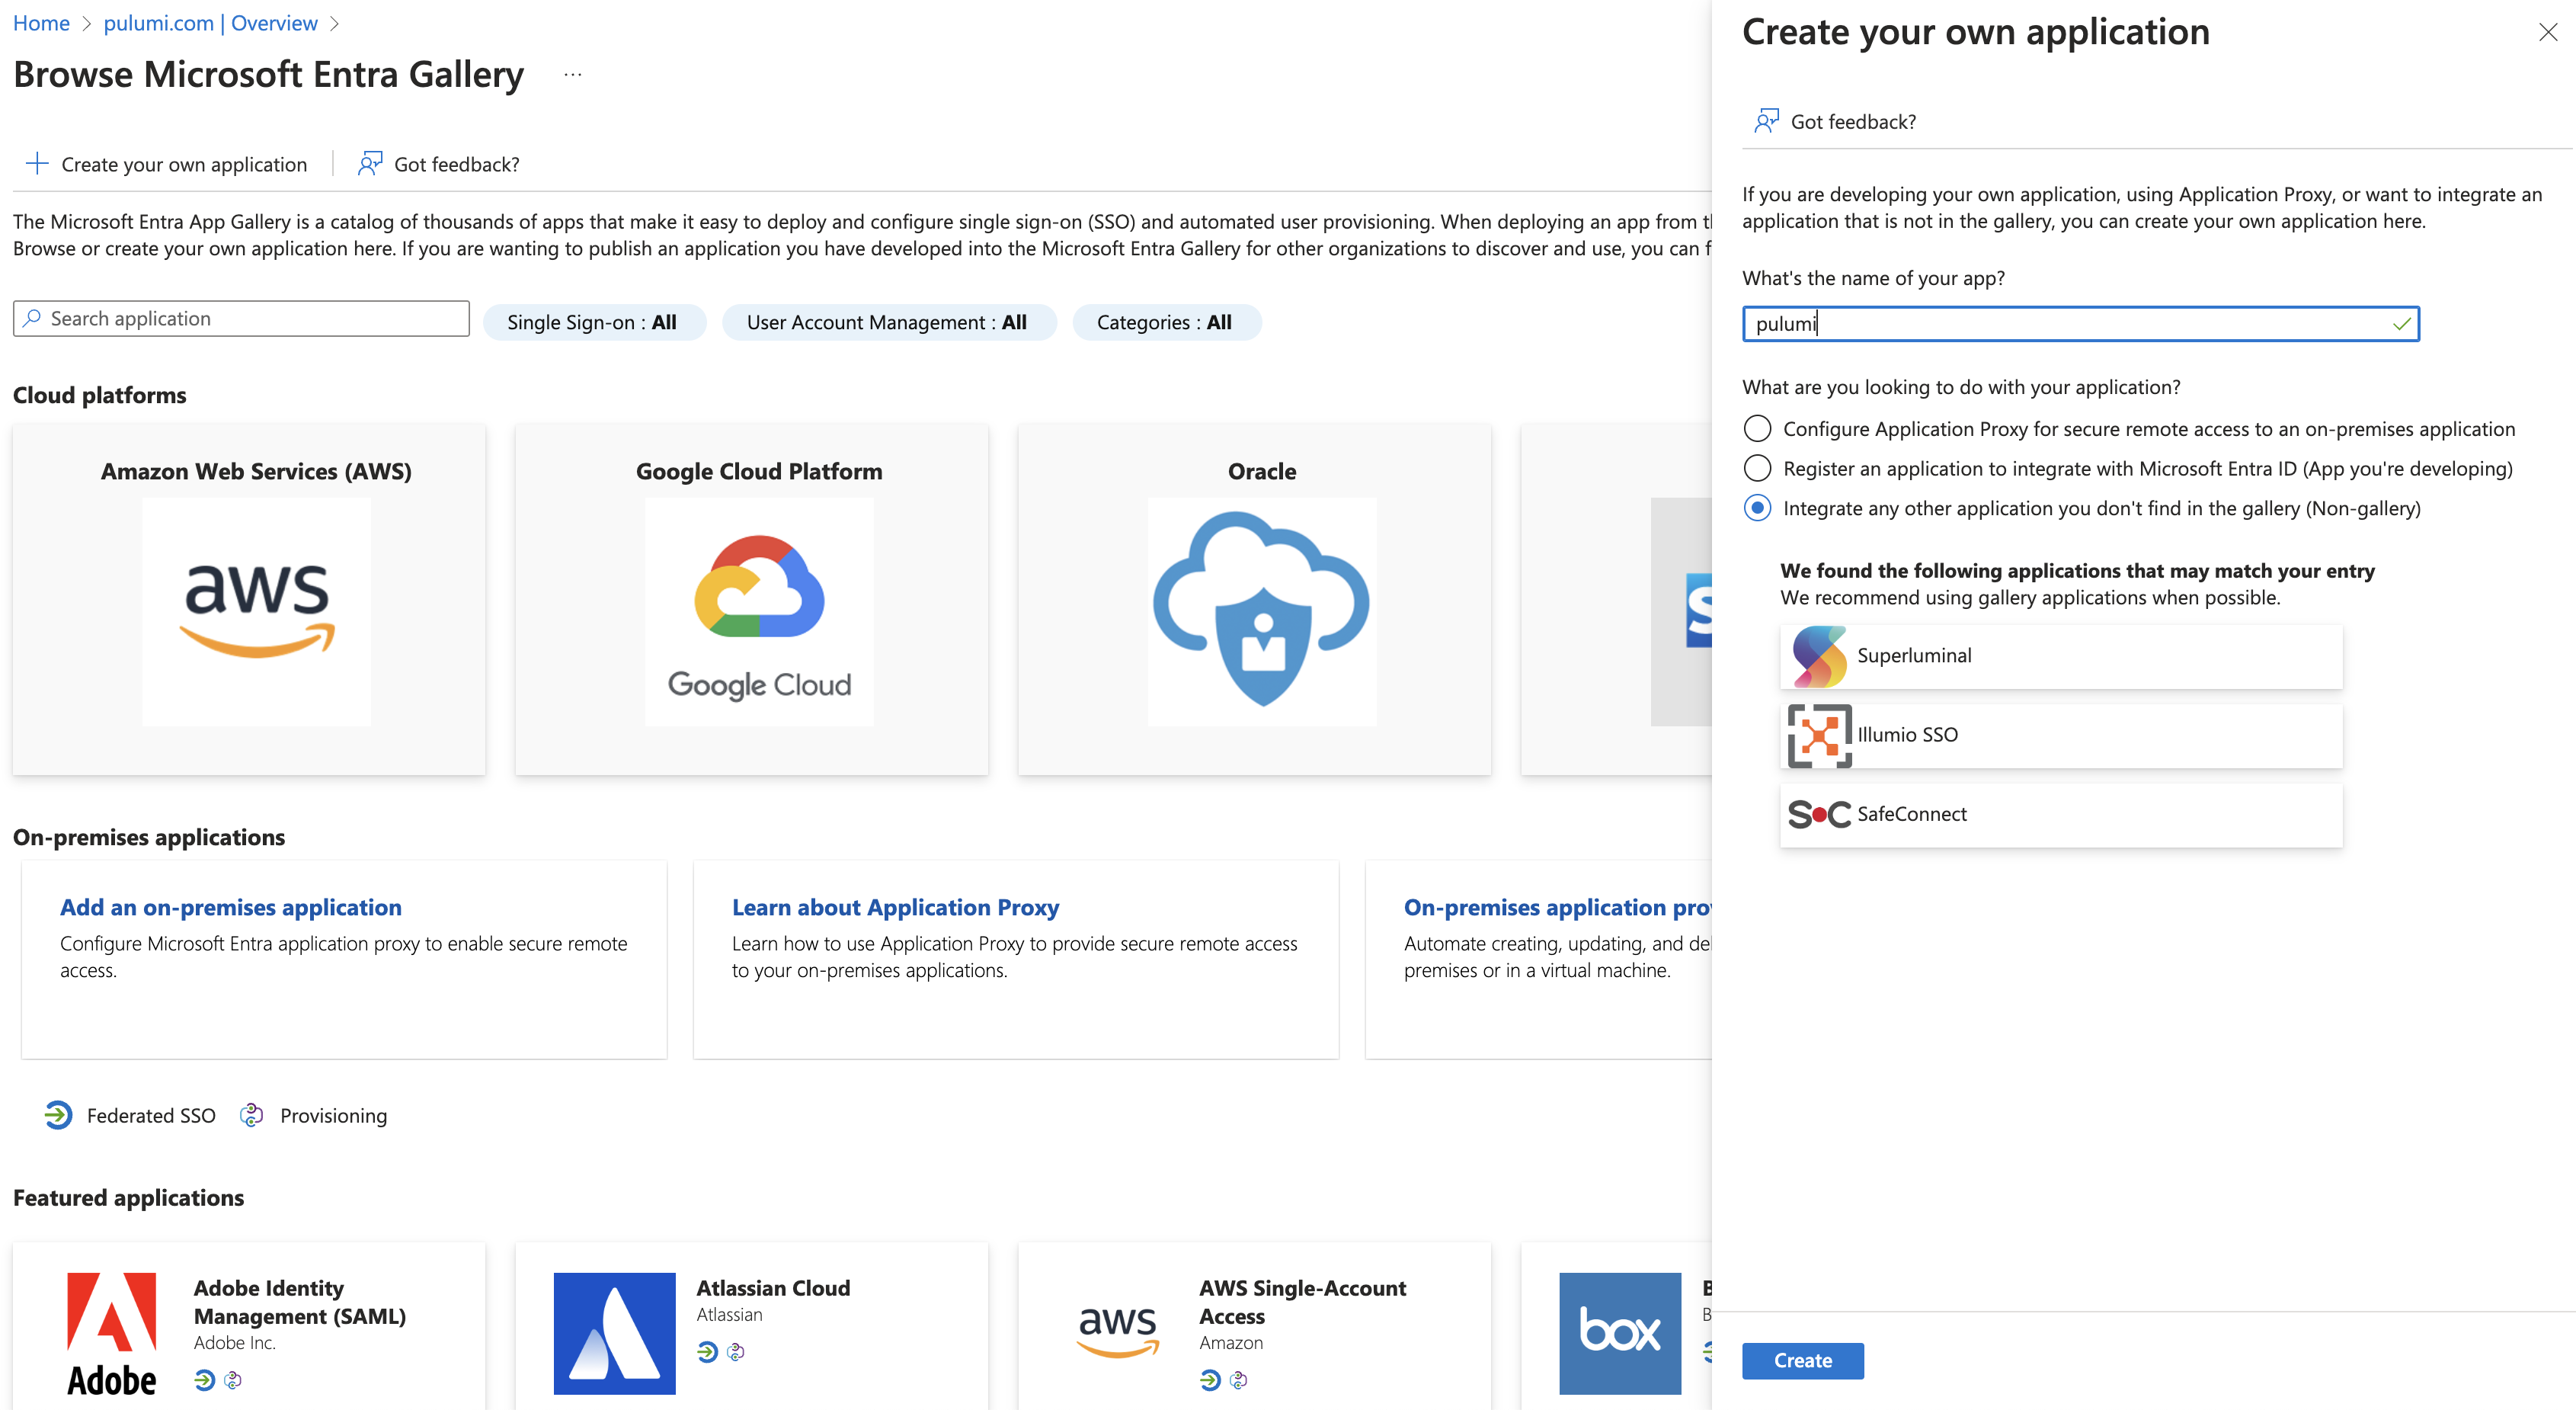
Select Create your own application and in the Create your own application panel, enter Pulumi Cloud as the application name. Make sure the Non-gallery option is selected, then select Create.
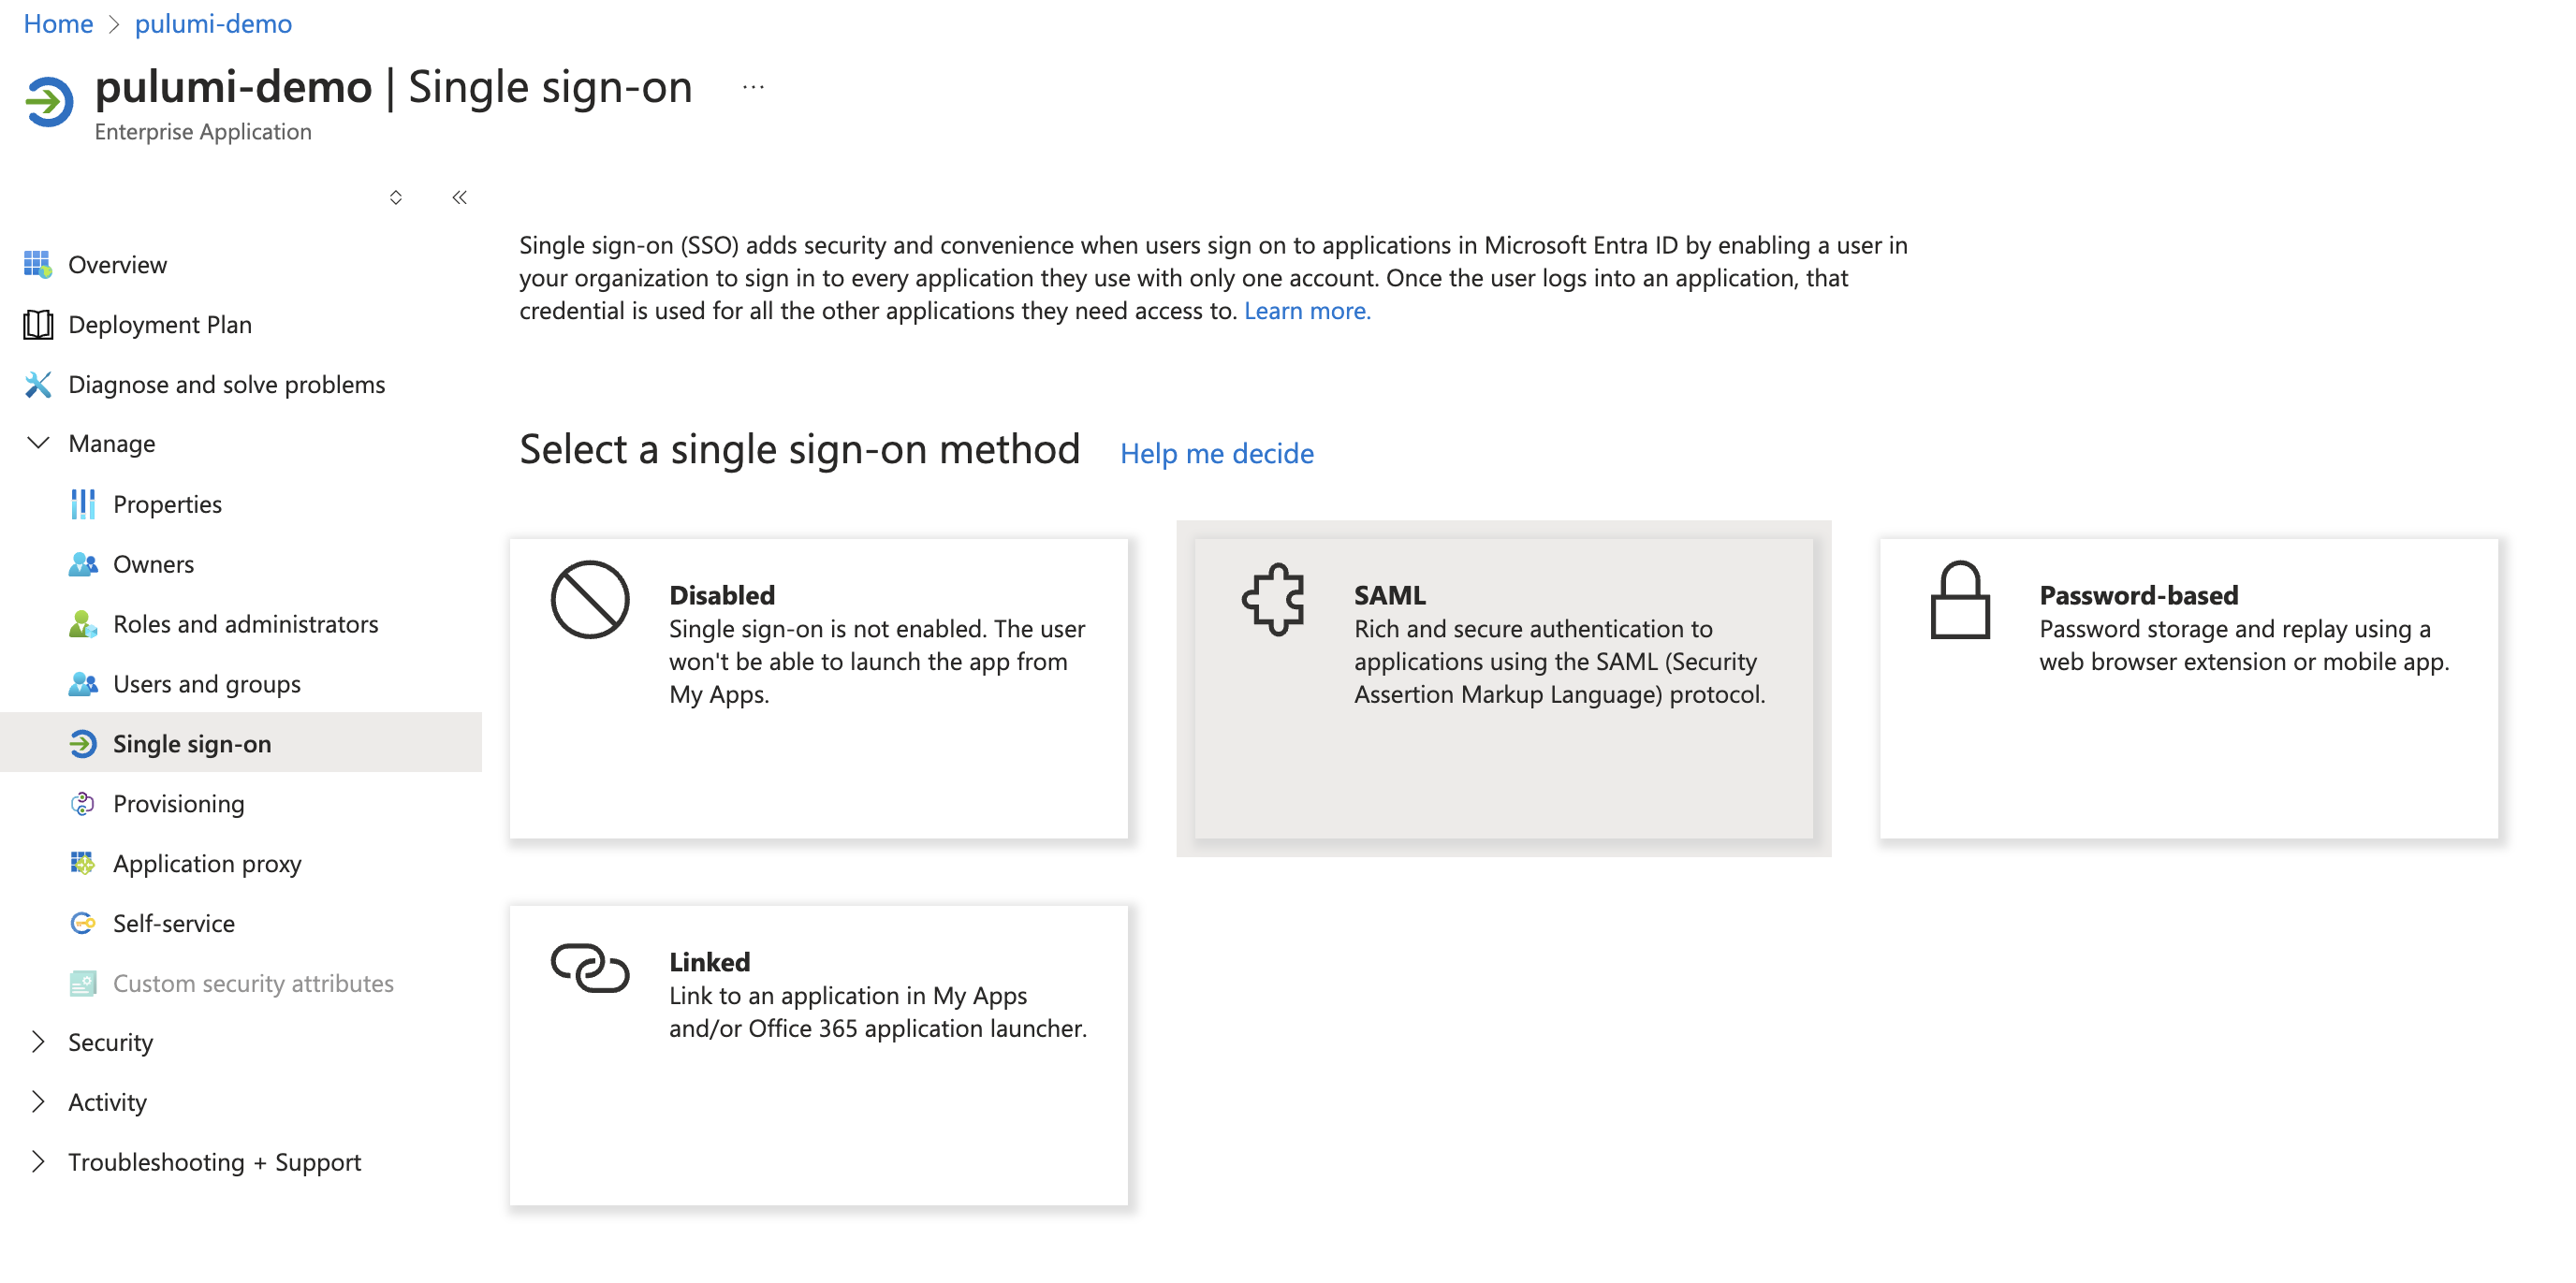
In the new Pulumi Cloud application, navigate to the Single sign-on section, and select SAML.
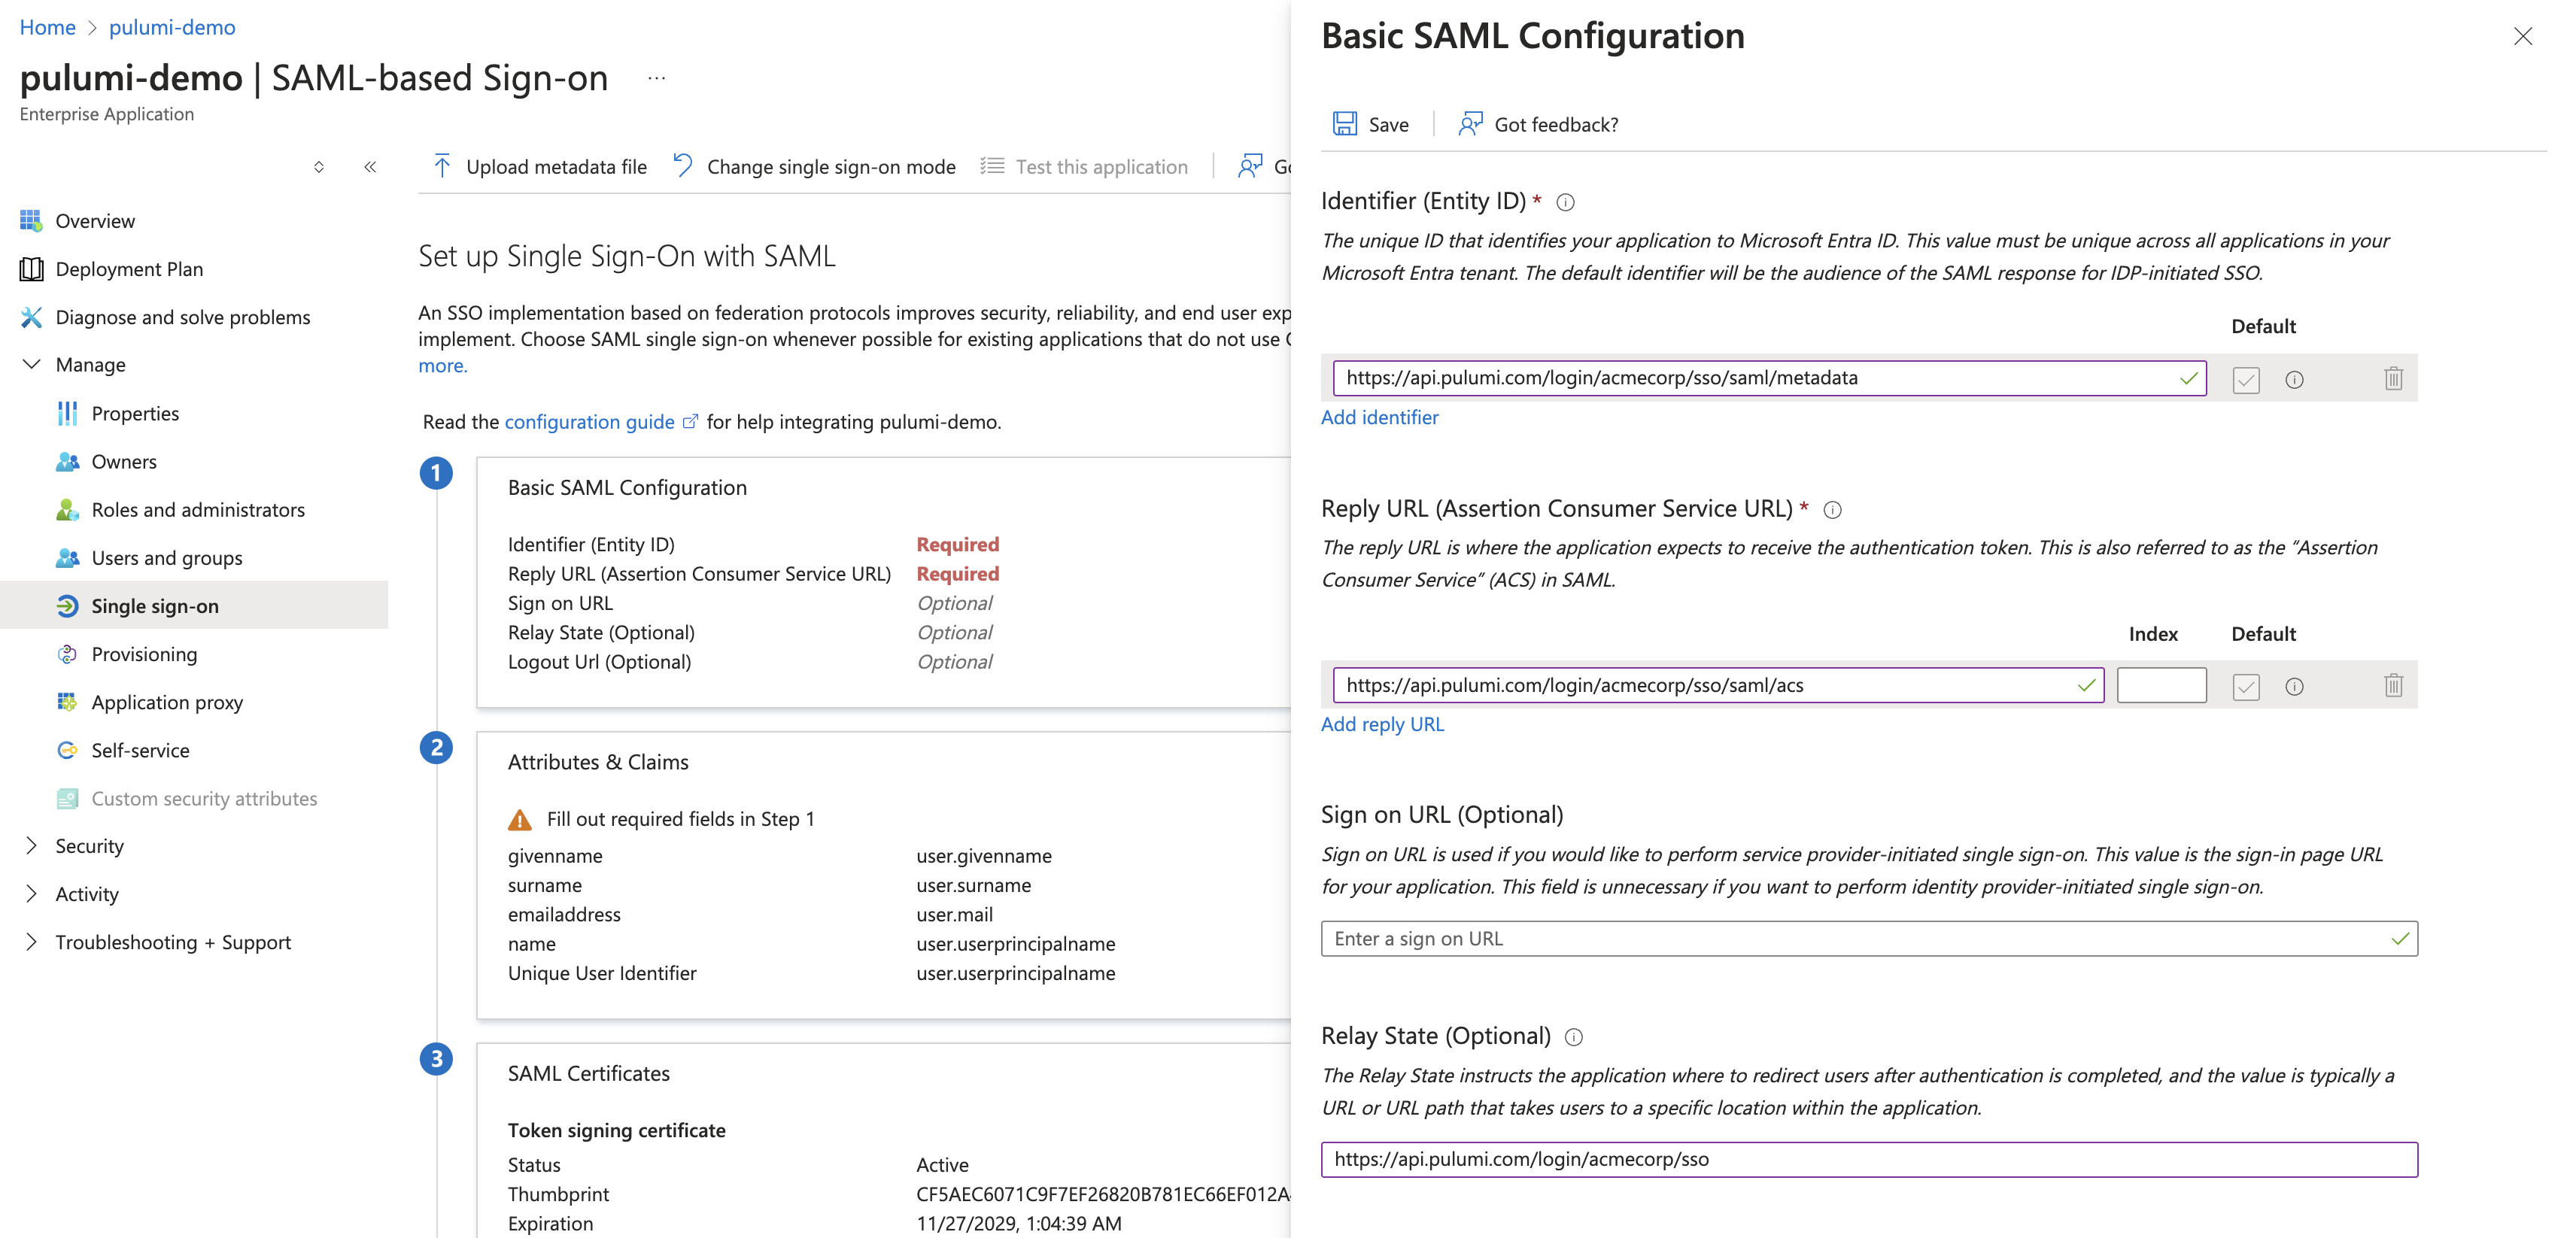
Select the Edit icon on the Basic SAML Configuration panel.
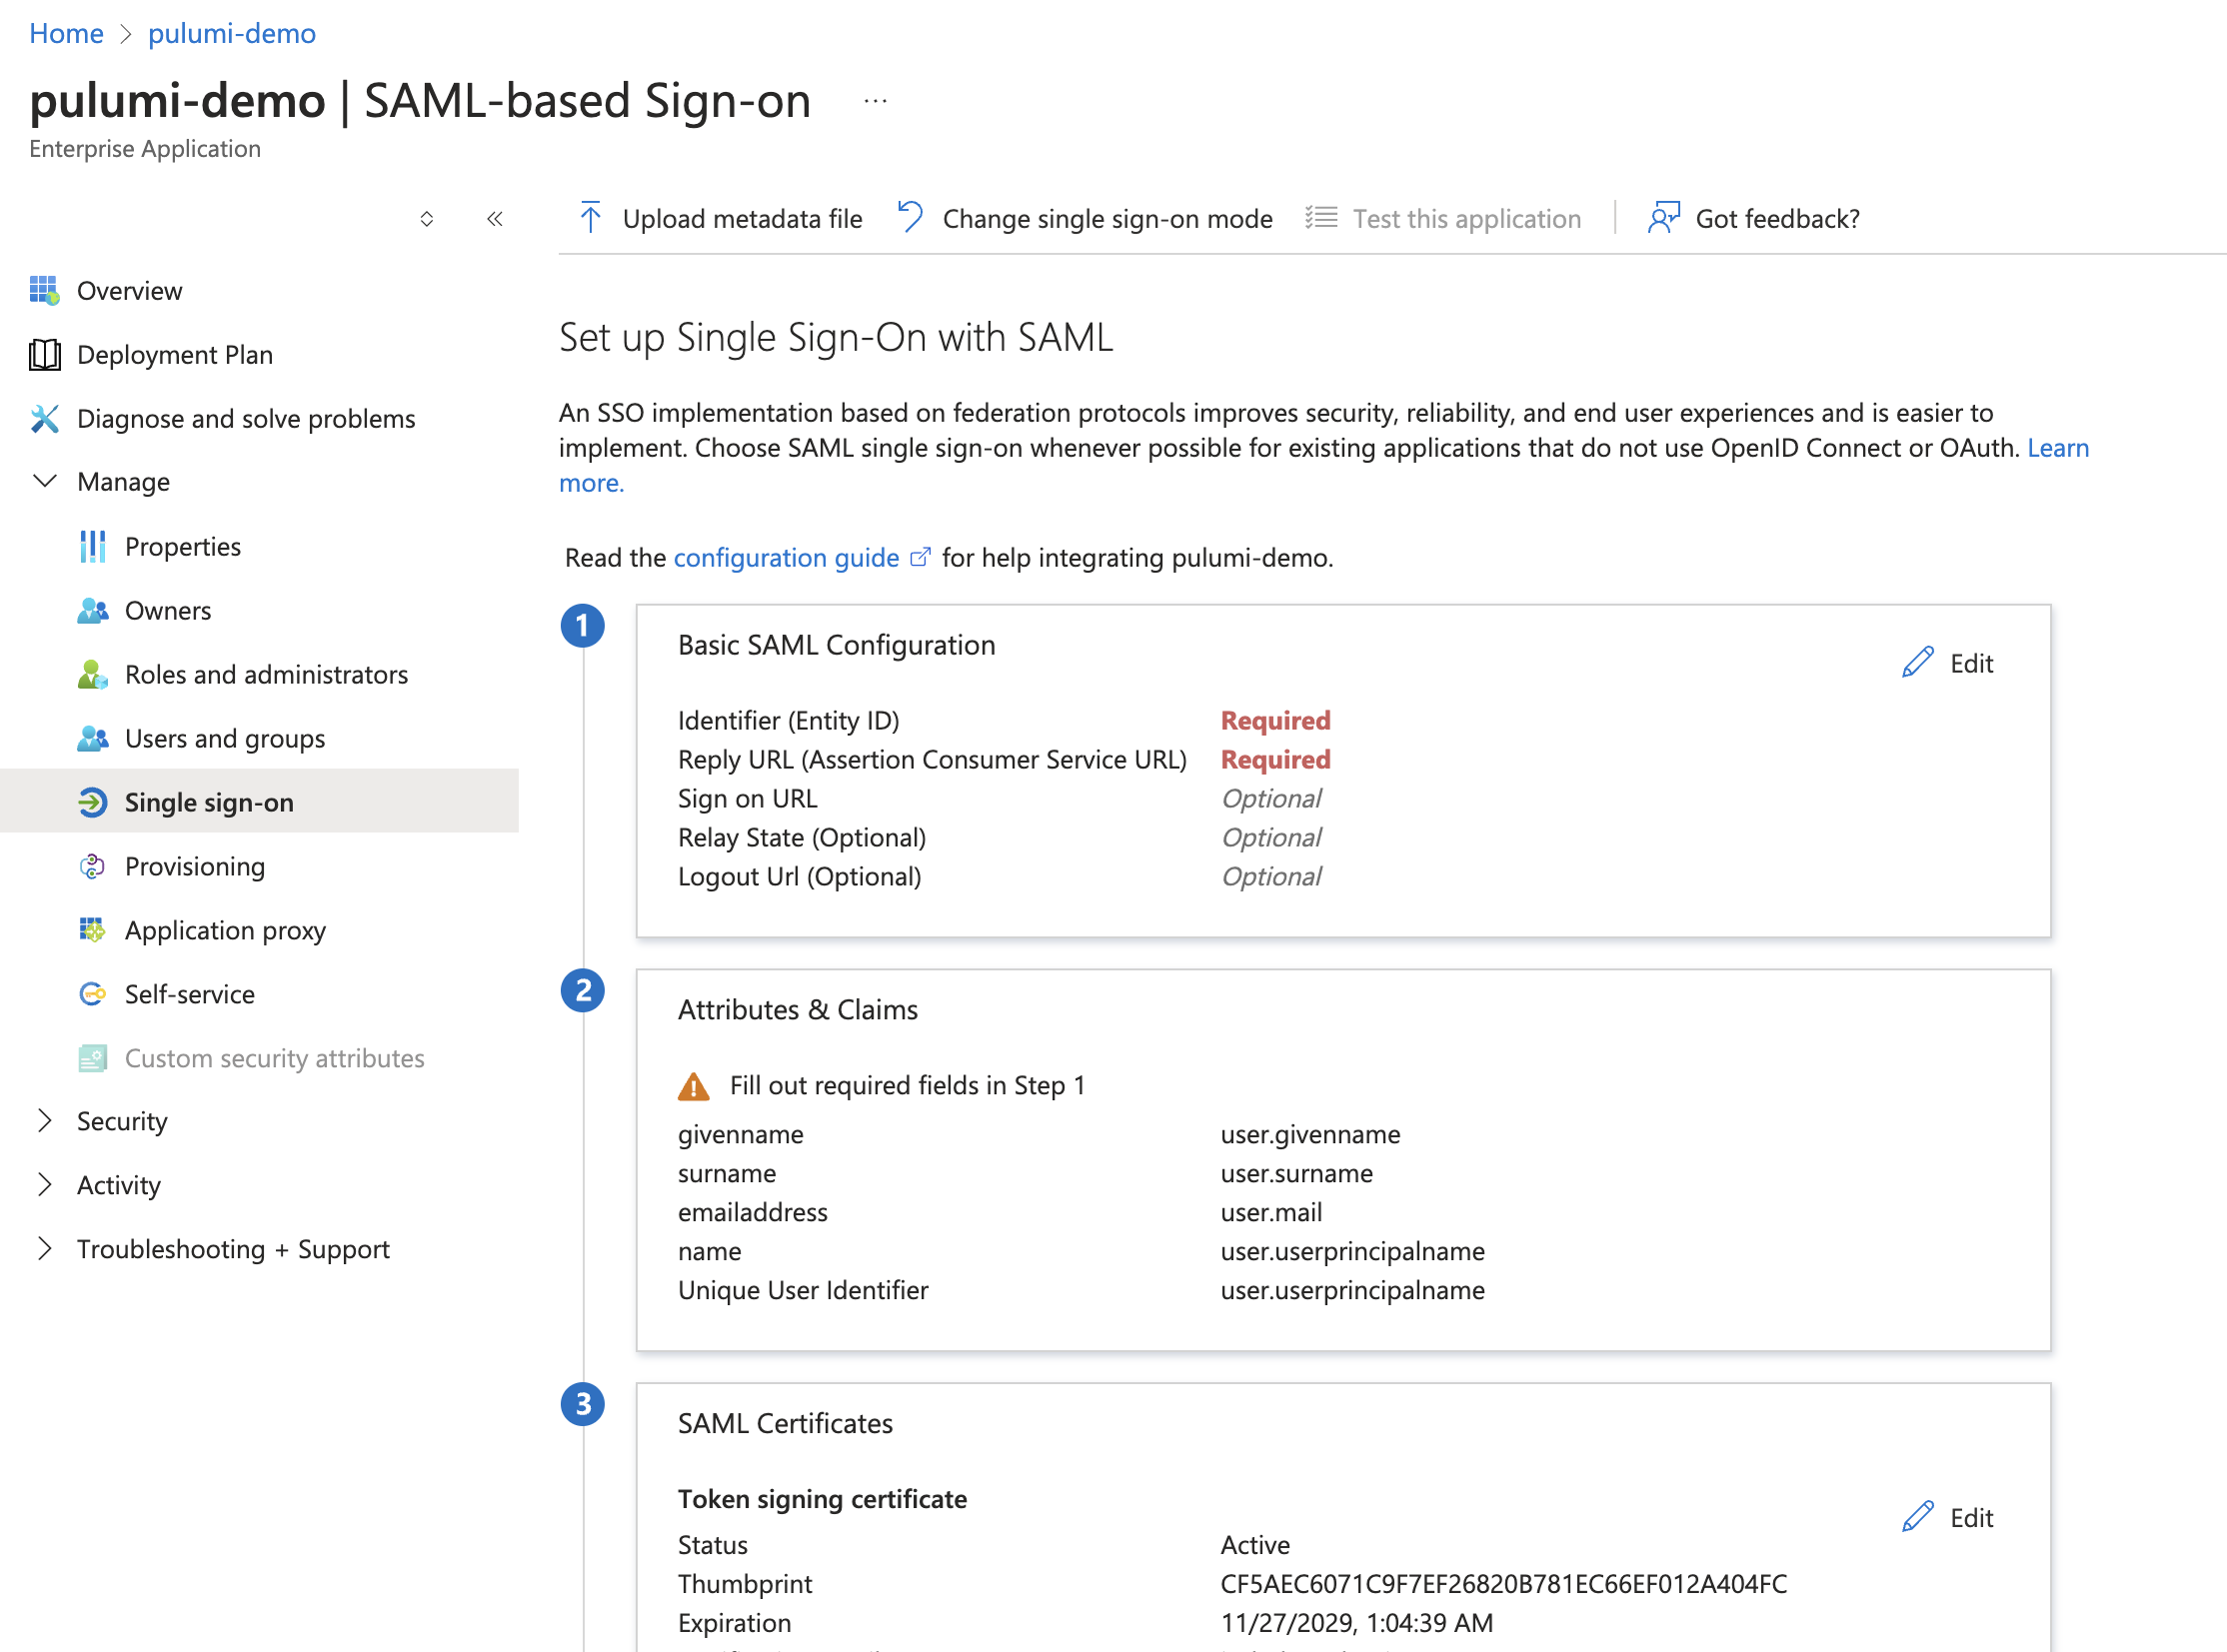
Enter Pulumi configuration into your Entra ID application
The values you need to use are dependent upon your Pulumi organization name. Be sure to replace acmecorp with your actual organization name.
| SAML Setting | Value |
|---|---|
| Identifier (Entity ID) | https://api.pulumi.com/login/<acmecorp>/sso/saml/metadata |
| Reply URL | https://api.pulumi.com/login/<acmecorp>/sso/saml/acs |
| Relay State | https://api.pulumi.com/login/<acmecorp>/sso |
Configure the name identifier format
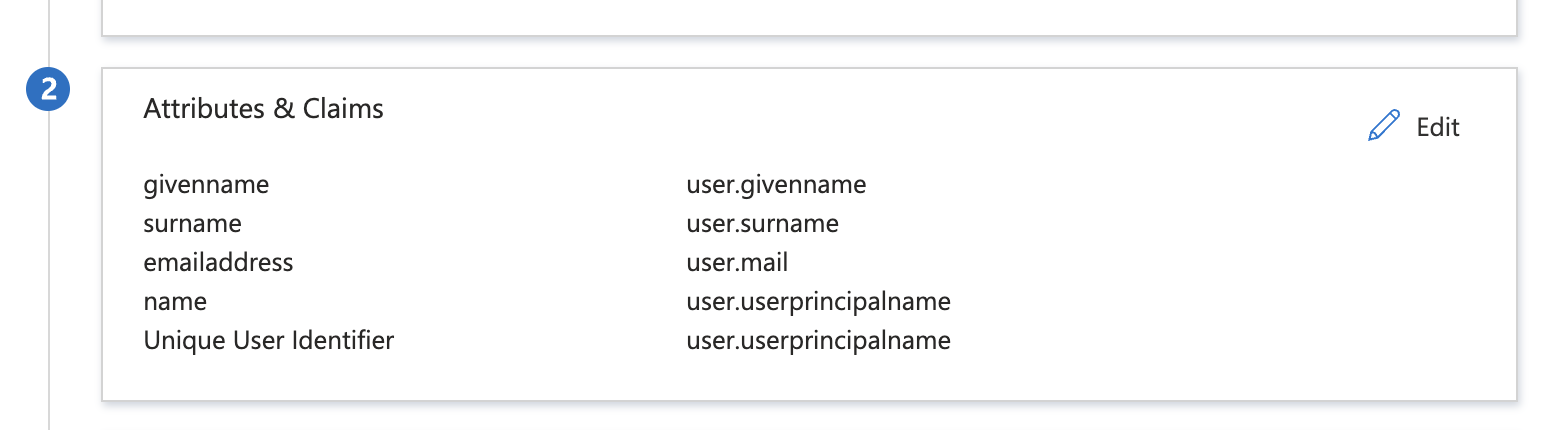
Select the Edit icon on the Attributes & Claims panel.
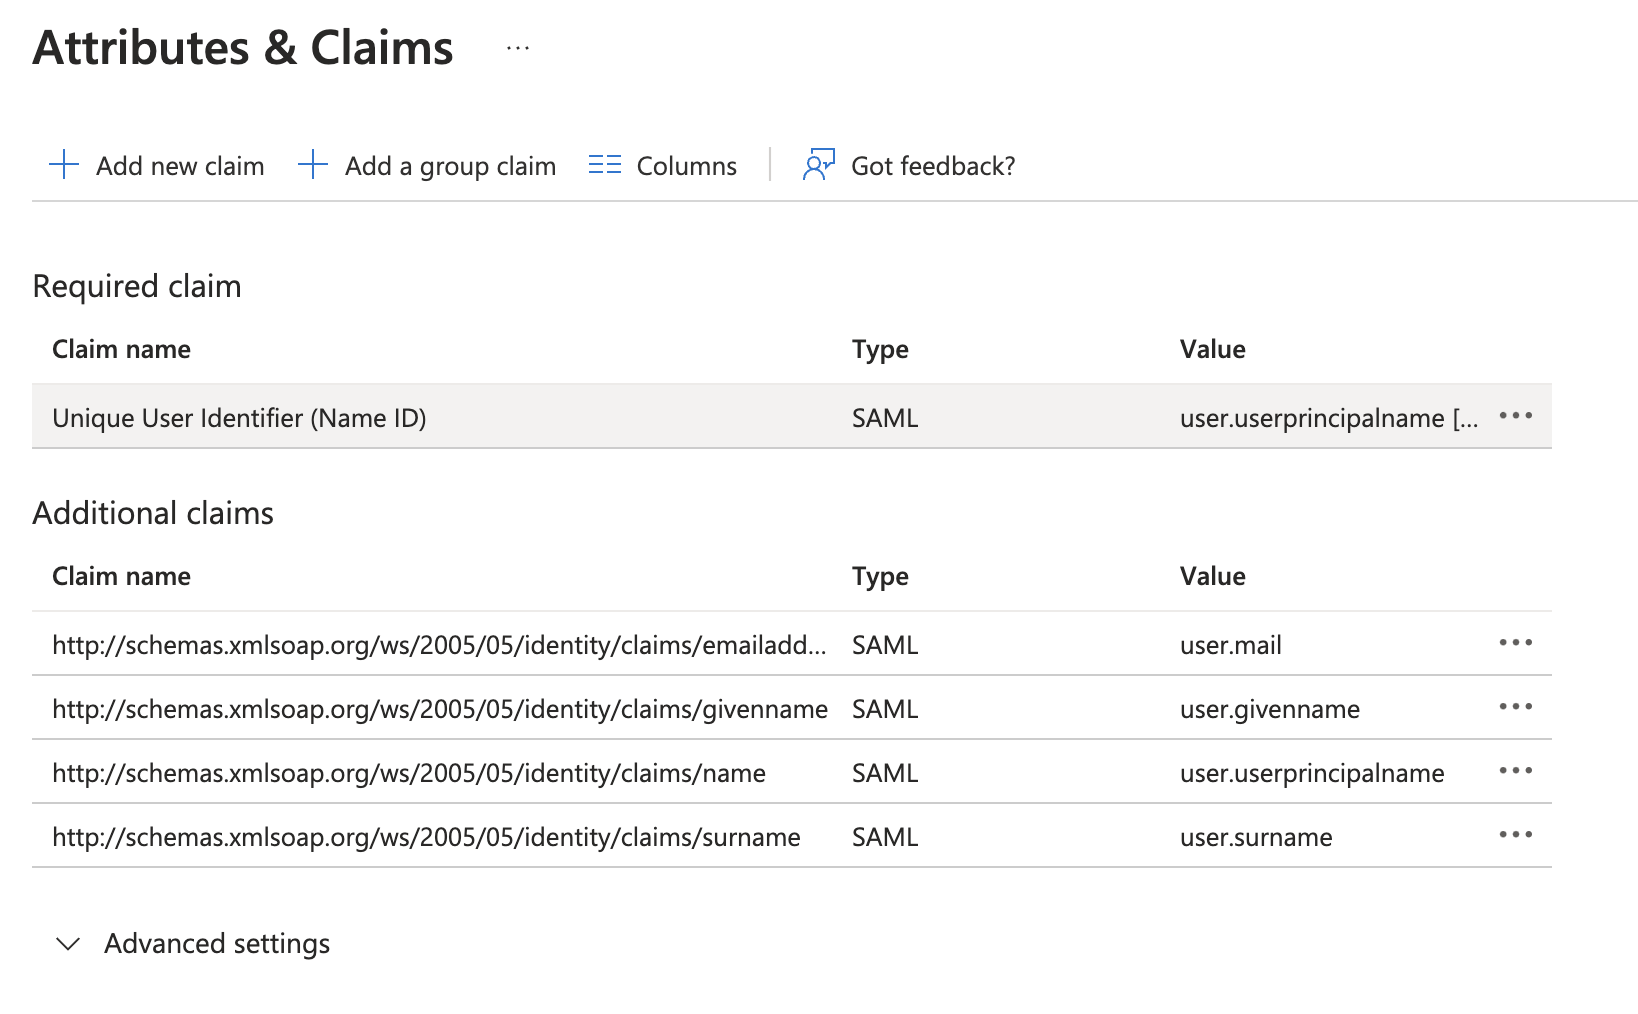
Then, select Unique User Identifier (Name ID) under Required claim.
In the Manage User Claims panel, expand Choose name identifier format and select Email address.
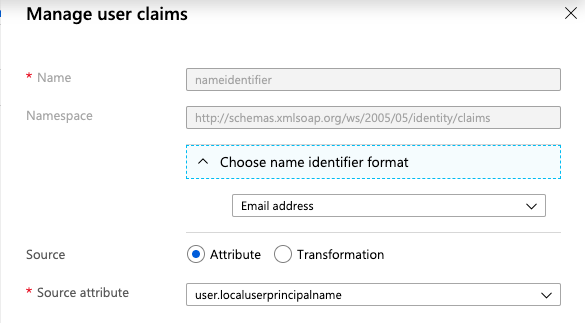
Finally, select Save at the bottom of the Manage User Claims panel.
Important: Do not change the value of Name ID Format value once your users have started using Pulumi—not even switching its value between Email or Persistent.
Note: Be sure to assign users and groups to use your new Pulumi Cloud SAML application. That is how you can control membership access to your Pulumi organization. See the Entra ID documentation for more information.
Now that the Entra ID side of the SAML SSO configuration is complete, you will need to configure the Pulumi Cloud to receive SAML SSO requests from your Entra ID application.
Configuring Your Pulumi Organization
To configure your Pulumi organization to accept SAML SSO requests from Entra ID, you will need to download the SAML application’s configuration data and then pass that to Pulumi.
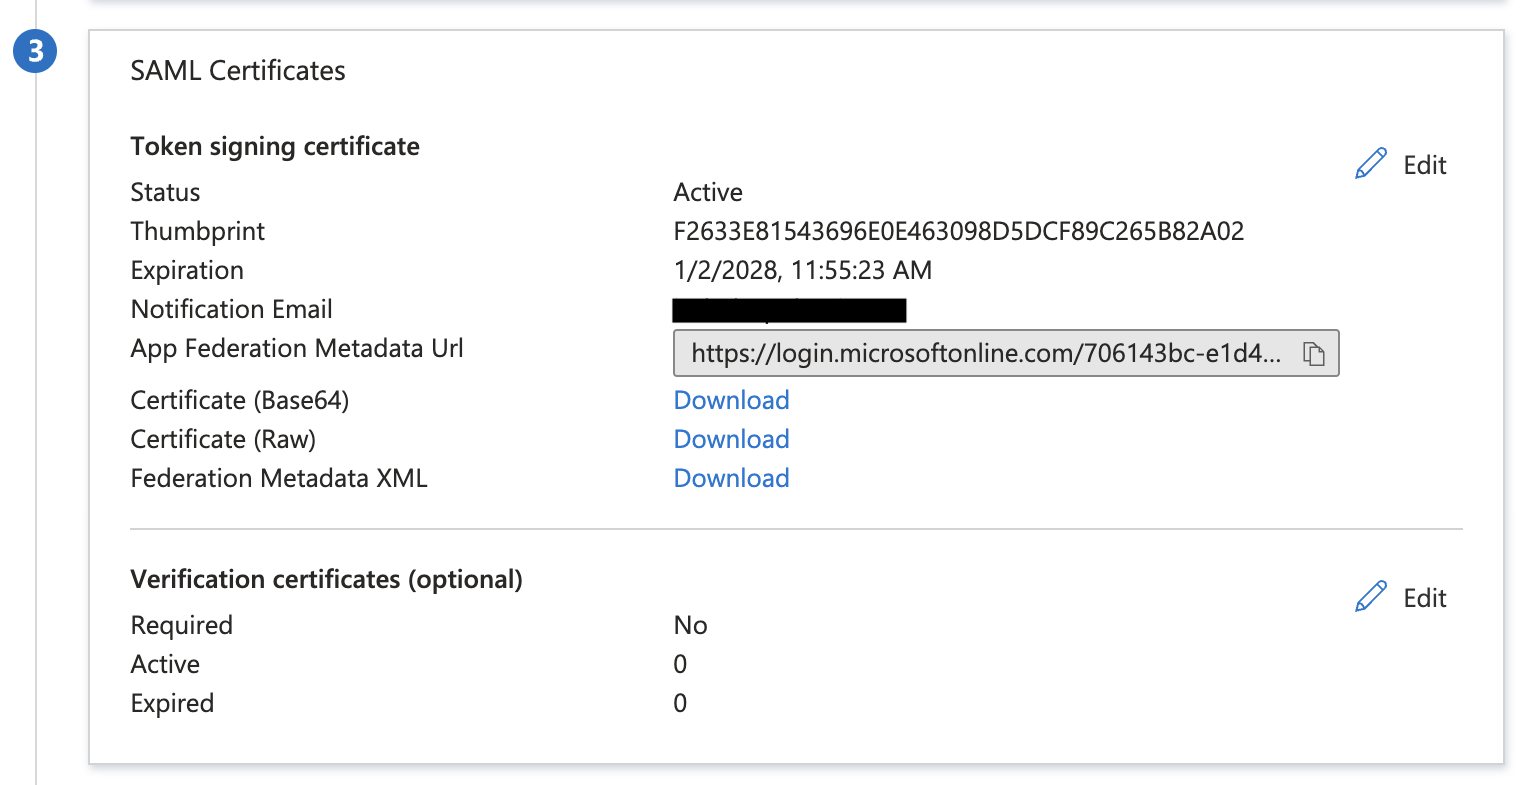
Back on the Entra ID application’s settings page, select the SAML Certificates panel. Then select Download next to Federated Metadata XML and save the resulting file.
Sign into the Pulumi Cloud and navigate to your SAML organization. Navigate to the Settings tab and then select Access Management.
Select the Change Requirements button and then SAML SSO.
Open up the XML document you downloaded from the Entra ID portal, and paste its full contents into the text box.
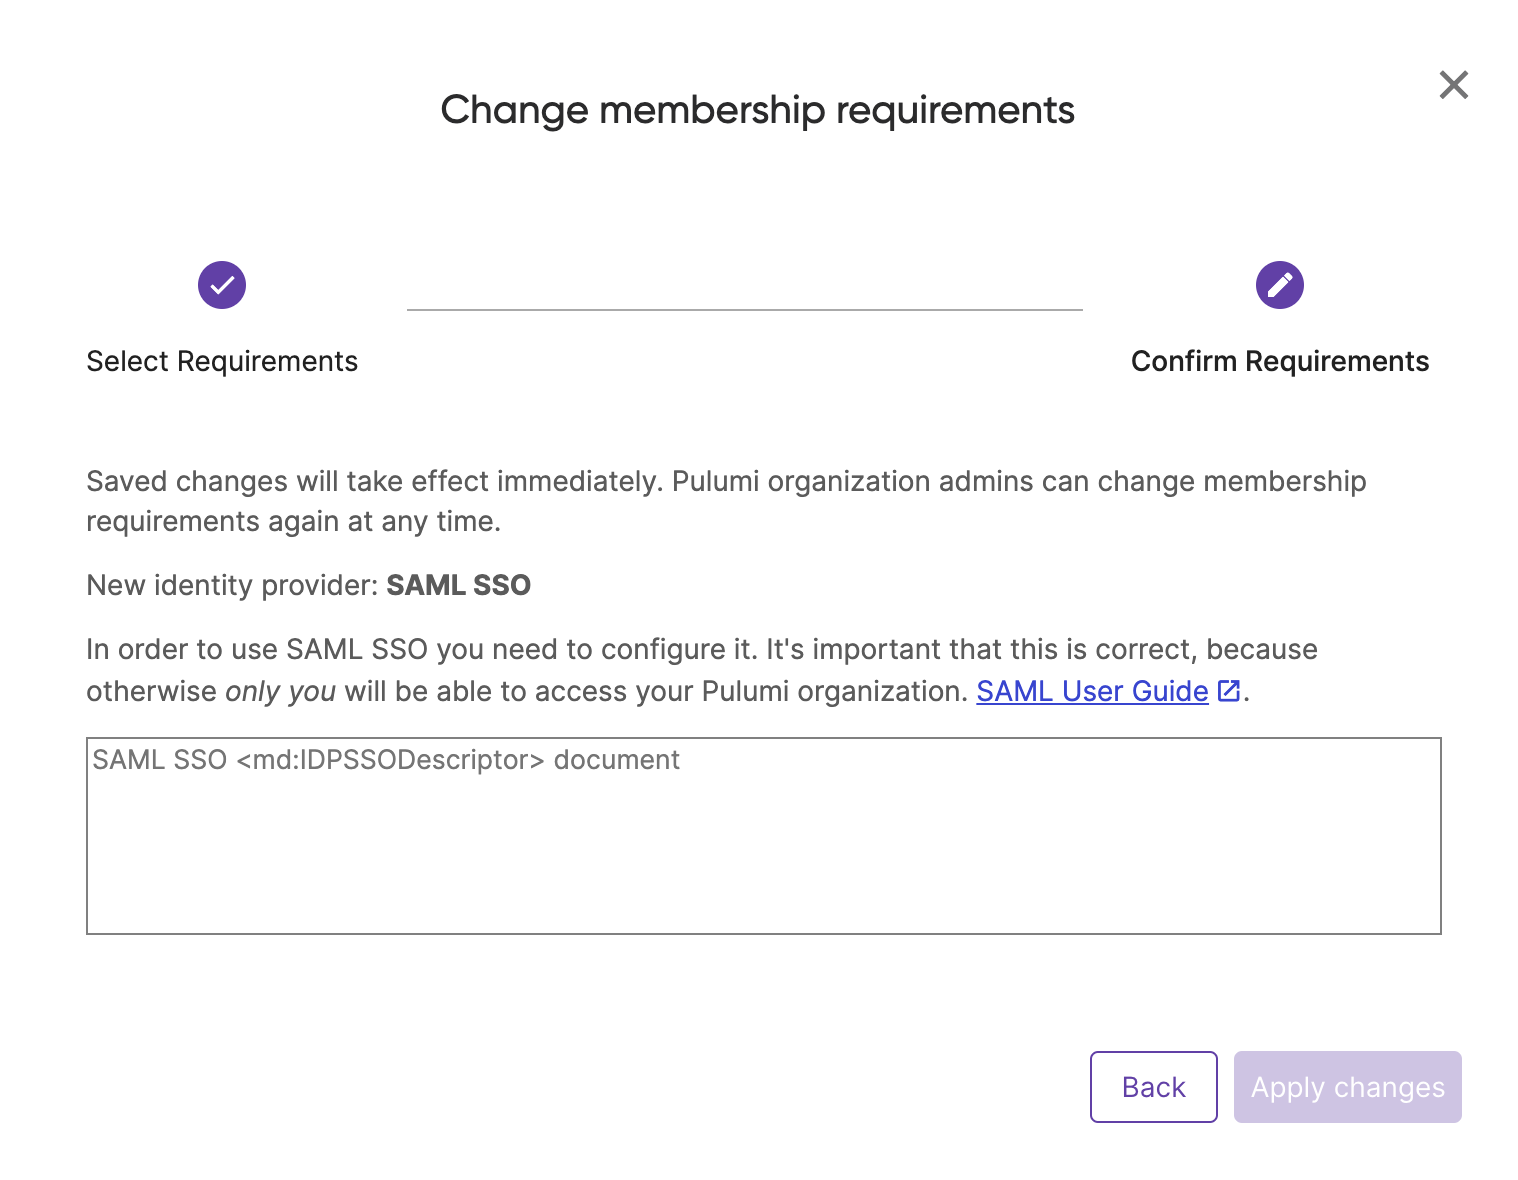
Select Apply changes.
Signing into Pulumi using Entra ID
Once your Entra ID application is created, and its configuration data passed to Pulumi, you can now sign in to the Pulumi Cloud using your SAML SSO credentials.
Navigate to https://app.pulumi.com/signin/sso/ and enter the name of your Pulumi organization. If everything is configured correctly, you should be prompted to sign in to your Entra ID instance, and then immediately be redirected back to the Pulumi Cloud.

Troubleshooting
If you have any trouble configuring Entra ID, signing into Pulumi, or need additional assistance, please contact support.
Thank you for your feedback!
If you have a question about how to use Pulumi, reach out in Community Slack.
Open an issue on GitHub to report a problem or suggest an improvement.
