SCIM: Configuring Okta
This document outlines the steps required to help you configure automatic provisioning/deprovisioning of your users and groups in Pulumi using SCIM 2.0.
Please note that some advanced SCIM features aren’t supported yet. For more information, see Known Limitations.
Prerequisites
- Your organization must already be configured to use SAML SSO with Pulumi.
- You must be an admin of your Pulumi organization.
- (Optional, but highly recommended) You should have more than one admin for your Pulumi organization.
Enabling SCIM For Your Okta Org
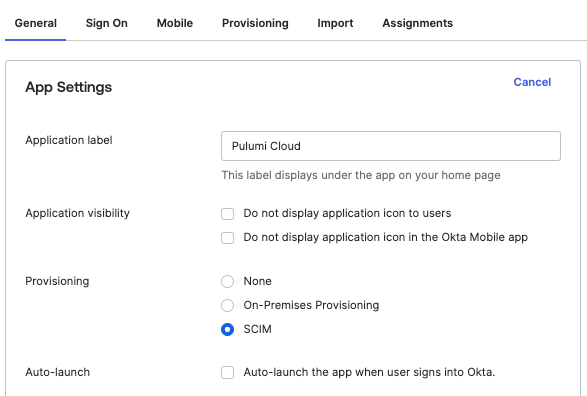
In order to enable SCIM provisioning in Okta, navigate to the Pulumi application configured in your Okta org. Under the General tab, in the App Settings dialog box, locate the Provisioning section and select SCIM by clicking Edit in the top right corner of the dialog box. Click Save to save your changes.
Important: If you do not see the SCIM option in the App Settings under the General tab, you may need to email Okta support at support@okta.com and request that they enable
SCIM_PROVISIONINGfor your Okta account.
For more information on how to enable SCIM provisioning in Okta, see How to Enable SCIM Provisioning in Custom App in the Okta documentation.
Changing the SAML SSO Settings For SCIM
Depending on how you configured the application for SAML, you may need to adjust some of the attributes sent by Okta in SAML SSO requests. To make the changes, navigate to the SAML Settings section on the General tab, click Edit, and make the following changes:
Click Next on the first step.
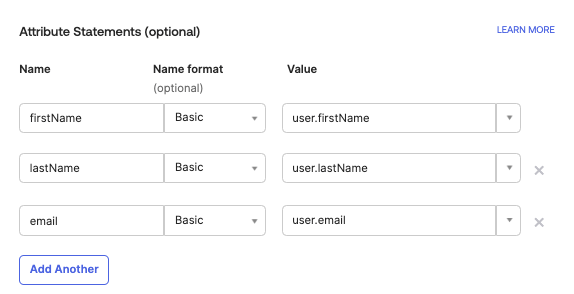
In the Attribute Statements section, click Add Another and set the Name of the property to
emailand the value to be source fromuser.email. The ATTRIBUTE STATEMENTS should now be as follows:Name Name Format Value firstName Basic user.firstName lastName Basic user.lastName email Basic user.email Click Next then click Finish.
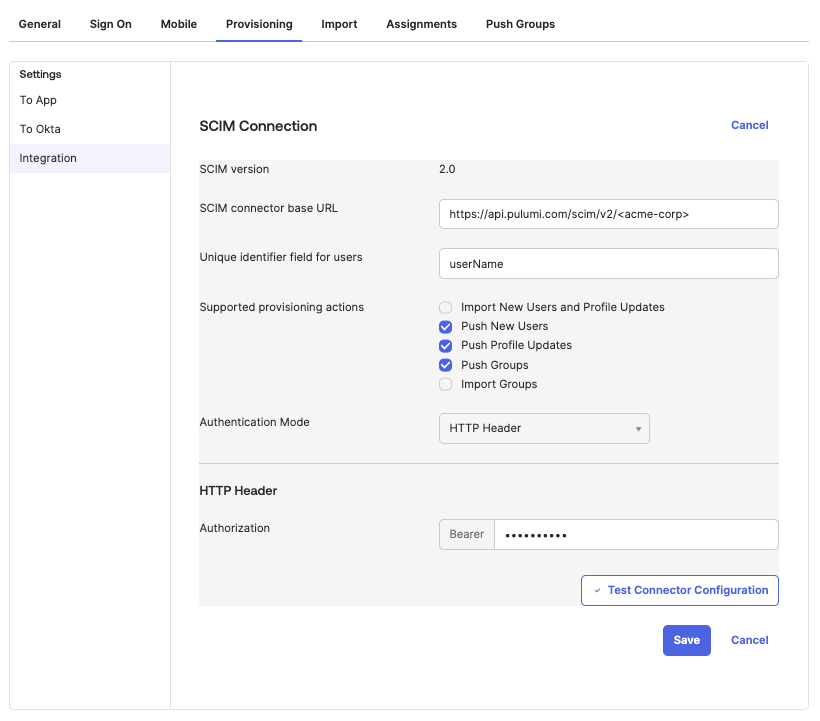
Configuring the SCIM Connector
To configure the SCIM connector, click the Provisioning tab, and then select the Integration option in the left nav. Click Edit. Fill out the form as follows:
- SCIM connector base URL:
https://api.pulumi.com/scim/v2/<orgName>, where<orgName>must be replaced with your organization’s login name (not display name). If you do not know this, navigate to your SAML settings and look at the SSO URL. It will have your organization’s login name in the URL. - Supported provisioning actions: Check Push New Users and Push Profile Updates.
Unique identifier field for users: Set to
userName.Authentication Mode:
HTTP HeaderFor the HTTP Header, you will use a token from the Pulumi Cloud.
To generate a token, navigate to your org in the Pulumi Cloud, click on the Settings tab, and then click Access Management. Scroll down to the SCIM section and generate a new token if you have never generated one for your org, or regenerate it if you have already done so in the past.
- Paste the token from the Pulumi Cloud into the Okta Authorization field under the HTTP Header section.
The following shows how your SCIM connection info should be filled in.
Enabling SCIM Provisioning Actions
To configure the actions that Okta will send to the Pulumi Cloud, you need to enable them.
Under the Provisioning tab, click Edit.
While you are in the To App section, check Enable on the following:
- Create Users
- Update User Attributes
- Deactivate Users
Select Save.
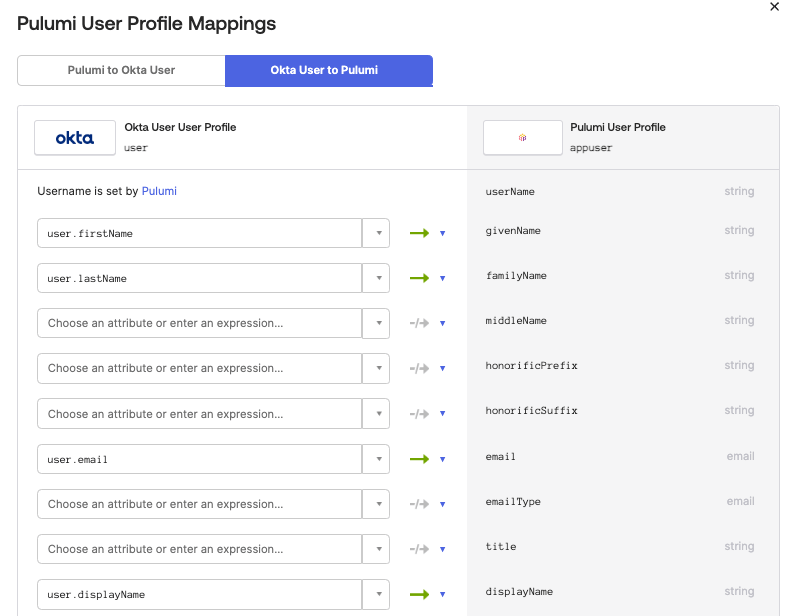
Adjusting the Okta to Pulumi Attribute Mappings
Now that the SCIM connector knows how to connect to Pulumi, you need to adjust the attributes that Okta will send to Pulumi and what it might receive back from Pulumi. To do that, perform the following steps:
Under Provisioning > To App, click Go to Profile Editor.
Click Mappings to open the Attribute Editor dialog box.
Click on the Okta User To … tab and un-map all but the following attributes:
- givenName
- familyName
- displayName
Click Save Mappings.
Click Apply Updates.
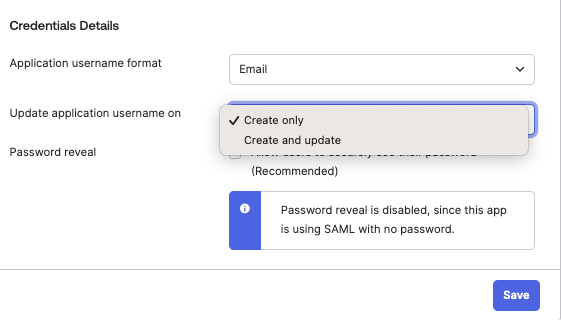
Adjusting the Okta to Pulumi Username Mappings
Pulumi usernames are immutable and should not be changed after a user is associated with a Pulumi application. To disable Okta from pushing username updates to Pulumi, perform the following steps:
- Under Sign On in the Settings module, select Edit.
- Under Credentials Details, change Update application username on from Create and update to Create only.
- Select Save.
Enabling Group Provisioning
The Pulumi Cloud supports the provisioning of teams within your organization using SCIM. This is done by mapping the groups you have created using SCIM to create teams within your organization in the Pulumi Cloud. Setting this up allows you to manage your teams’ memberships solely in Okta.
To set this up, you need to enable Push Groups as a supported provisioning action under the Provisioning settings. To do that, perform the following steps:
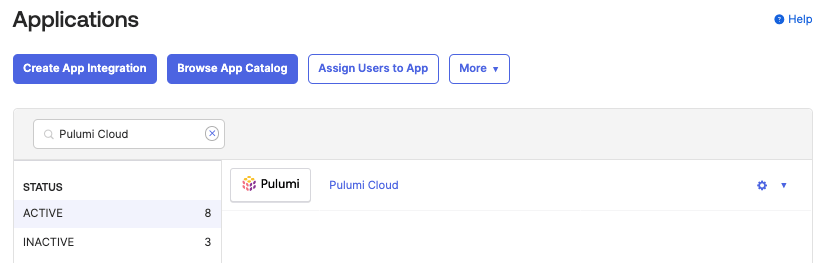
Navigate to the application that you created above by clicking the on the Applications tab and then selecting the application.
Click on Provisioning tab, then click on the integrations menu option located on the left side navigation.
Check the Push Groups box under Supported provisioning actions.
Setting up Group Provisioning
To specify which groups you would like to push with group provisioning, select the Push Groups tab in your Pulumi Cloud application in Okta and complete the following steps.
Select the Push Groups drop down menu. Here you will have the option to find groups either by name or rule.
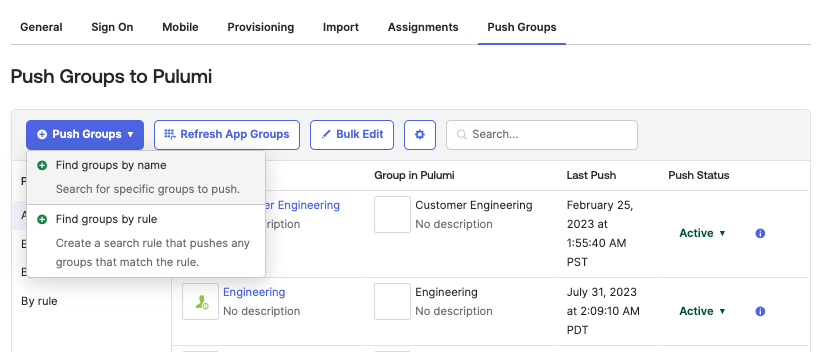
Select Find groups by name. This will take you to a screen where you can search groups by the group name. Once you find the group(s) that you are looking for, click Save.
You will notice there is a checkbox labeled Push group memberships immediately. This will also add all the members that are part of your group to the Pulumi team after your selection has been saved.
After clicking Save, you should see that your group was pushed and it should say Active.
Verifying Group Provisioning
To confirm that the groups were provisioned correctly, sign in to the Pulumi Cloud and select Settings > Teams from the left navigation.
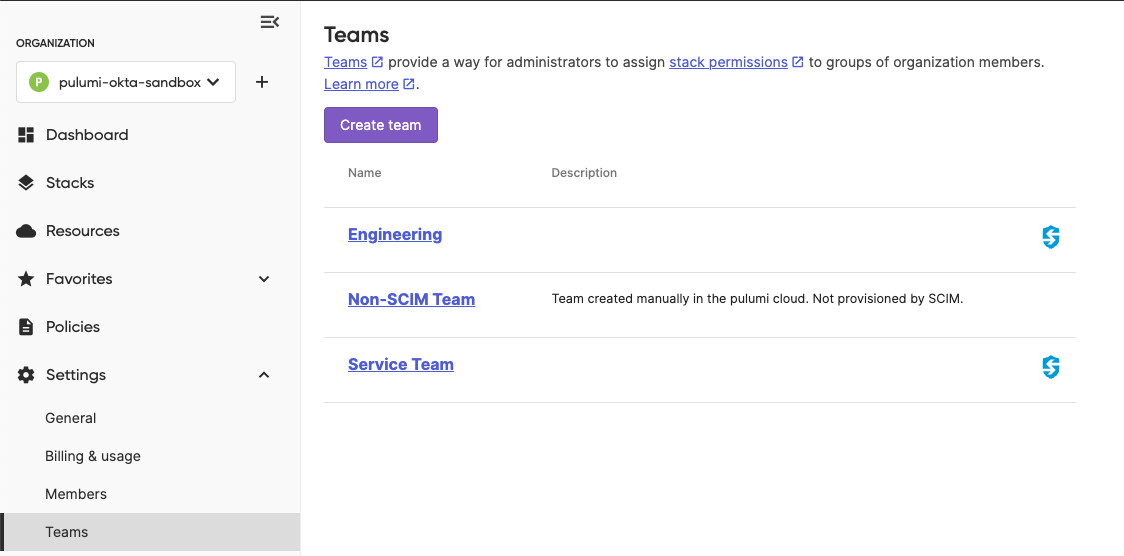
Teams provisioned with SCIM will be marked with a blue SSO icon. Select the provisioned team and verify its membership.
Known Limitations
Some SCIM features are currently not supported:
- Secondary emails
- Password sync
- Bulk importing
Thank you for your feedback!
If you have a question about how to use Pulumi, reach out in Community Slack.
Open an issue on GitHub to report a problem or suggest an improvement.
