Projects & stacks
Projects group stacks together and contain a Pulumi.yaml file. Stacks are isolated, independently configurable instances of a Pulumi program. Projects can have as many stacks as you need.
Creating a Project
To create a project:
- Navigate to All stacks.
- Select Create project.
- Select a cloud and a language and use the Next button.
- Optionally, change your project name and project description.
- Select Create project.
- Follow the provided CLI command instructions.
Stack Access Control
Stacks support fine-grained access controls through permissions. For detailed information about stack permissions, including permission levels and how to manage them, see Stack permissions.
Viewing Stacks
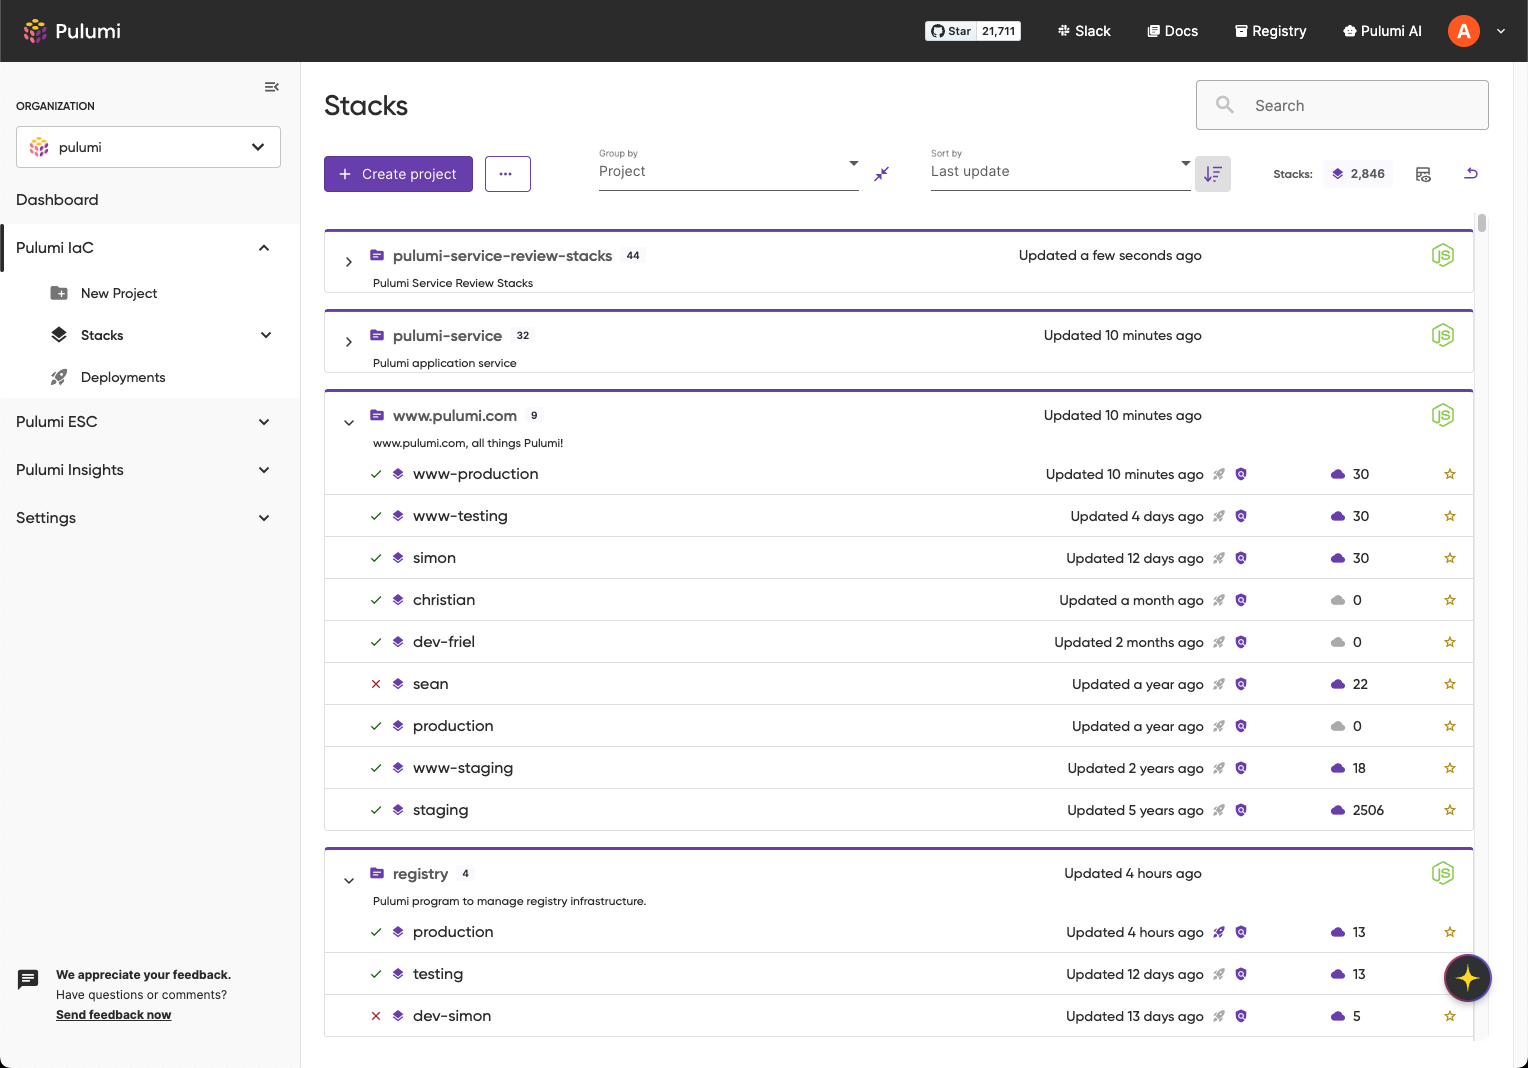
To view an organization’s stacks:
- Navigate to All stacks.
- Optionally, adjust the grouping by selecting the Group By and Sort By controls.
- To view a stack’s details, select the stack’s name.
- To view a specific stack update, navigate to Activity and select it from the list.
Stack Favorites
Stack favorites allow you to label specific stacks for quick and easy access. Stack favorites are displayed in the navigation and on your dashboard.
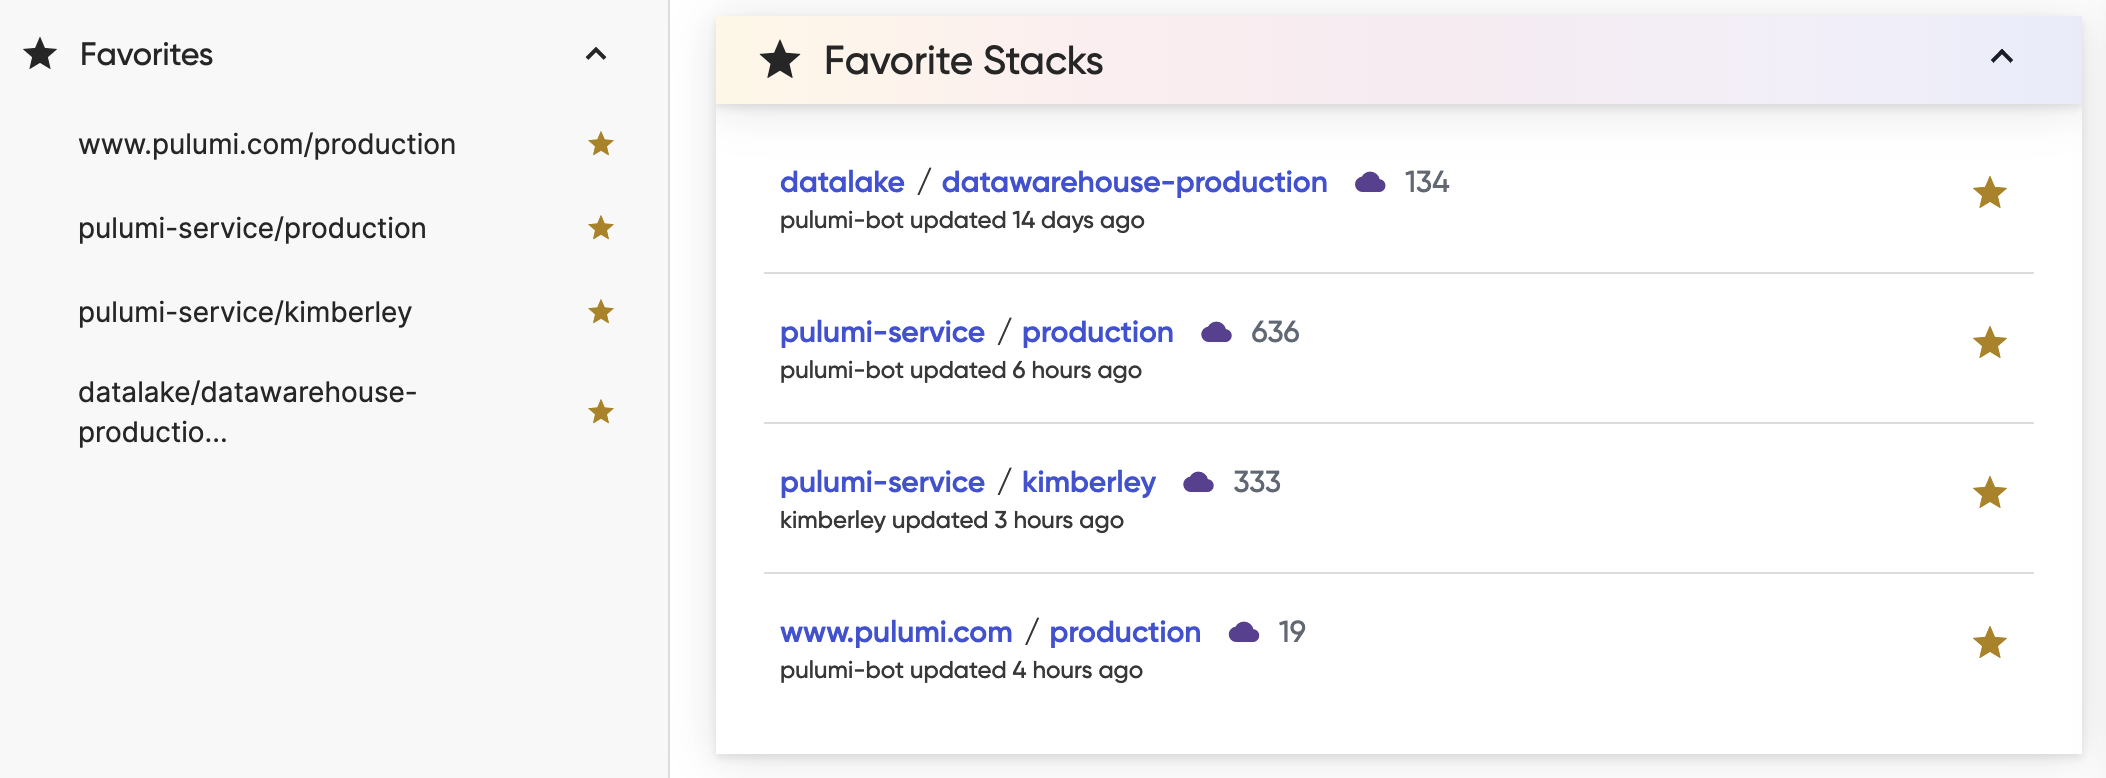
Favorite a Stack
- Navigate to the stack.
- Select the star icon next to the stack name.
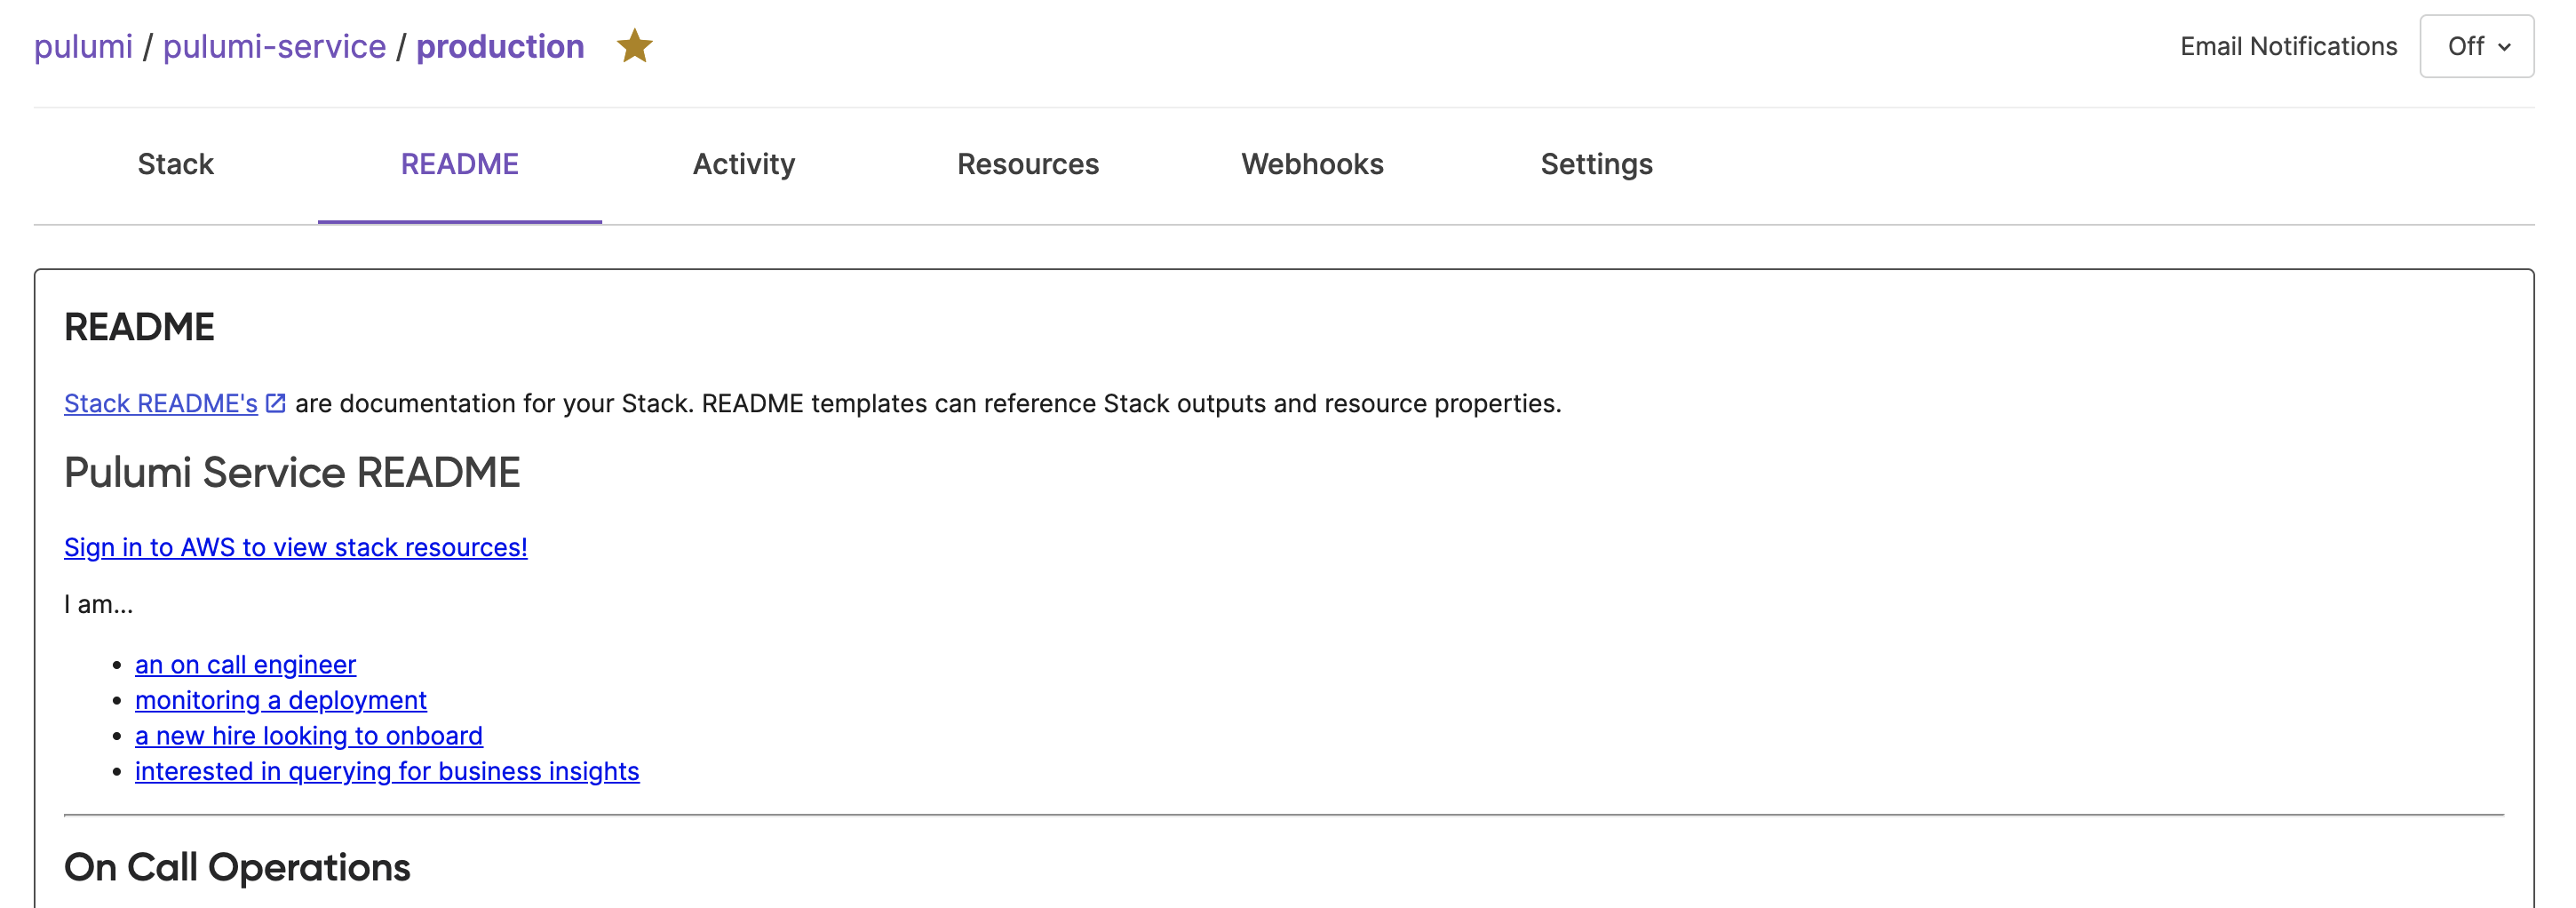
Stack README
To add a README to a stack:
- Export a Stack output named
readmethat contains your templated Stack README markdown, commonly by reading a file, i.e.Pulumi.README.md. - Create a README template for the Stack.
- Run
pulumi upon that Stack. - Navigate to All stacks and then select the stack.
- Navigate to README.
Examples for adding the Stack Output readme to a Pulumi program:
import { readFileSync } from "fs";
export const strVar = "foo";
export const arrVar = ["fizz", "buzz"];
// add readme to stack outputs. must be named "readme".
export const readme = readFileSync("./Pulumi.README.md").toString();
import pulumi
pulumi.export('strVar', 'foo')
pulumi.export('arrVar', ['fizz', 'buzz'])
# open template readme and read contents into stack output
with open('./Pulumi.README.md') as f:
    pulumi.export('readme', f.read())
func main() {
  pulumi.Run(func(ctx *pulumi.Context) error {
    strVar := "foo"
    arrVar := []string{"fizz", "buzz"}
    readmeBytes, err := ioutil.ReadFile("./Pulumi.README.md")
    if err != nil {
      return fmt.Errorf("failed to read readme: %w", err)
    }
    ctx.Export("strVar", pulumi.String(strVar))
    ctx.Export("arrVar", pulumi.ToStringArray(arrVar))
    ctx.Export("readme", pulumi.String(string(readmeBytes)))
    return nil
  })
}
using Pulumi;
class MyStack : Stack
{
    public MyStack()
    {
        this.StrVar = "foo";
        this.ArrVar = new string[] { "fizz", "buzz" };
        this.Readme = Output.Create(System.IO.File.ReadAllText("./Pulumi.README.md"));
    }
    [Output]
    public Output<string> StrVar { get; set; }
    [Output]
    public Output<string[]> ArrVar { get; set; }
    [Output]
    public Output<string> Readme { get; set; }
}
package stackreadme;
import java.io.IOException;
import java.nio.file.Files;
import java.nio.file.Paths;
import com.pulumi.Pulumi;
import com.pulumi.core.Output;
public class App {
    public static void main(String[] args) {
        Pulumi.run(ctx -> {
            var strVar = "foo";
            var arrVar = new String[]{ "fizz", "buzz" };
            try {
                var readme = Files.readString(Paths.get("./Pulumi.README.md"));
                ctx.export("strVar", Output.of(strVar));
                ctx.export("arrVar", Output.of(arrVar));
                ctx.export("readme", Output.of(readme));
            } catch (IOException e) {
                throw new RuntimeException(e);
            }
        });
    }
}
An example of a README file, Pulumi.README.md, the template Stack README file for the Pulumi Cloud.
# Pulumi Cloud README
[Sign in to AWS to view stack resources!](https://top-secret-url.com)
## On Call Operations
### Monitor
1. [Cloudwatch Metrics](https://us-west-2.console.aws.amazon.com/cloudwatch/home?region=us-west-2#dashboards:name=${outputs.dashboardName}): Monitor holistic metrics tracking overall service health
2. [RDS Performance Metrics](https://us-west-2.console.aws.amazon.com/rds/home?region=us-west-2#performance-insights-v20206:/resourceId/${database.databaseCluster.id}/resourceName/${outputs.rdsClusterWriterInstance}): Monitor RDS performance (wait times, top queries)
3. [Cloudwatch Logs](https://us-west-2.console.aws.amazon.com/cloudwatch/home?region=us-west-2#logStream:group=${outputs.cloudwatchLogGroup}): Search across service logs
Here is how it looks rendered in the Pulumi Cloud UI:
Stack Detailed View
To view a stack’s details:
- Navigate to Stacks and then a specific stack.
- Navigate to Activity.
- Review the stack’s outputs, configuration values, and tags.
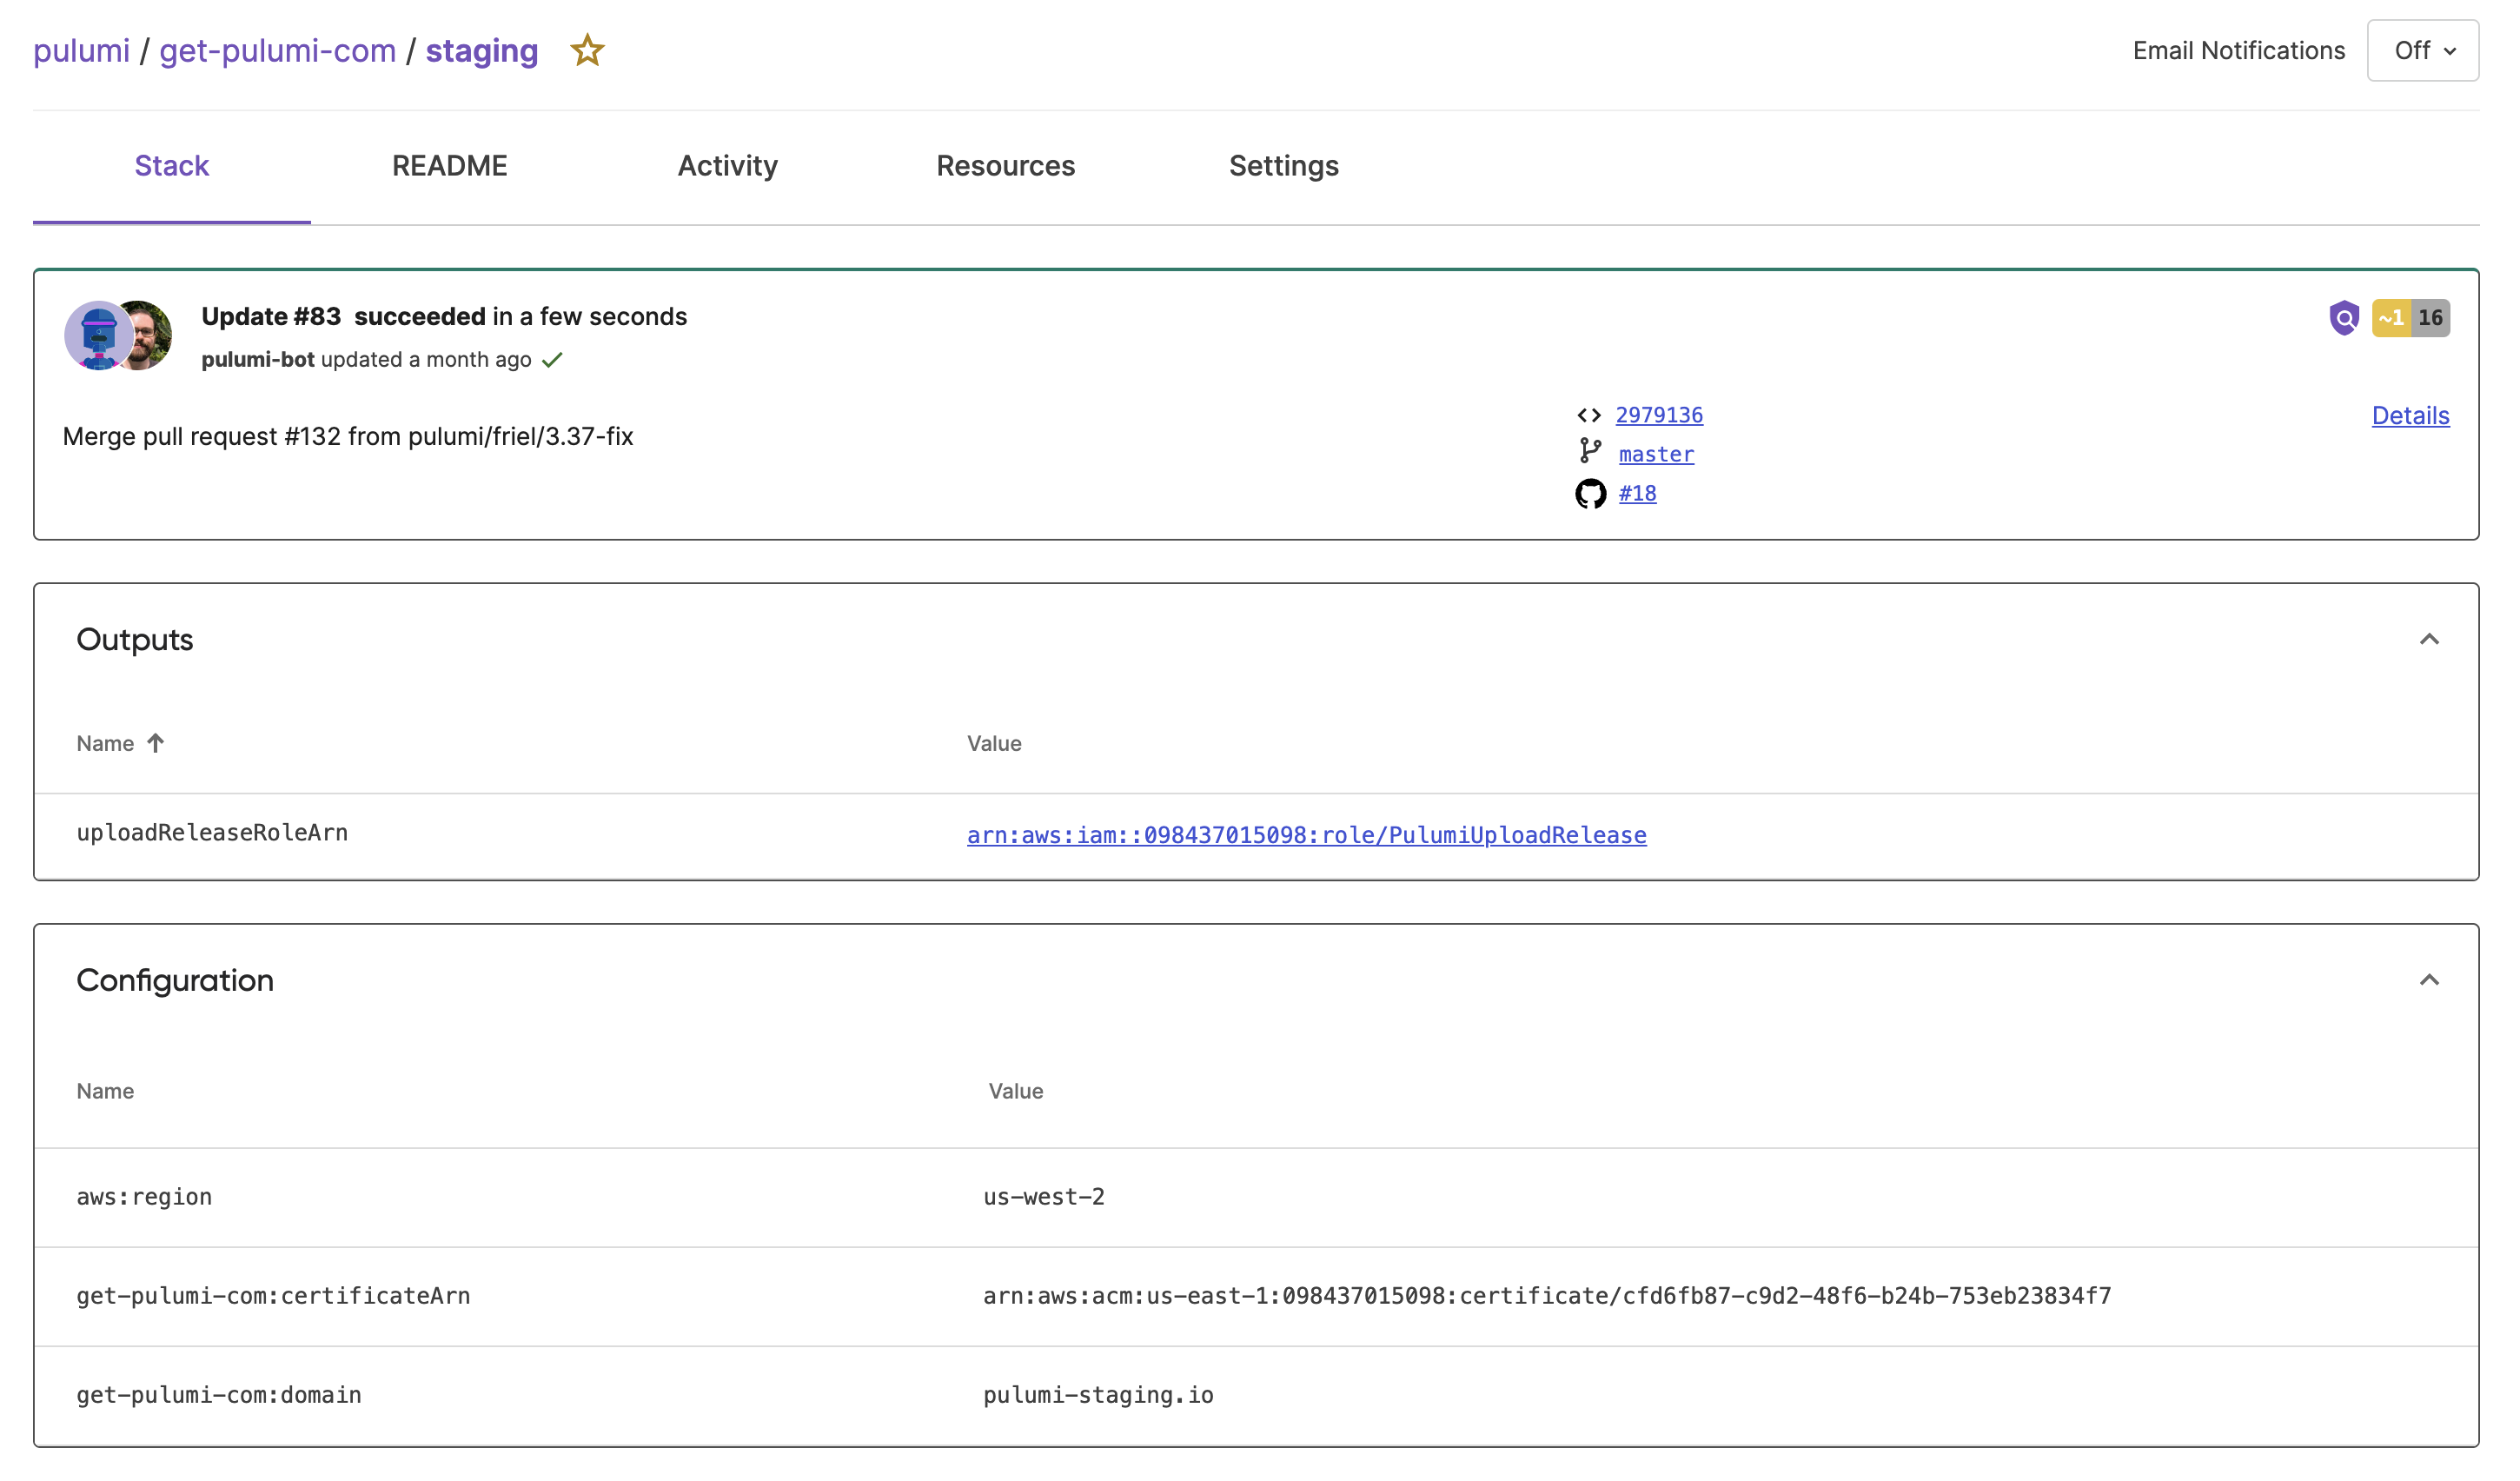
You can see other details, such as who applied the update, when, and counts of added, updated, and unchanged resources. If your stack is integrated with a CI/CD pipeline, such as GitHub Actions, you also see useful links to data like your Git commit hash, mapped branch, and pull request ID.
Custom Stack Tags
Custom stack tags can help you group and filter your stacks.
To create a custom tag:
- Navigate to Stacks and then a specific stack.
- Select New tag.
To modify or delete a custom tag:
- Navigate to All stacks and then a specific stack.
- To modify a custom tag, use the pencil icon.
- To delete a custom tag, use the trash can icon.
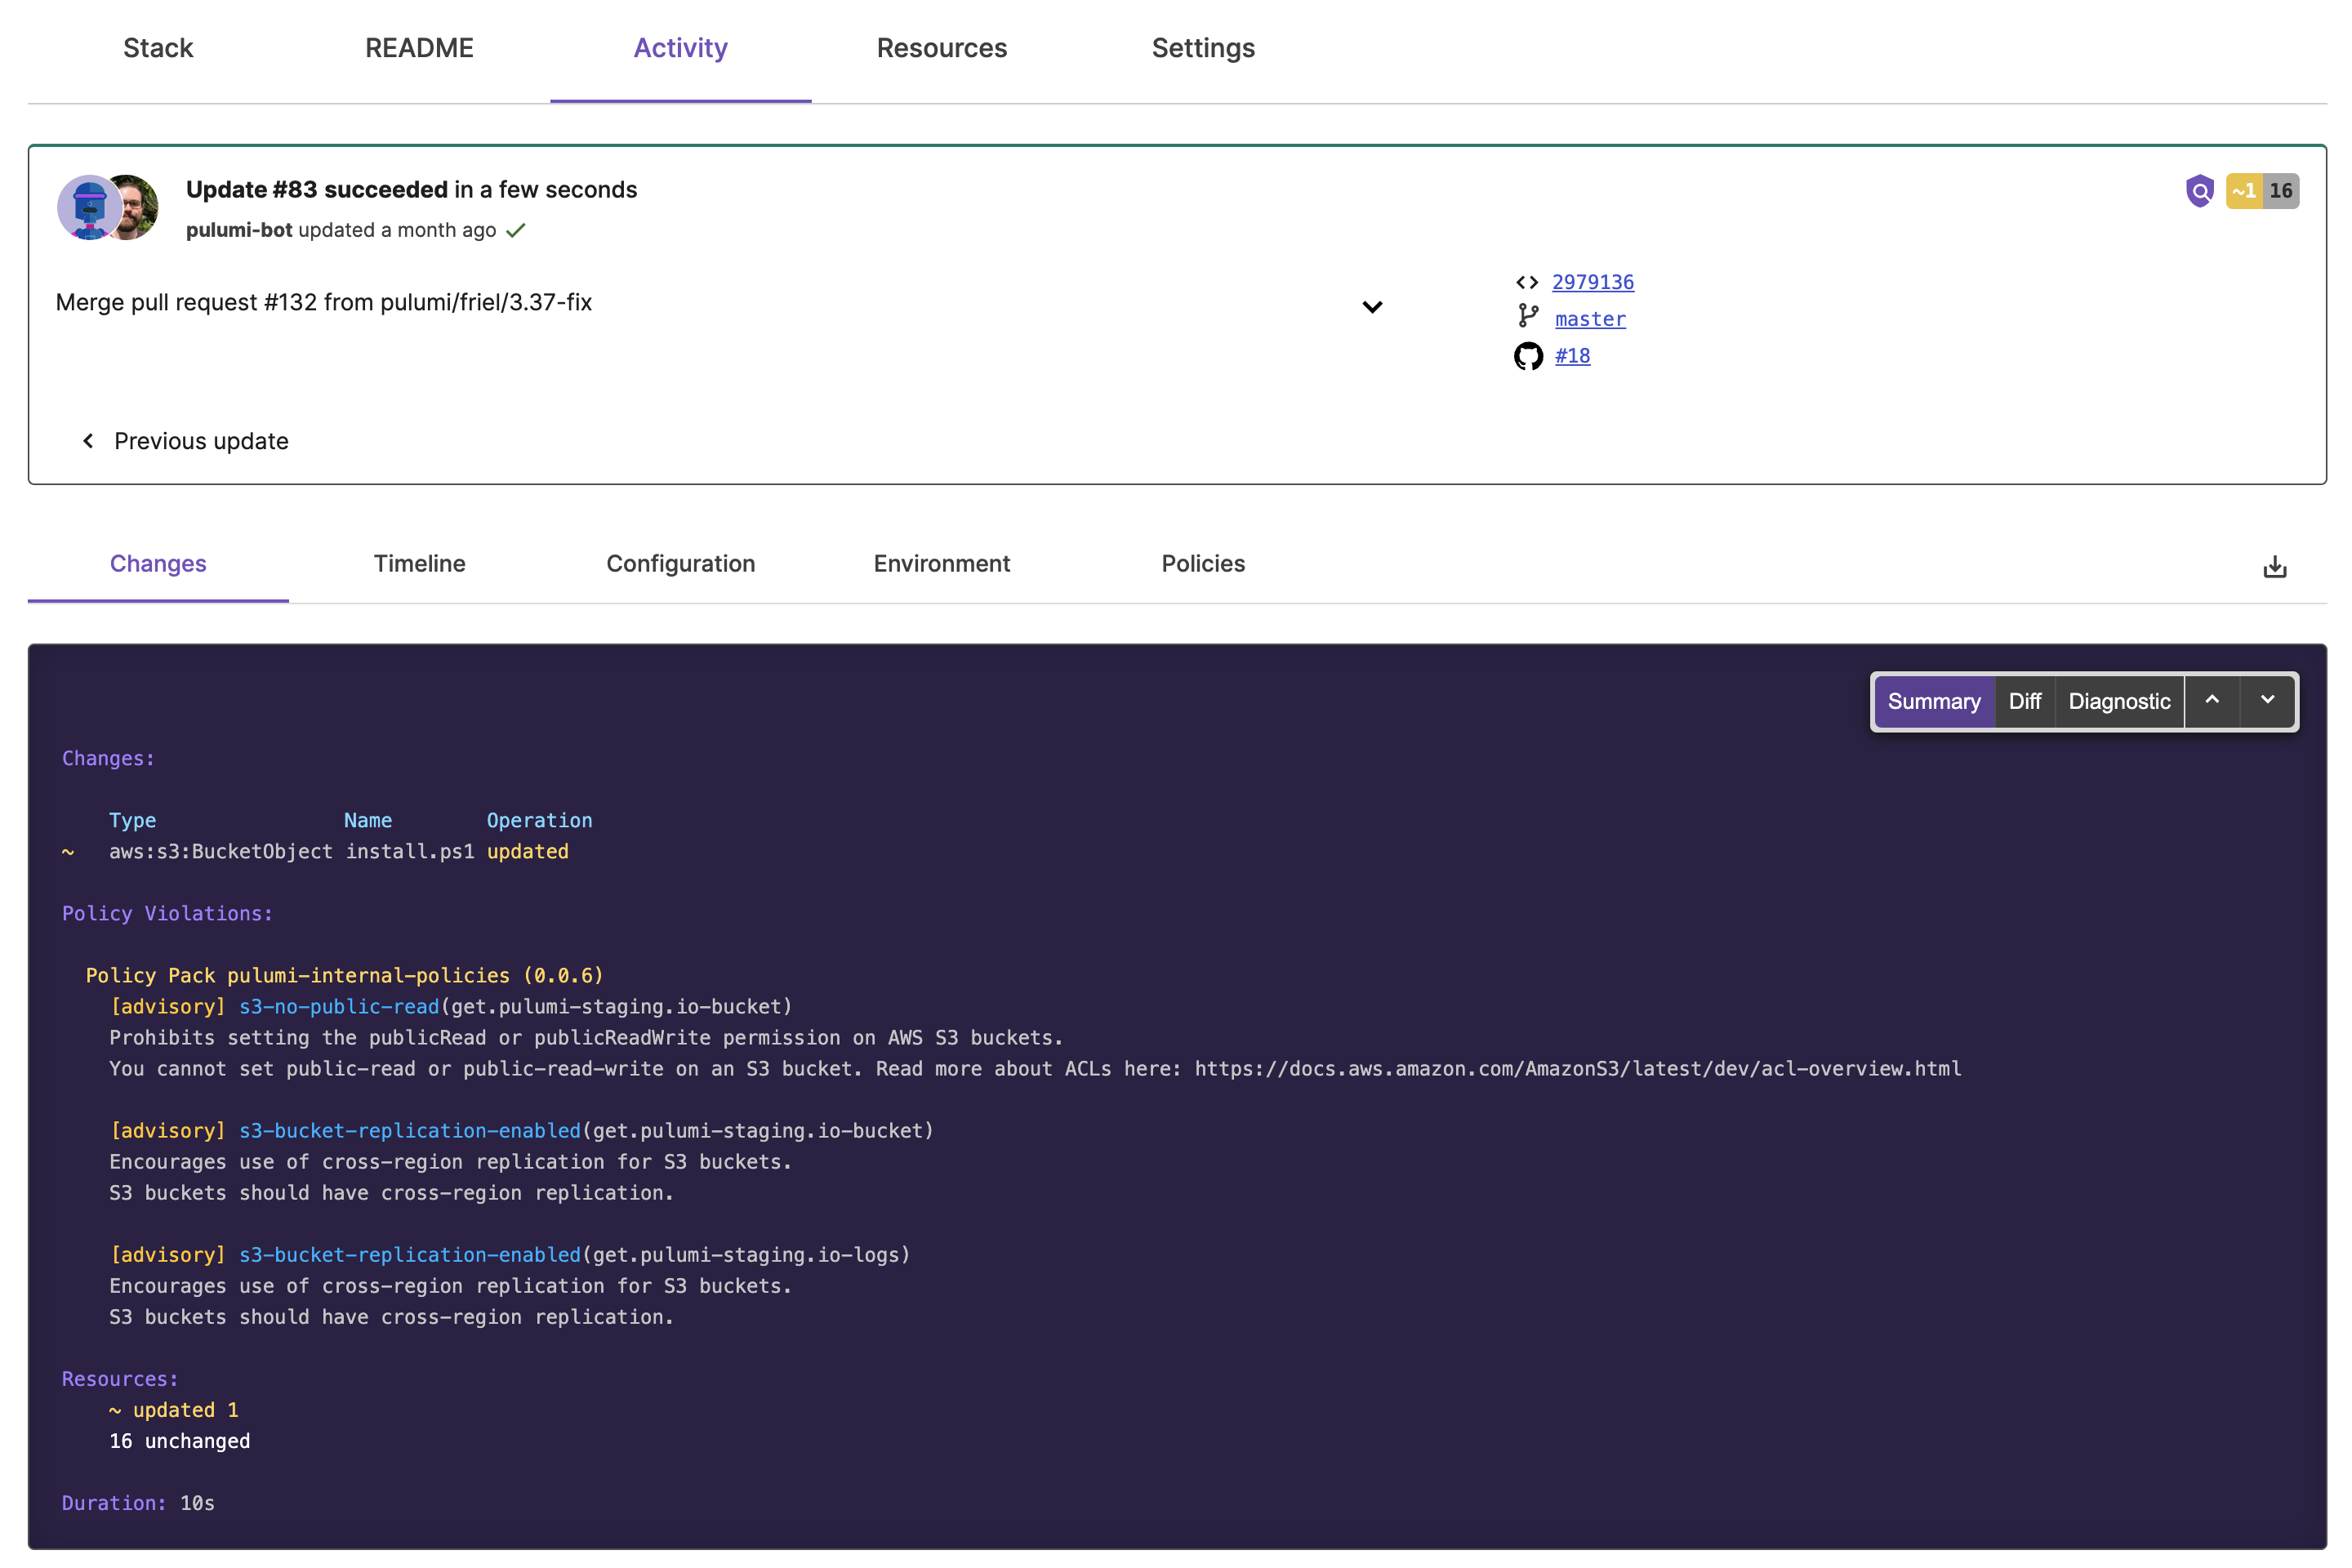
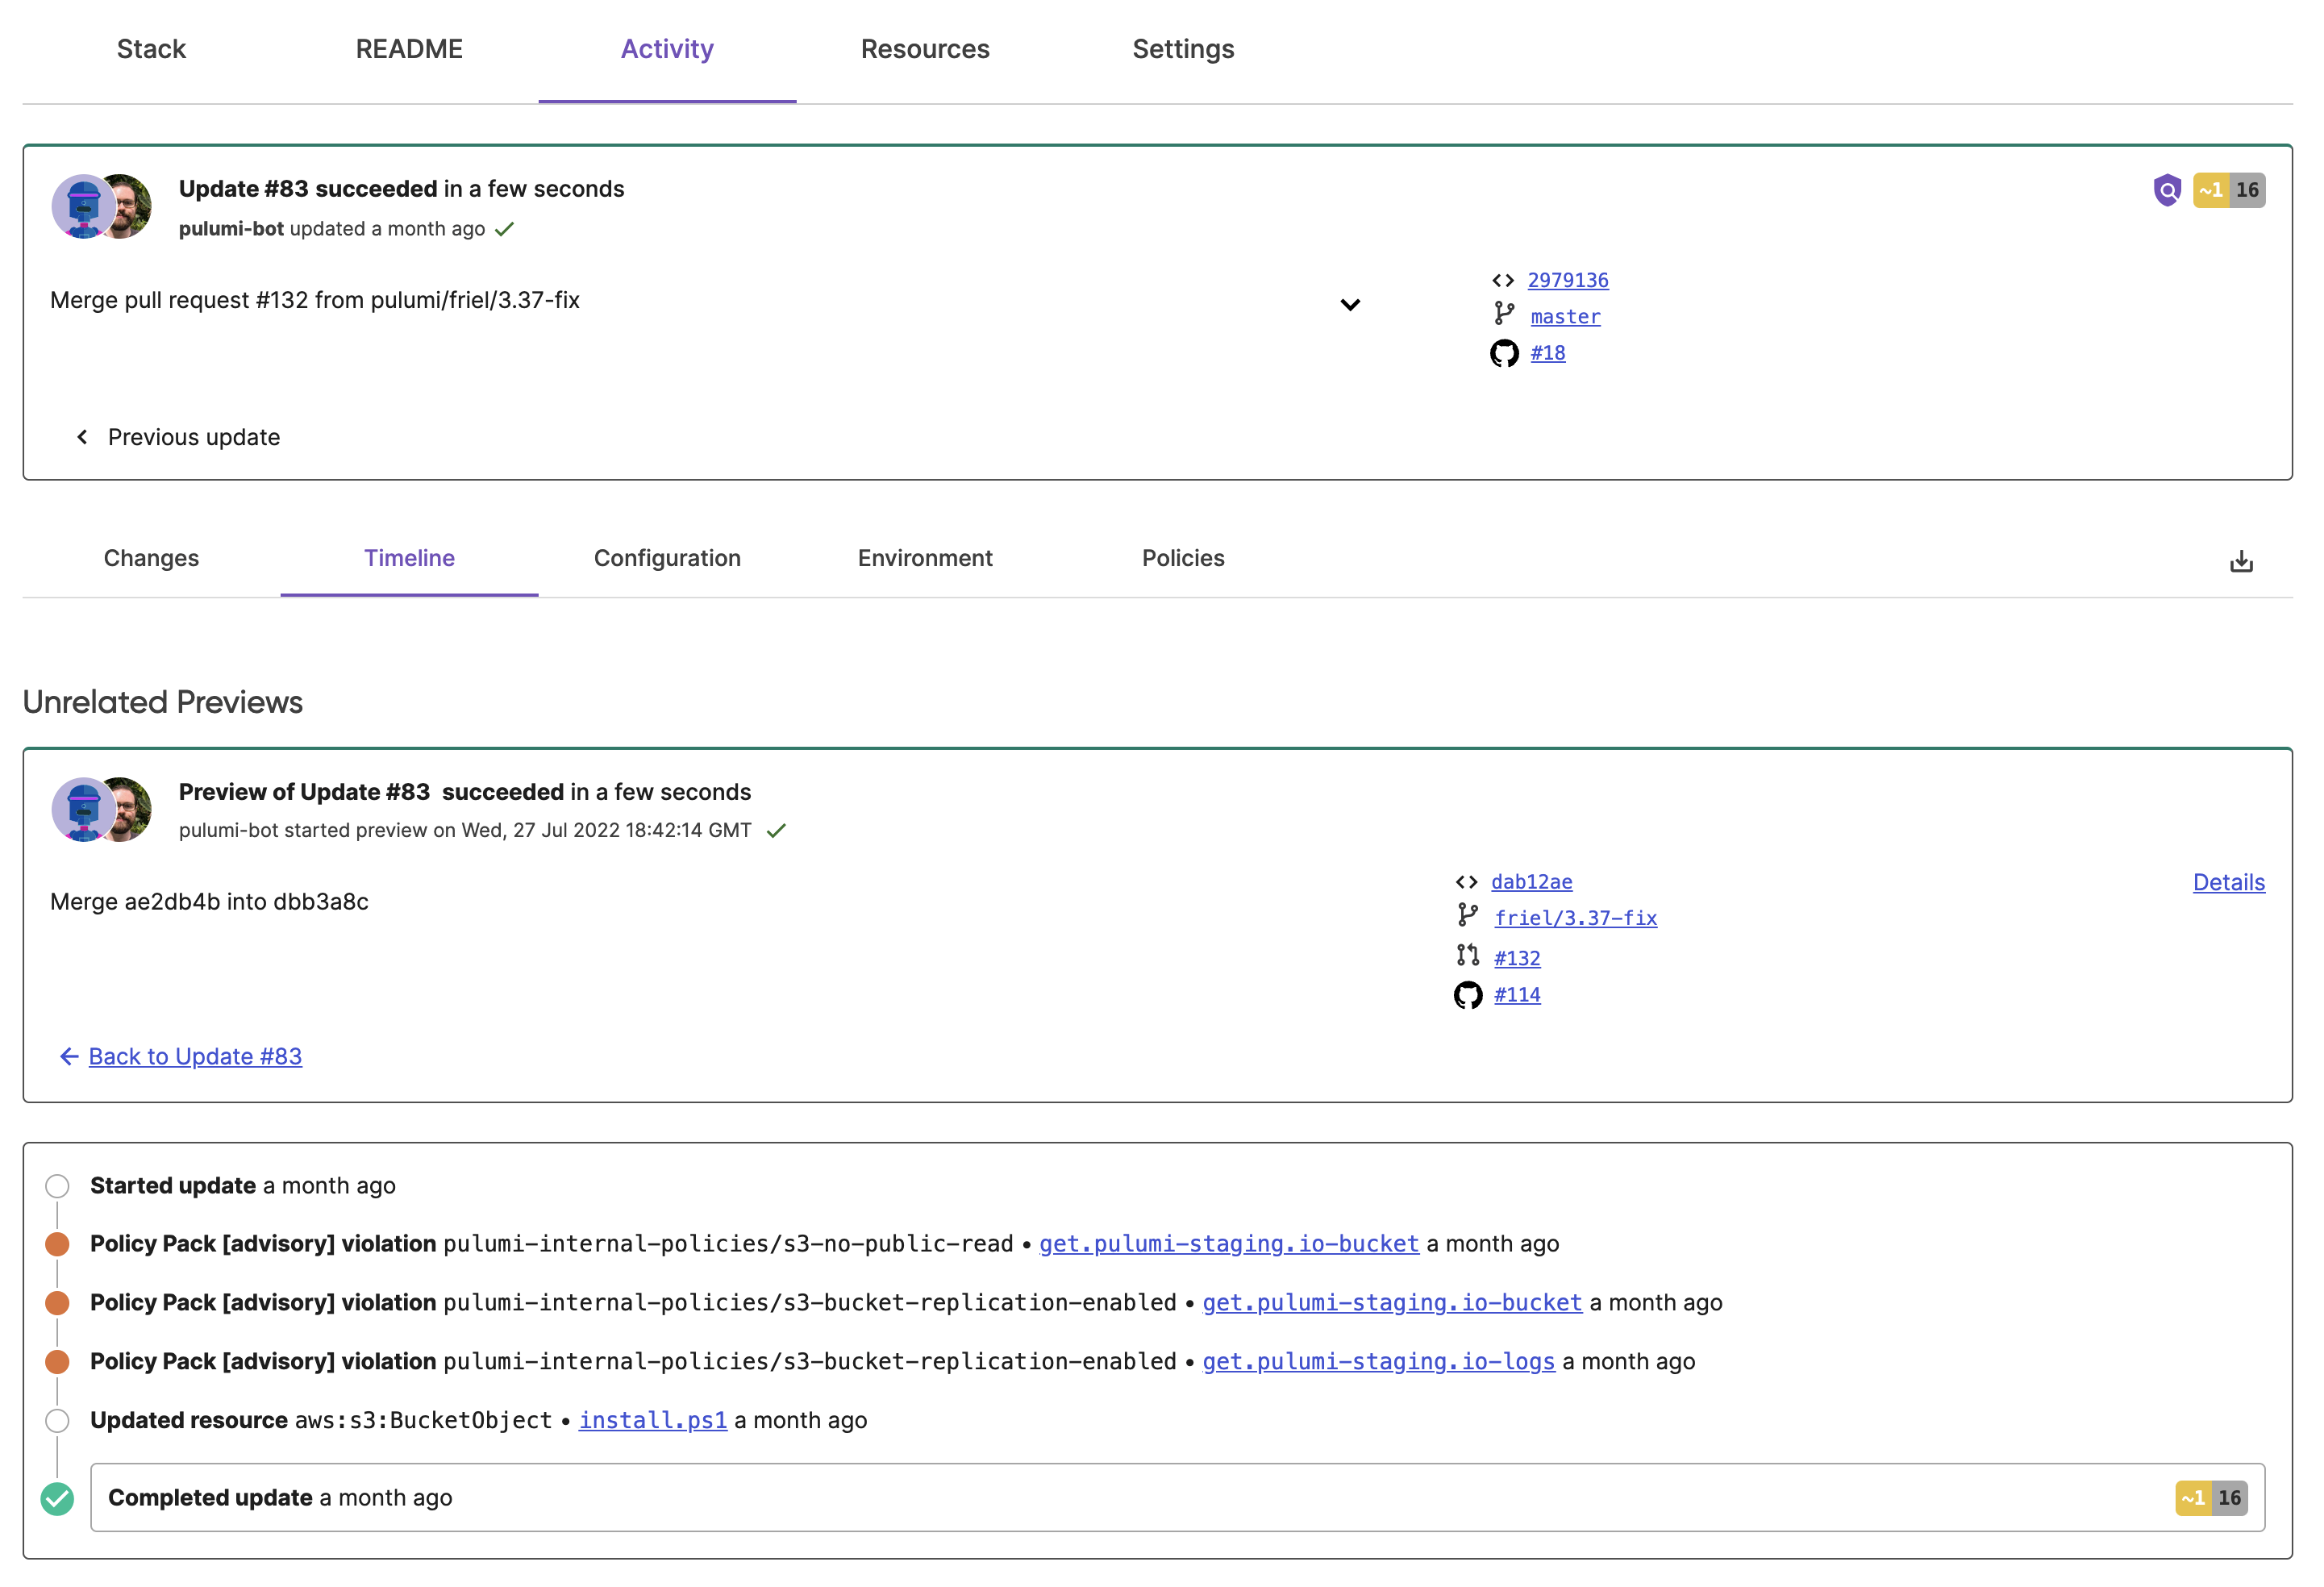
Stack Activity
To view stack activity:
- Navigate to Stacks and then a specific stack.
- Navigate to Activity.
- Review insights and operations that were performed on your stack resources during the update.
- Navigate to Changes, Timeline, or Configuration for more details.
The Changes section of activity lets you toggle between different log views:
- Summary Log lists a summary of changes, counts of affected resources, and update duration
- Diff Log displays a diff of the changes (created, updated, or deleted resources), your stack outputs, and the same counts and update duration shown in the Summary Log view.
- Diagnostic Log displays warning messages or a description of the operations performed during the update (if any).
The Timeline section provides a detailed timeline of changes to individual cloud resources. It also includes useful resource links and counts of affected resources.
The Configuration section displays the same configuration details found in the Stack view for your update.
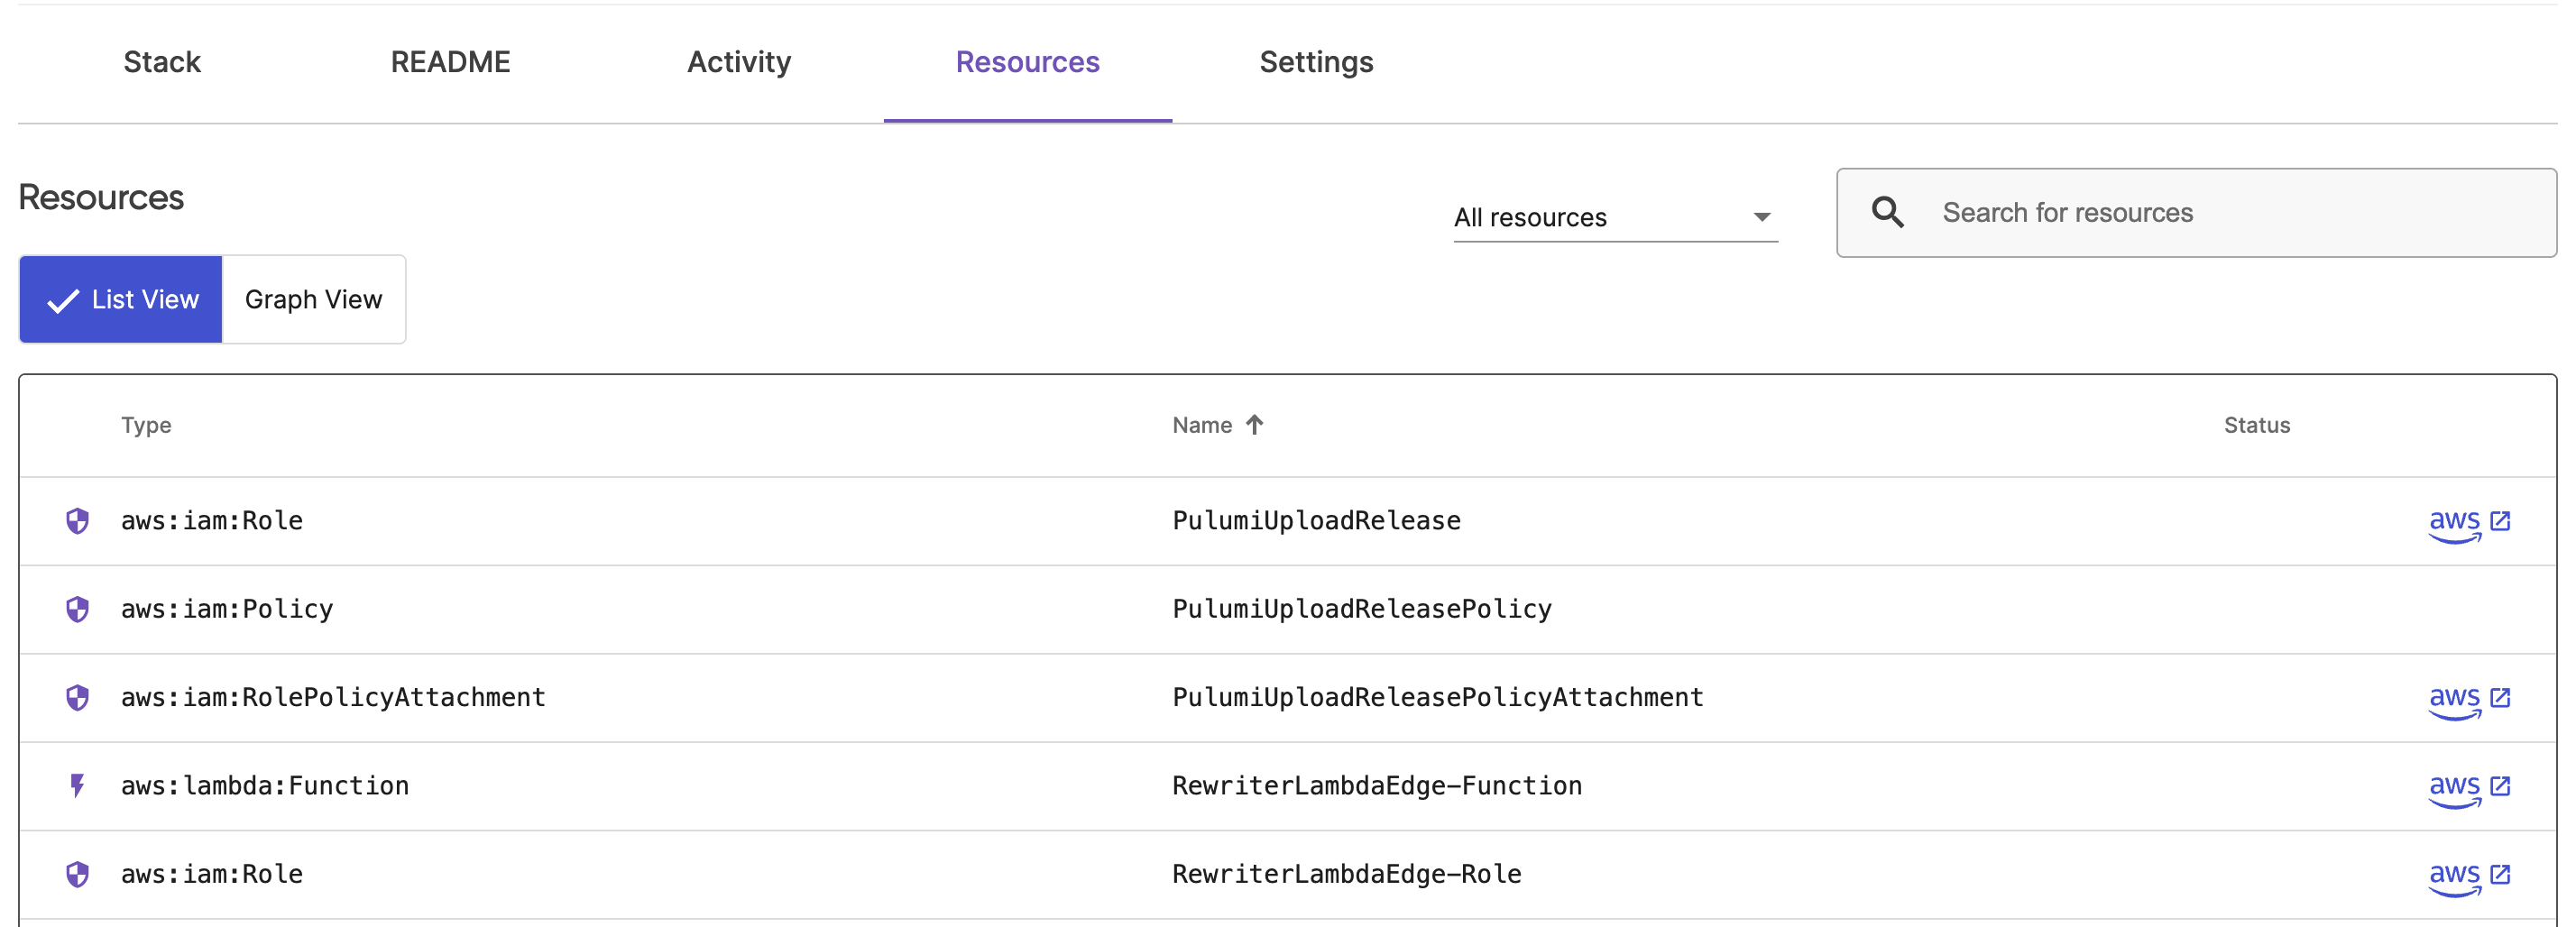
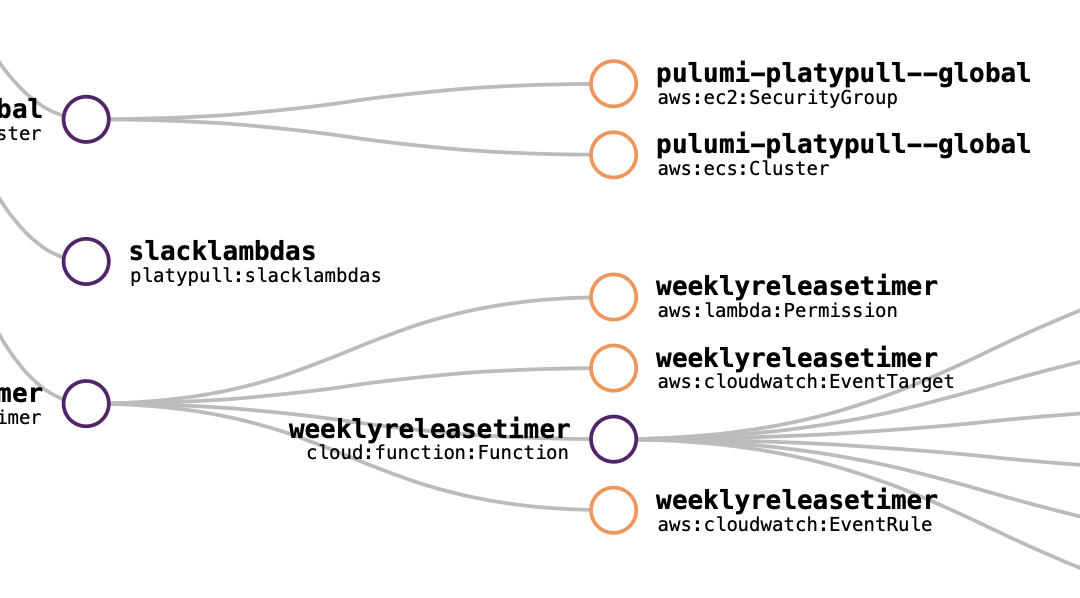
Stack Resources
To view a stack’s resources:
- Navigate to Stacks and then a specific stack.
- Navigate to Resources.
- Select List View or Graph View to toggle between a list view and a graph view.
- Selecting an individual resource from the list or graph view will provide more details.
The list view displays a list of all of the stack’s resources, including their type, name, status, and link to the associated cloud provider.
The graph view displays a graphical representation of the stack’s resources and their dependencies. Select an individual resource to view its list of properties and dependencies.
Transferring Stacks
Stack admins can transfer individual stacks between personal accounts and organizations or between organizations. Organization admins can transfer stacks in bulk.
If transferring to an organization, the Allow organization members to create stacks and transfer stacks to this organization setting must be turned on from the Access Management page in the organization’s settings.
To transfer an individual stack:
- Navigate to the stack, and then the stack’s Settings.
- Select Transfer stack.
- Provide the personal account or organization name and select Transfer.
To transfer stacks in bulk:
- Navigate to the Stacks page.
- Select the three dot menu beside Create project.
- Choose Transfer stacks from the dropdown.
- Choose the Transfer destination from the dropdown.
- Tick the stacks you’d like to transfer and select Transfer stacks.
Deleting a Stack
Deleting a stack removes the stack entirely from the Pulumi Cloud, along with all of its update history.
To delete a stack:
- Navigate to the Stacks page and then a specific stack.
- Navigate to the stack’s Settings and then Options.
- If you have no resources in the stack use the Delete stack button, otherwise use the provided CLI commands.
Restoring a Stack
Restoring a stack allows you to recover a previously deleted stack, either because it was accidentally deleted or because you want to restore its history. The last 25 stacks deleted in your organization can be restored by an organization admin. Stacks can only be restored if deleted within the last year.
To restore a stack:
- Navigate to the Stacks page.
- Select the three dot menu beside Create project.
- Choose Restore deleted stacks from the dropdown.
- Use the three dot menu on the stack you want to restore and select Restore stack.
Related Docs
Thank you for your feedback!
If you have a question about how to use Pulumi, reach out in Community Slack.
Open an issue on GitHub to report a problem or suggest an improvement.
