Pulumi CI/CD & Octopus Deploy
Octopus Deploy is a deployment automation server, designed to make it easy to orchestrate releases and deploy applications, whether on-premises or in the cloud. It can integrate with your existing build pipeline such as Jenkins, TeamCity, Azure DevOps etc.
Prerequisites
- A working installation of Octopus or a hosted instance from https://octopus.com.
- An account in the Pulumi Cloud.
- The latest version of Pulumi.
- Setup a new project and stack using one of our Get Started guides or by running
pulumi newand choosing one of the many templates that are available. - Optionally, also create a CI pipeline from a source control repository of your choice to be the source of packages. You will learn more about packages and how to create them later in this guide.
Sample Project
For the sake of this walkthrough, we will try to deploy an AWS example. The example deploys a containerized Python Flask app on AWS Fargate. This example also shows a pattern that is common with Pulumi – keeping your infrastructure app (Pulumi) with your actual application code, but certainly not necessary. Regardless of how you decide to structure your project, you will need to provide the package to Octopus somehow.
Stack and Branch Mappings
The steps below act on a hypothetical stack: my-org/my-project/aws-ts-hello-fargate.
You can create a new stack by running pulumi stack init from the folder containing the Pulumi.yaml file.
Note: The names used above are purely for demonstration purposes only. You may choose a naming convention that best suits your organization.
Octopus Setup
Infrastructure
Infrastructure in Octopus is represented as environments, deployment targets and workers (tentacles or SSH machines.) You could think of each environment as representing one of your Pulumi stacks. For example, if you are creating cloud infrastructure that represents your dev, staging and prod environments, each of those would typically map to a Pulumi stack and you could create an Octopus environment for each of those.
In a typical scenario where Pulumi is creating your cloud infrastructure, you will only need to a worker that can run the Pulumi CLI commands against your code package.
Project
A project represents the application being deployed and uses versioned packages (detailed below) as well as variables, during the deployment process. A project also contains a deployment process, which is a series of steps that are associated with “deploying” your project. Projects can contain the actual runtime application (a Go service, or a Python Flask app, etc.), as well as any infrastructure required.
Packages
Packages can be your source code bundled-up in one of the supported formats. They can also just be a handful of scripts that you may want to use during your deployment process.
In order to create a package, Octopus offers several ways that you can integrate into your existing build (CI) system. Learn more about the options available to you for packaging your apps.
For Pulumi apps, you can package the entire Pulumi app and extract the bundled package onto a worker where the Pulumi CLI can access them.
Deployment Process
In order to create an Octopus deployment process, project variables need to be configured for each of the environments which maps to a Pulumi stack. Each Pulumi stack could use environment-specific configuration. For example, each stack (or environment) could be deployed using different cloud credentials. So at a minimum you would need to configure those credentials needed for deploying a Pulumi stack.
Configure Project Variables
You can configure your AWS Account and Azure Subscription credentials as project variables using the built-in AWS Account and Azure Subscription variable types. Before you can do that, though, you will need to add them to the Accounts section under Infrastructure in your Octopus instance.
For other cloud providers, you will need to add the account credentials directly as a project variable using the appropriate built-in variable type.
Variables can be scoped right down to the environment that can access them. For sensitive strings, be sure to set the right scopes so that the account credentials are not accidentally used by the wrong environments.
PULUMI_ACCESS_TOKEN
To run Pulumi commands non-interactively, you will need to set the env var PULUMI_ACCESS_TOKEN as a project variable. To create a new access token, go the Access Tokens page in Pulumi Cloud.
Create the Process
A process consists of the steps to execute in a project. The following sections outline the steps for configuring your process in order to use Pulumi to deploy infrastructure (not be confused with Octopus Infrastructure).
Extract the Code Package
Click on the Add Step button in your project’s Process section.
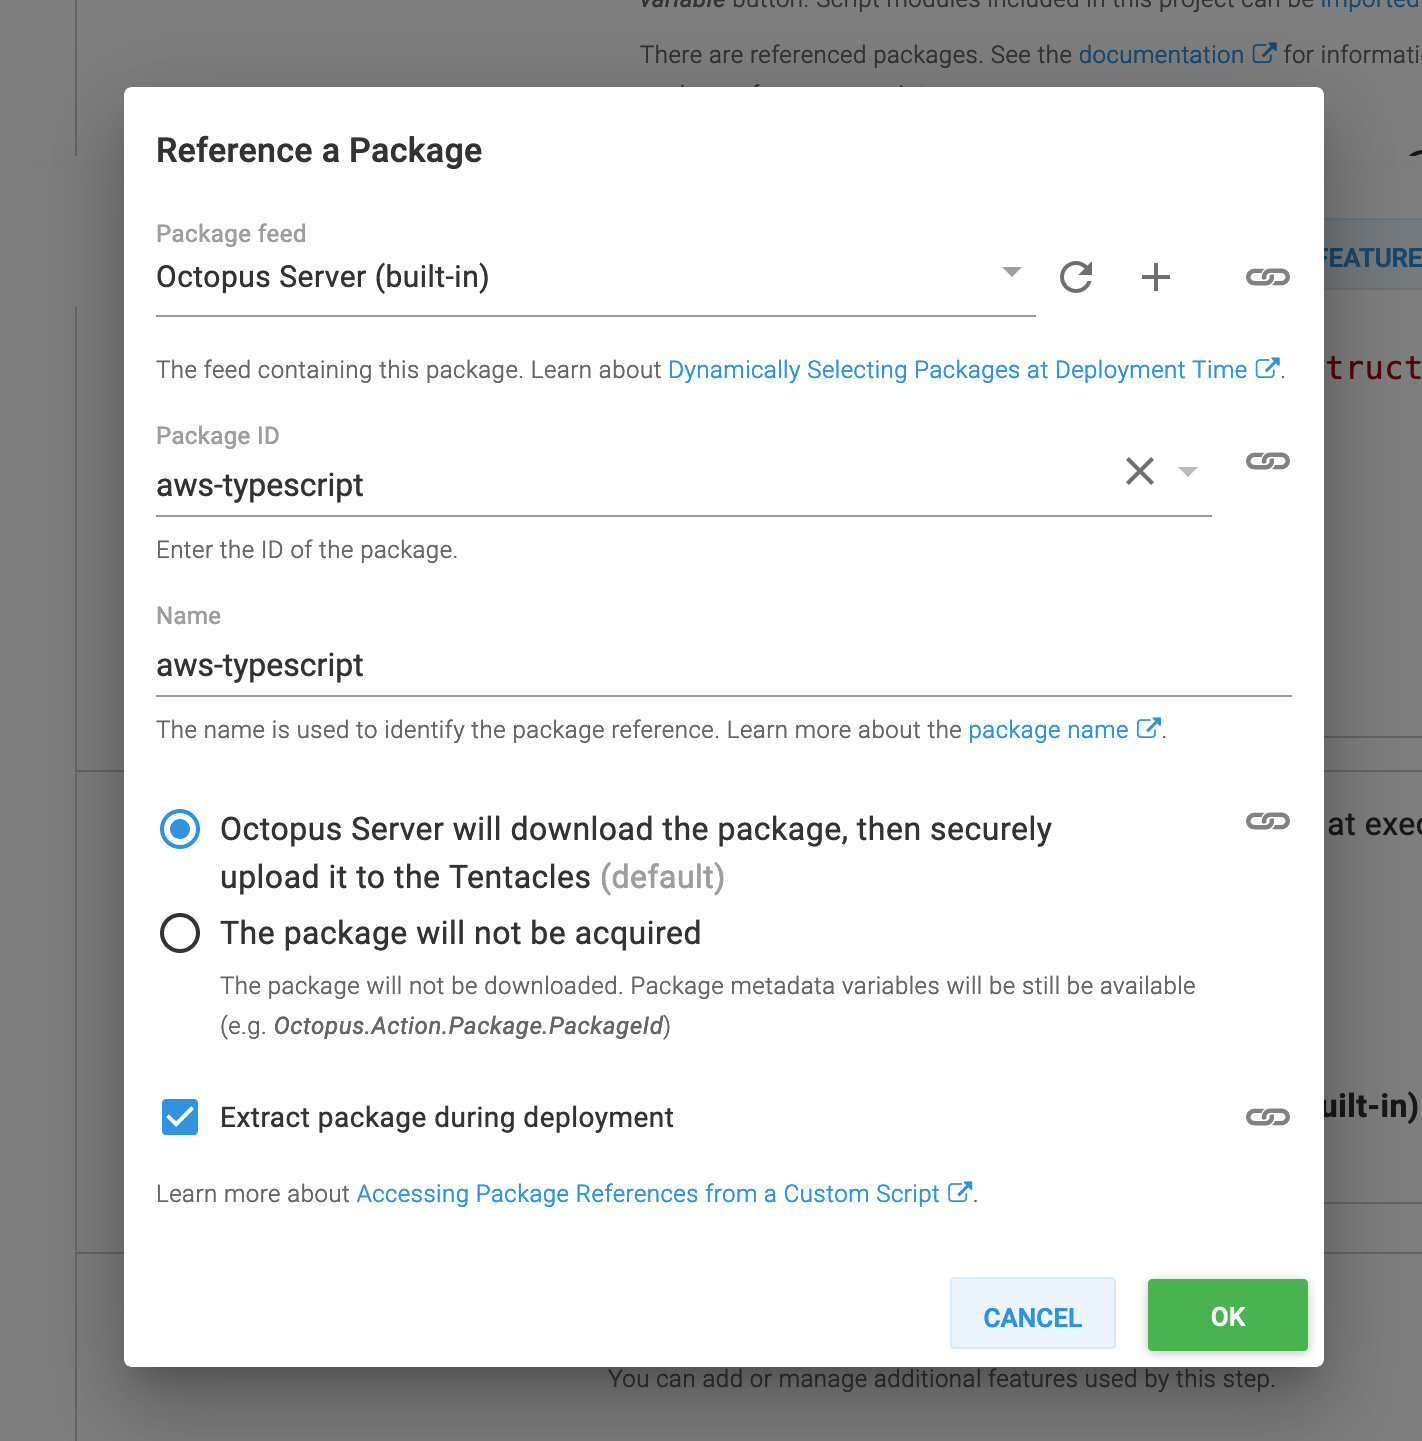
Click the Referenced Packages and choose the package that contains your Pulumi infrastructure app.
- Package feed: Choose the appropriate source for your package.
- Package ID: This is usually derived from your package, but enter a name of your choice. This ID will be used later.
- Package Name: Enter any name.

Select the Run a Script, fill out the following fields as follows:
- Script Source: Inline source code
- Inline Source Code: (click the Bash radio button)
  # Remove any previously extracted packages
  rm -rf /tmp/pulumi-app
  # Use the pre-defined variable to get the extracted path for the package.
  extractedPath=$(get_octopusvariable "Octopus.Action.Package[aws-typescript].ExtractedPath")
  # Copy the extracted package contents to another directory that can be accessed by other steps.
  cp -r "${extractedPath}/infrastructure/" /tmp/pulumi-app
  cd /tmp/pulumi-app
Run Pulumi
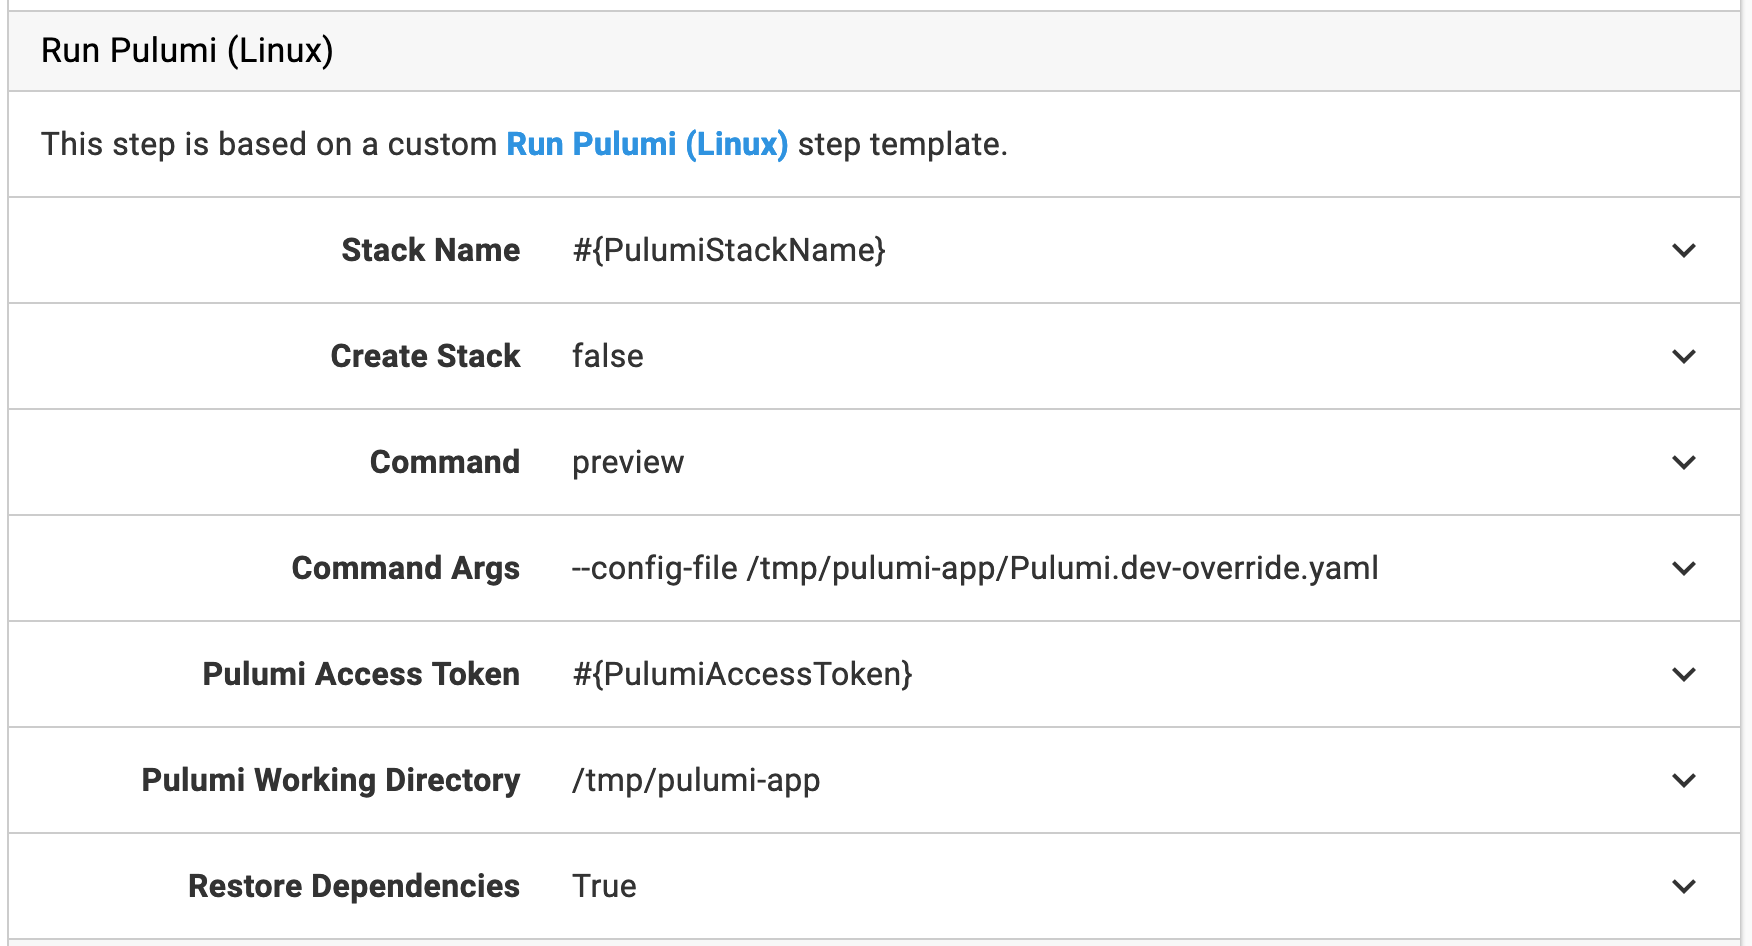
- Click on Add Step again and search for
Pulumifrom the Community Library Steps. - Fill out the configuration as appropriate for your stack.
- In the following screenshot the stack configuration is overridden using a file that is created in a separate Run a script step.
- Overriding the stack configuration is not required. It was done here for demonstrating the use of the
--config-fileflag.

To deploy a package, create a release from the latest package using the appropriate package feed and deploy it to an environment. To do that, click on Releases under the Projects tab and click on Create Release, and follow the on-screen instructions.
Additional Information
Manual Intervention Steps
Since Octopus Deploy is a deployment automation server it does not inherit the capabilities of a traditional VCS wherein you have Pull Request or Push builds. With Pulumi modifying your infrastructure, you may be interested in running pulumi preview first, then run pulumi up but only if the preview looks right to you. One way to do this is, to add a Manual Intervention and Approval Step. With this step, you can effectively pause the deployment of your infrastructure changes until someone has signed-off on it. This is desirable in a team-based environment where several members might be making changes.
Variable Sets
In addition to Project Variables, Octopus Deploy also supports Variable Sets which are variables that are common across deployment environments. Variable Sets can be scoped just like regular Project-specific variables. Learn more about all of the ways you can make use of the rich configuration system in Octopus Deploy.
Thank you for your feedback!
If you have a question about how to use Pulumi, reach out in Community Slack.
Open an issue on GitHub to report a problem or suggest an improvement.
