Configuring policy packs
Overview
Configuration allows you to author flexible Policy Packs that can be reused across your entire organization. As an organization administrator, you can use a single Policy Pack yet vary configuration (e.g. enforcement level, the allowed instance types, cost allowances, etc.) from one Policy Group to the next. For example, you may have a Policy Group for your non-production stacks that allow smaller instance types, while your Production Policy Group allows for use of large instance types.
Configuration schema is defined per policy, and then the actual configuration can be set via a form in the Pulumi Cloud or using a JSON file.
Writing Configurable Policy Packs
The process of writing a configurable policy pack entails first creating the configuration schema for the Policy Pack or individual policies and then consuming the configuration from within your policy validation or remediation logic.
Enforcement Level
The Policy SDK will automatically make the enforcement levels of all policies configurable. You can configure the enforcement level for all policies in a Policy Pack or configure it for each individual policy. The top-level enforcement level under all will override the existing enforcement levels of all policies in the Policy Pack. A configured enforcement level for a specific policy will override the policy’s existing enforcement level as well as the top-level configured enforcement level.
In the example configuration below, all policies in the Policy Pack would be disabled with the exception of the a-policy policy, which would be mandatory.
{
    "all": {
        "enforcementLevel": "disabled"
    },
    "a-policy": {
         "enforcementLevel": "mandatory"
    }
}
As a convenience, when only configuring an enforcement level for a policy, its value can be specified directly. The above example could therefore also be written as:
{
    "all": "disabled",
    "a-policy": "mandatory"
}
Custom Configuration
Policy authors can denote the schema for a particular Policy’s configuration using the configSchemaconfigSchemaconfig_schema
At the top level, the configSchemaconfigSchemaconfig_schemaproperties and required arguments. Within properties, you may use the entire breadth of validations keywords provided by the JSON Schema. Validation keywords are fields like minLength and maxLength in the below example.
The below example shows a ResourceValidationPolicy that has an optional message config property, which must be between five and fifty characters. Then, from within the validateResourcevalidateResourcevalidateargs.getConfigargs.getConfigargs.get_config
const examplePolicy: ResourceValidationPolicy = {
    name: "example-policy-with-schema",
    description: "Example policy with schema.",
    configSchema: {
        properties: {
            message: {
                type: "string",
                minLength: 5,
                maxLength: 50,
            }
        },
    },
    validateResource: validateResourceOfType(aws.s3.Bucket, (_, args, reportViolation) => {
        const config = args.getConfig<{ message?: string }>();
        if (!config.message) {
            config.message = "Setting reasonable defaults is recommended!";
        }
        reportViolation("Here is the configurable message: " + config.message);
    }),
}
def example_policy_validator(args: ResourceValidationArgs, report_violation: ReportViolation):
    config = args.get_config()
    if "message" not in config:
        config["message"] = "Setting reasonable defaults is recommended!"
    report_violation(f"Here is the configurable message: {config['message']}")

example_policy = ResourceValidationPolicy(
    name="example-policy-with-schema",
    description="Example policy with schema.",
    config_schema=PolicyConfigSchema(
        properties={
            "message": {
                "type": "string",
                "minLength": 5,
                "maxLength": 50,
            },
        }
    ),
    validate=example_policy_validator,
)
The schema in the above example includes an optional property. If the property value is not set, a reasonable message is set from within the validateResourcevalidateResourcevalidate
Required Properties
In some cases, you may need to require a property be set via configuration. This can be done by adding the property to the required list as shown in the example below.
const examplePolicy: ResourceValidationPolicy = {
    name: "example-policy-with-schema",
    description: "Example policy with schema.",
    configSchema: {
        properties: {
            message: {
                type: "string",
                minLength: 5,
                maxLength: 50,
            }
        },
        required: ["message"],
    },
    validateResource: validateResourceOfType(aws.s3.Bucket, (_, args, reportViolation) => {
        // The `?` after the `message` property in the type specified to the `getConfig` function is no
        // longer necessary since `message` is required and will always have a value.
        const config = args.getConfig<{ message: string }>();
        reportViolation("Here is the configurable message: " + config.message);
    }),
}
def example_policy_validator(args: ResourceValidationArgs, report_violation: ReportViolation):
    config = args.get_config()
    report_violation(f"Here is the configurable message: {config['message']}")

example_policy = ResourceValidationPolicy(
    name="example-policy-with-schema",
    description="Example policy with schema.",
    config_schema=PolicyConfigSchema(
        properties={
            "message": {
                "type": "string",
                "minLength": 5,
                "maxLength": 50,
            },
        },
        required=["message"]
    ),
    validate=example_policy_validator,
)
Running Policy Packs Locally
If you are using the pulumi CLI to run local Policy Packs, you can store the configuration in a file and then use a flag to pass the file to the CLI.
With the above example Policy, we can write the following configuration to a config.json file:
{
    "all": "mandatory",
    "example-policy-with-schema": {
        "message": "Here is my message."
    }
}
To run this Policy Pack locally with the configuration, you can run:
$ pulumi preview --policy-pack <path-to-policy-pack-directory> --policy-pack-config <path-to-policy-pack-config-file>
Using the Pulumi Cloud
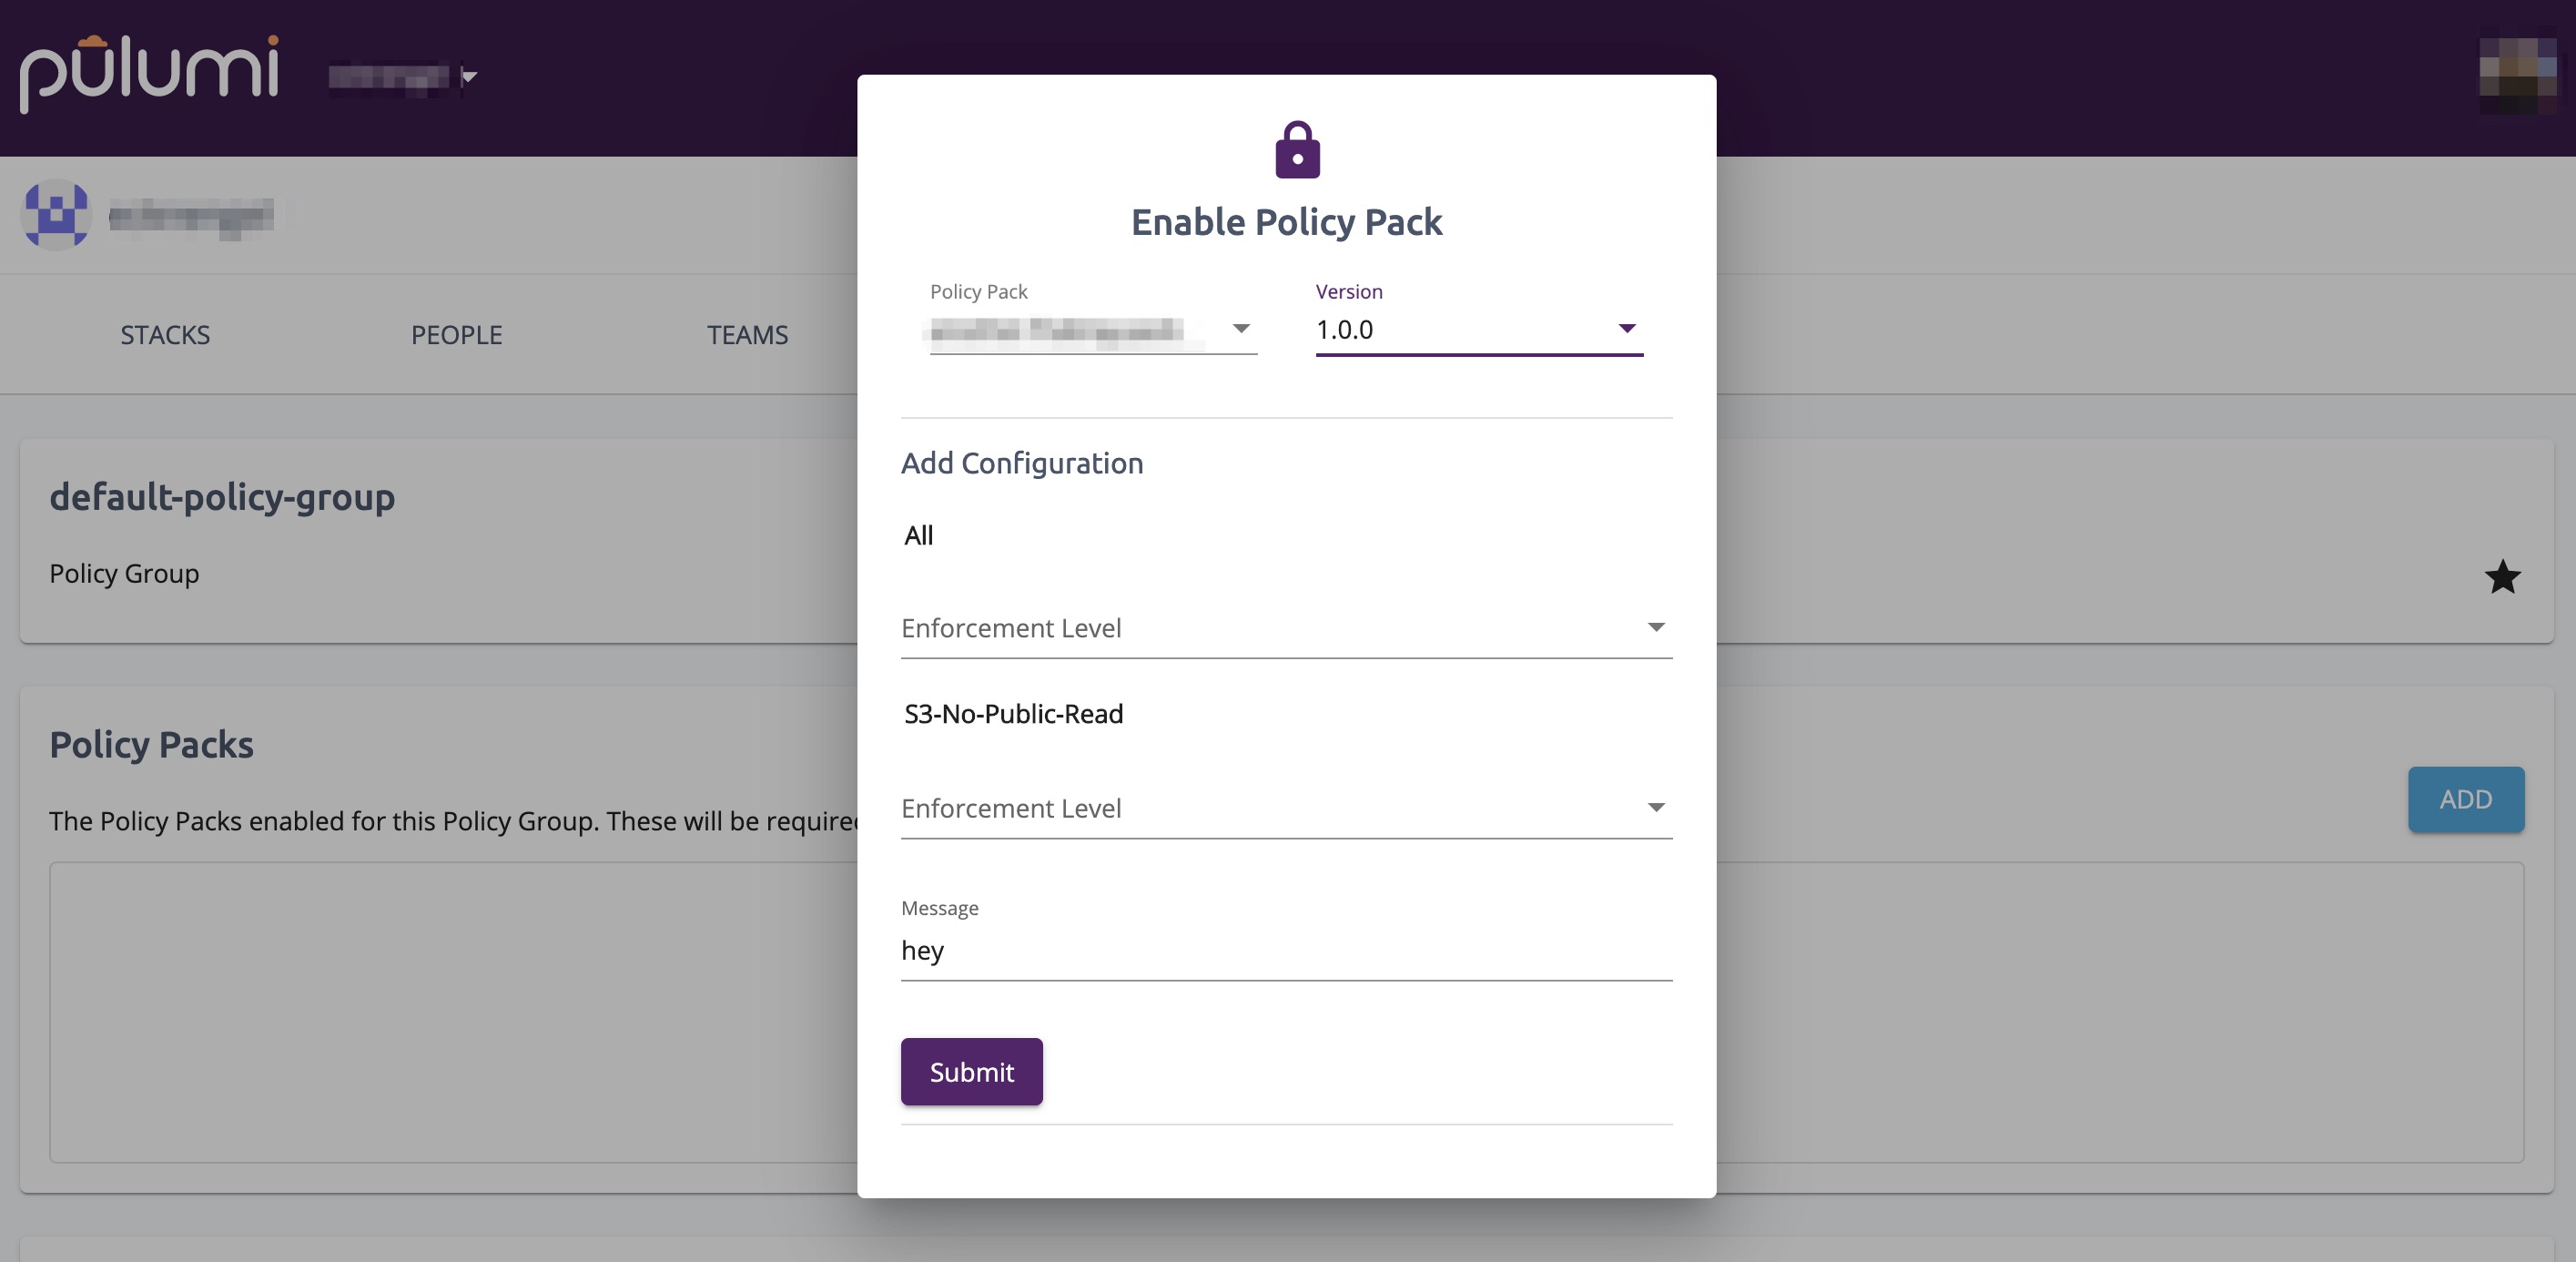
Configuration can also be added, edited and enabled via the Pulumi Cloud. Once a Policy Pack has been published to the Pulumi Cloud, organization administrators can enable the pack with configuration on a Policy Group using the console. Learn more in the Enforcing a policy pack guide.
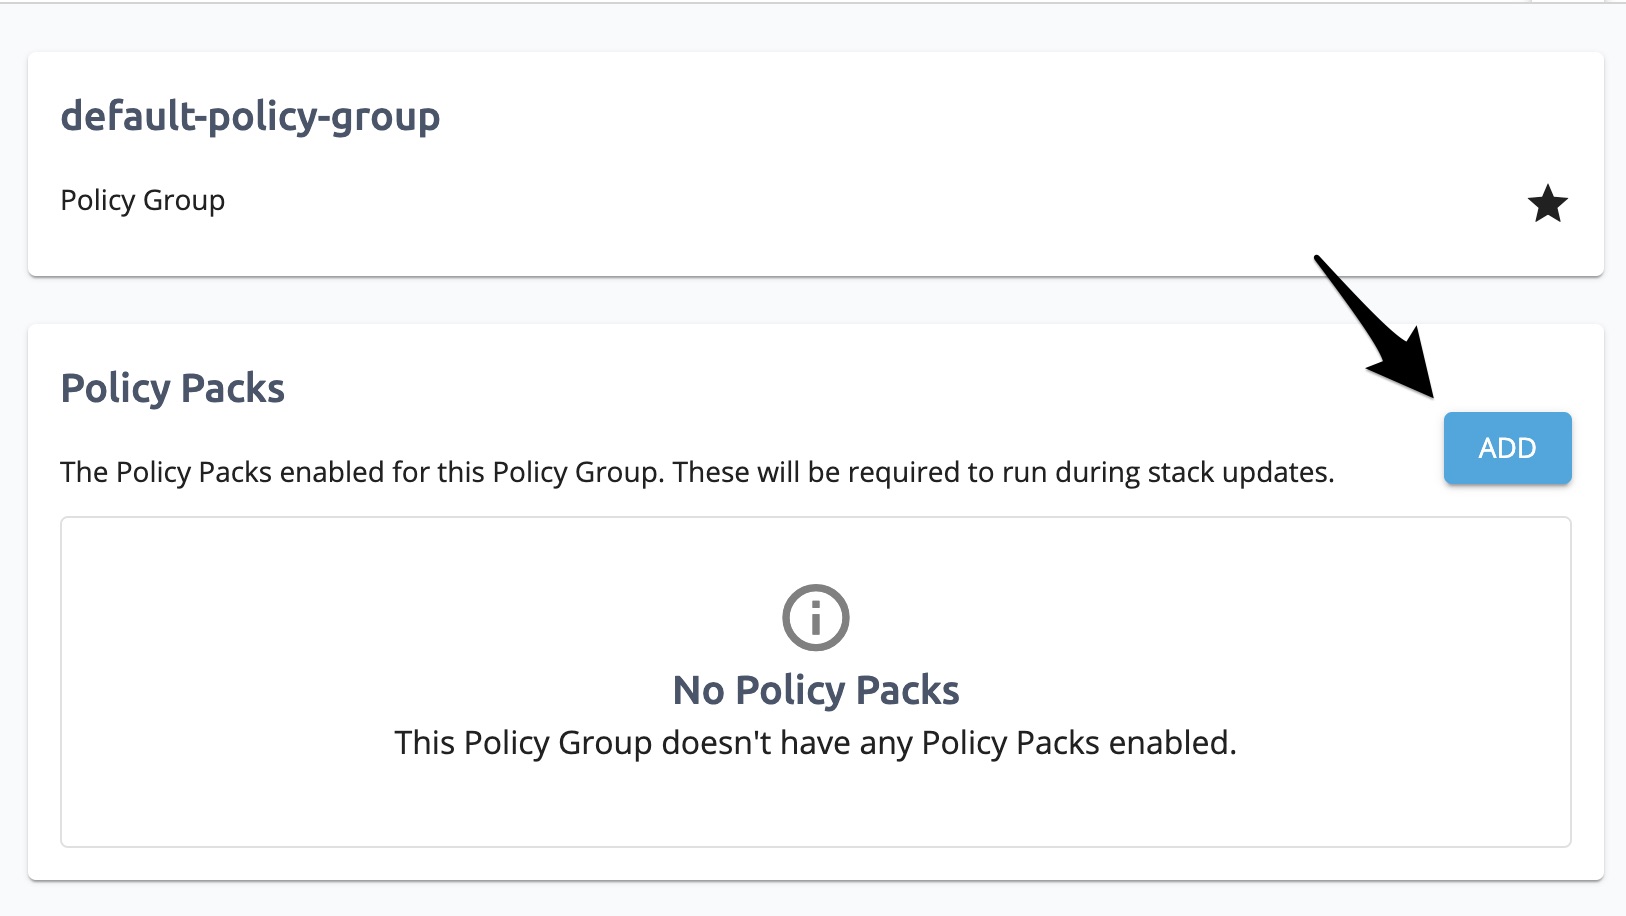
On a Policy Group page, you can click the ADD button to enable a new Policy Pack.

If the selected Policy Pack has configuration, a form will appear for you to enter the configuration. The form provides automatic validation to ensure the supplied configuration meets the configuration schema.

Using the CLI with the Console
The pulumi CLI can also be used to interact with Policy Packs enforced by the Pulumi Cloud. The CLI allows you to both validate configuration and enable Policy Packs with configuration files.
Validating Configuration
If the Policy Pack has already been published to the Pulumi Cloud, you can validate the configuration using the pulumi policy validate-config command.
$ pulumi policy validate-config <org-name>/<policy-pack-name> <version> --config <path-to-policy-pack-config-file>
Enabling the Policy Pack
Once you are satisfied with the configuration, (if Policy as Code is enabled for your organization) you can enable the Policy Pack and configuration for your organization’s default Policy Group by running:
$ pulumi policy enable <org-name>/<policy-pack-name> <version> --config <path-to-policy-pack-config-file>
If you would like to enable it for a specific Policy Group, you can specify the group using the --policy-group flag as follows:
$ pulumi policy enable <org-name>/<policy-pack-name> <version> --config <path-to-policy-pack-config-file> --policy-group <policy-group-name>
Thank you for your feedback!
If you have a question about how to use Pulumi, reach out in Community Slack.
Open an issue on GitHub to report a problem or suggest an improvement.
