Github actions with Pulumi ESC managed secrets
15 minThis tutorial demonstrates how you can use GitHub Actions and Pulumi ESC to inject secrets dynamically at runtime, instead of storing long-lived credentials in GitHub. You will use OpenID Connect (OIDC) to fetch a short-lived Pulumi token and AWS credentials for secure infrastructure deployments.
- How to authenticate GitHub Actions with Pulumi Cloud using OIDC
- How to Retrieve AWS credentials from Pulumi ESC dynamically
- How to Deploy infrastructure on AWS using Pulumi in GitHub Actions
- A Pulumi Cloud account and an access token
- The Pulumi CLI
- Complete the configure OIDC guide
- A GitHub repository
What are we building#
You can use GitHub Actions and Pulumi ESC to deploy infrastructure to AWS without storing long-lived secrets. This tutorial shows how to authenticate with Pulumi Cloud using GitHub’s OpenID Connect (OIDC) support, fetch a short-lived Pulumi access token, and use that token to open a Pulumi ESC environment that provides dynamic AWS credentials. These credentials are injected into your GitHub Actions workflow and used to run pulumi up.
This helps you:
- Avoid storing sensitive AWS credentials or Pulumi access tokens in GitHub
- Use identity-based access control with Pulumi ESC
- Follow security best practices for CI/CD
Step 1: Create a Pulumi IaC project#
Let’s start by creating a new Pulumi IaC Project using a template. In this example we’ll use the TypeScript AWS template to deploy an S3 bucket, but you can follow along with your favorite language of choice.
mkdir github-and-esc && cd github-and-escpulumi new aws-typescriptFollow the prompts to set up the project name and descriptions, and accept the default values or specify preferred values such as for the AWS region you want to deploy into.
Commit and push the project to your GitHub repository.
Step 2: Register GitHub OIDC as an issuer in Pulumi Cloud#
GitHub Actions uses OpenID Connect (OIDC) to authenticate with Pulumi Cloud. You’ll first register GitHub as an OIDC identity provider.
- In Pulumi Cloud, go to your organization’s settings and select OIDC Issuers.
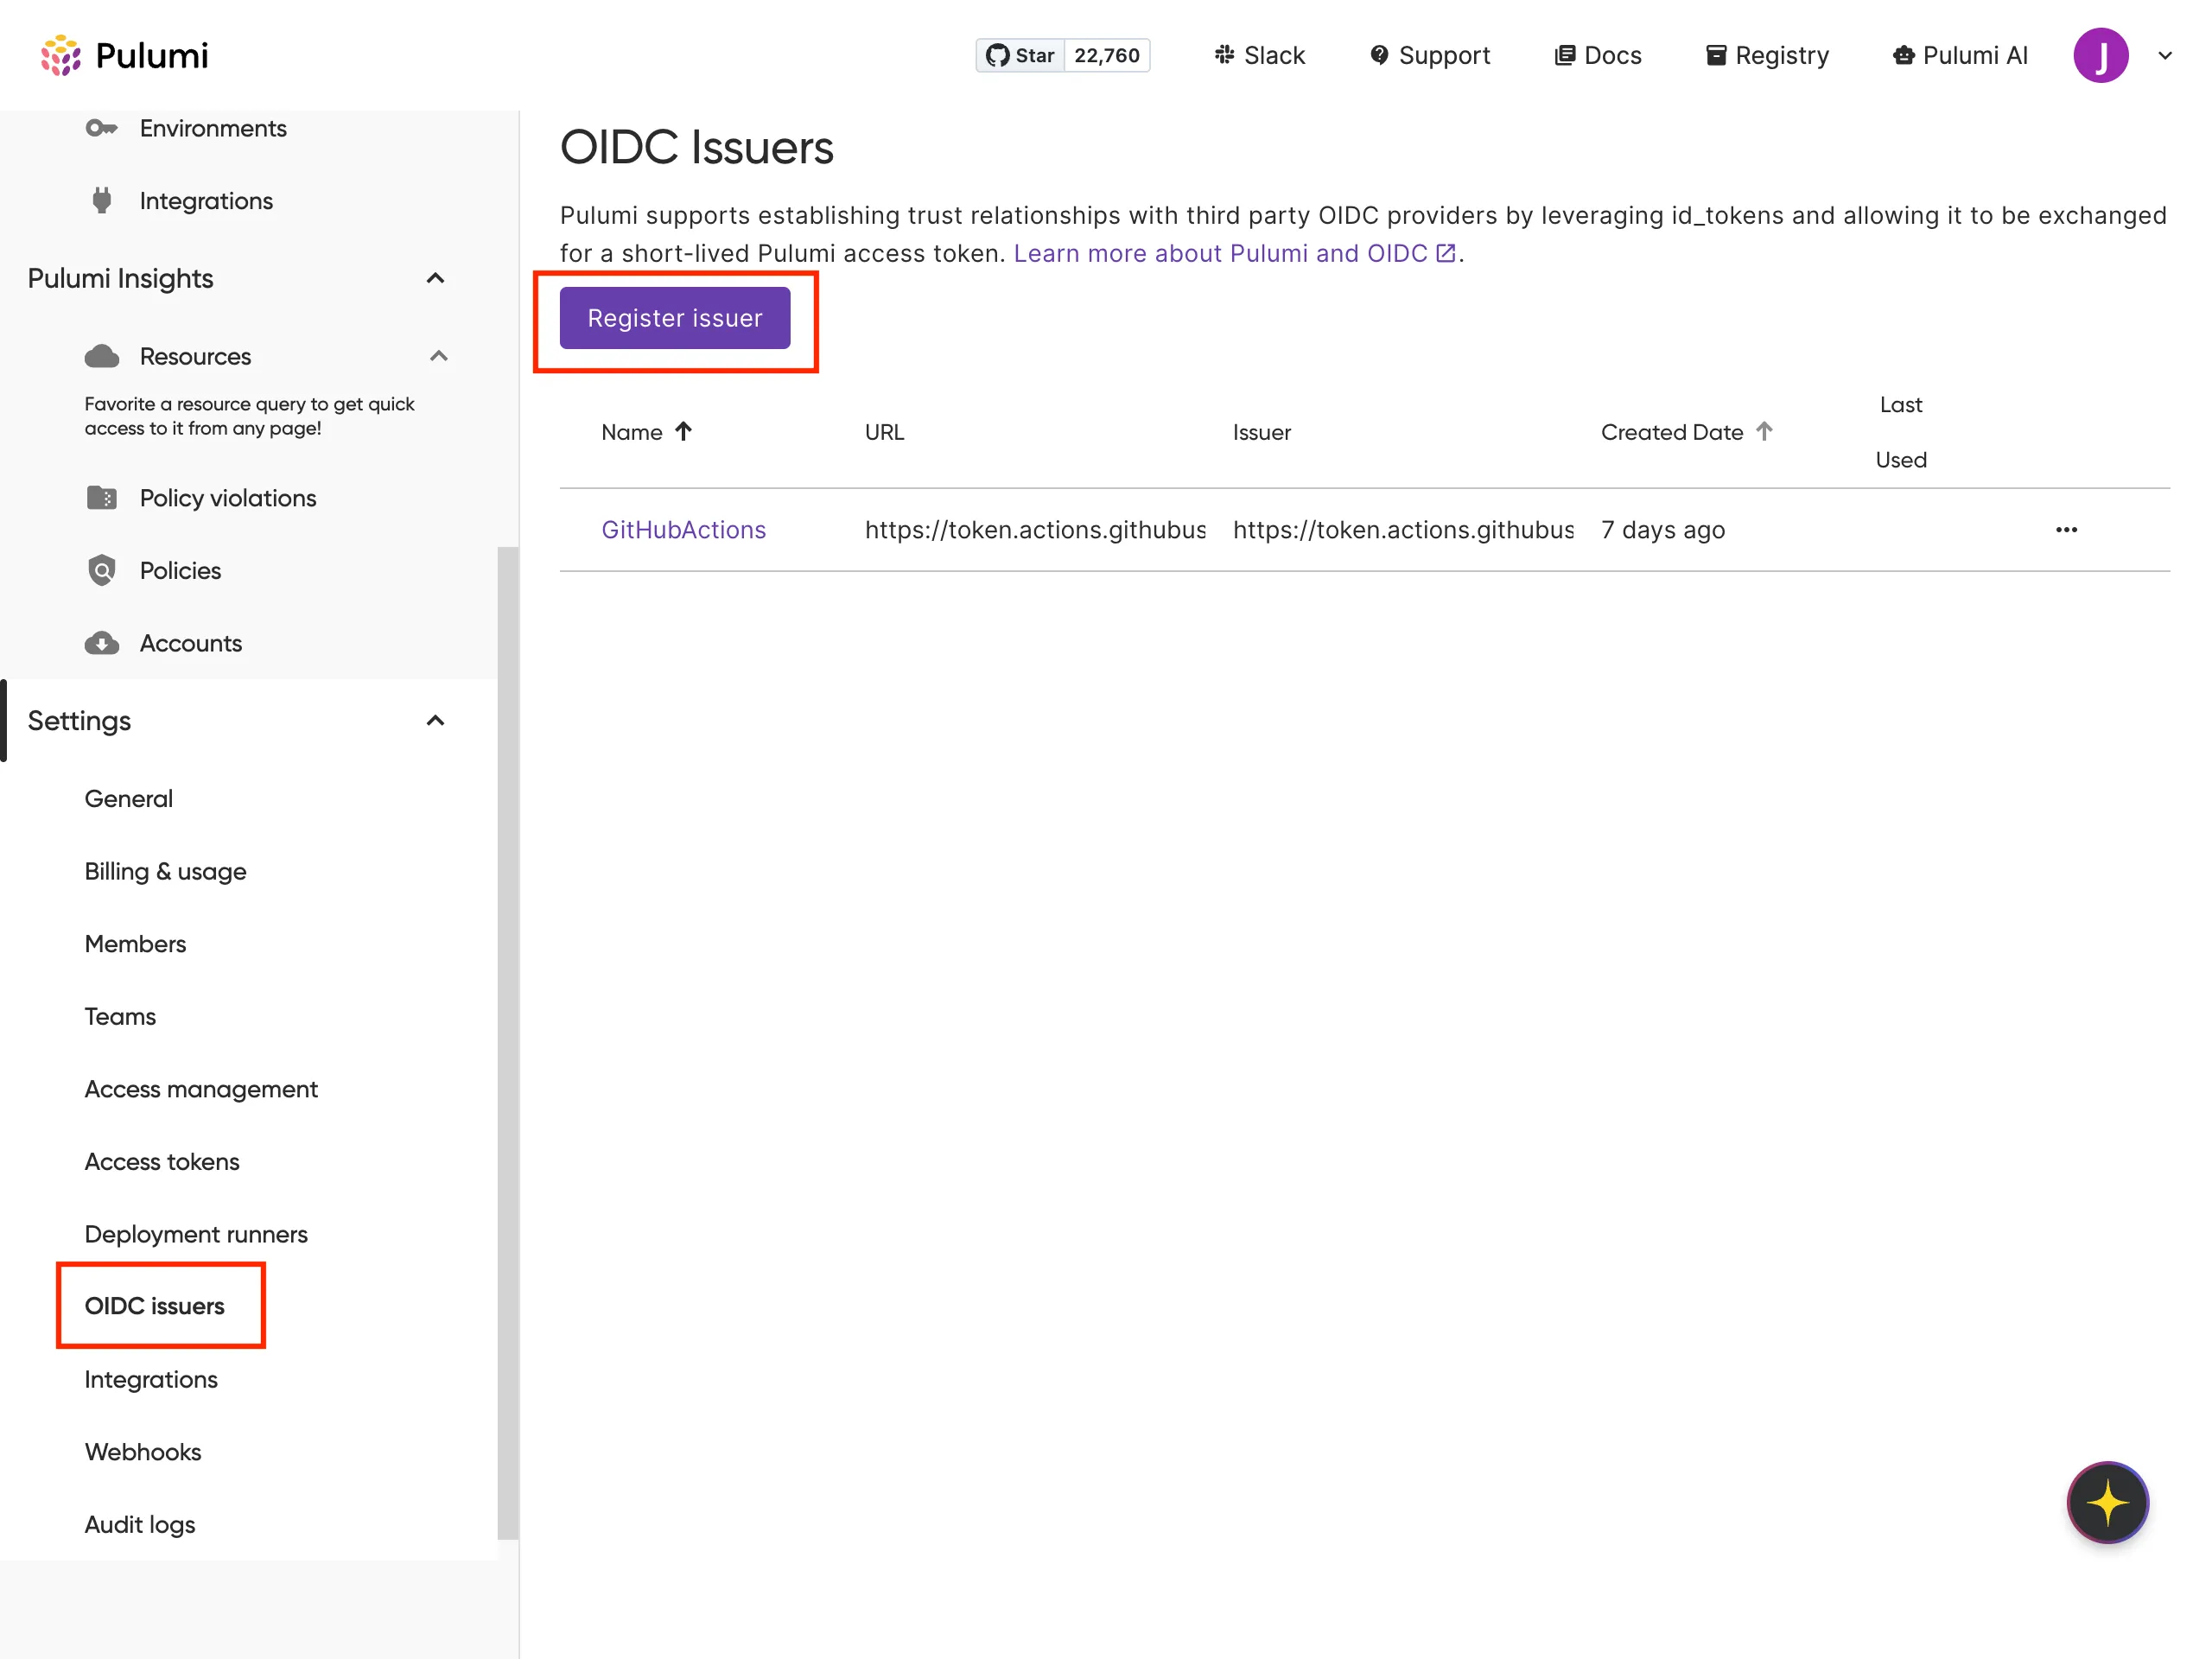
- Click Register issuer, then fill in the following:
- Name: A descriptive name like
GitHubActions - URL:
https://token.actions.githubusercontent.com
- Name: A descriptive name like
- Click Create issuer to save.
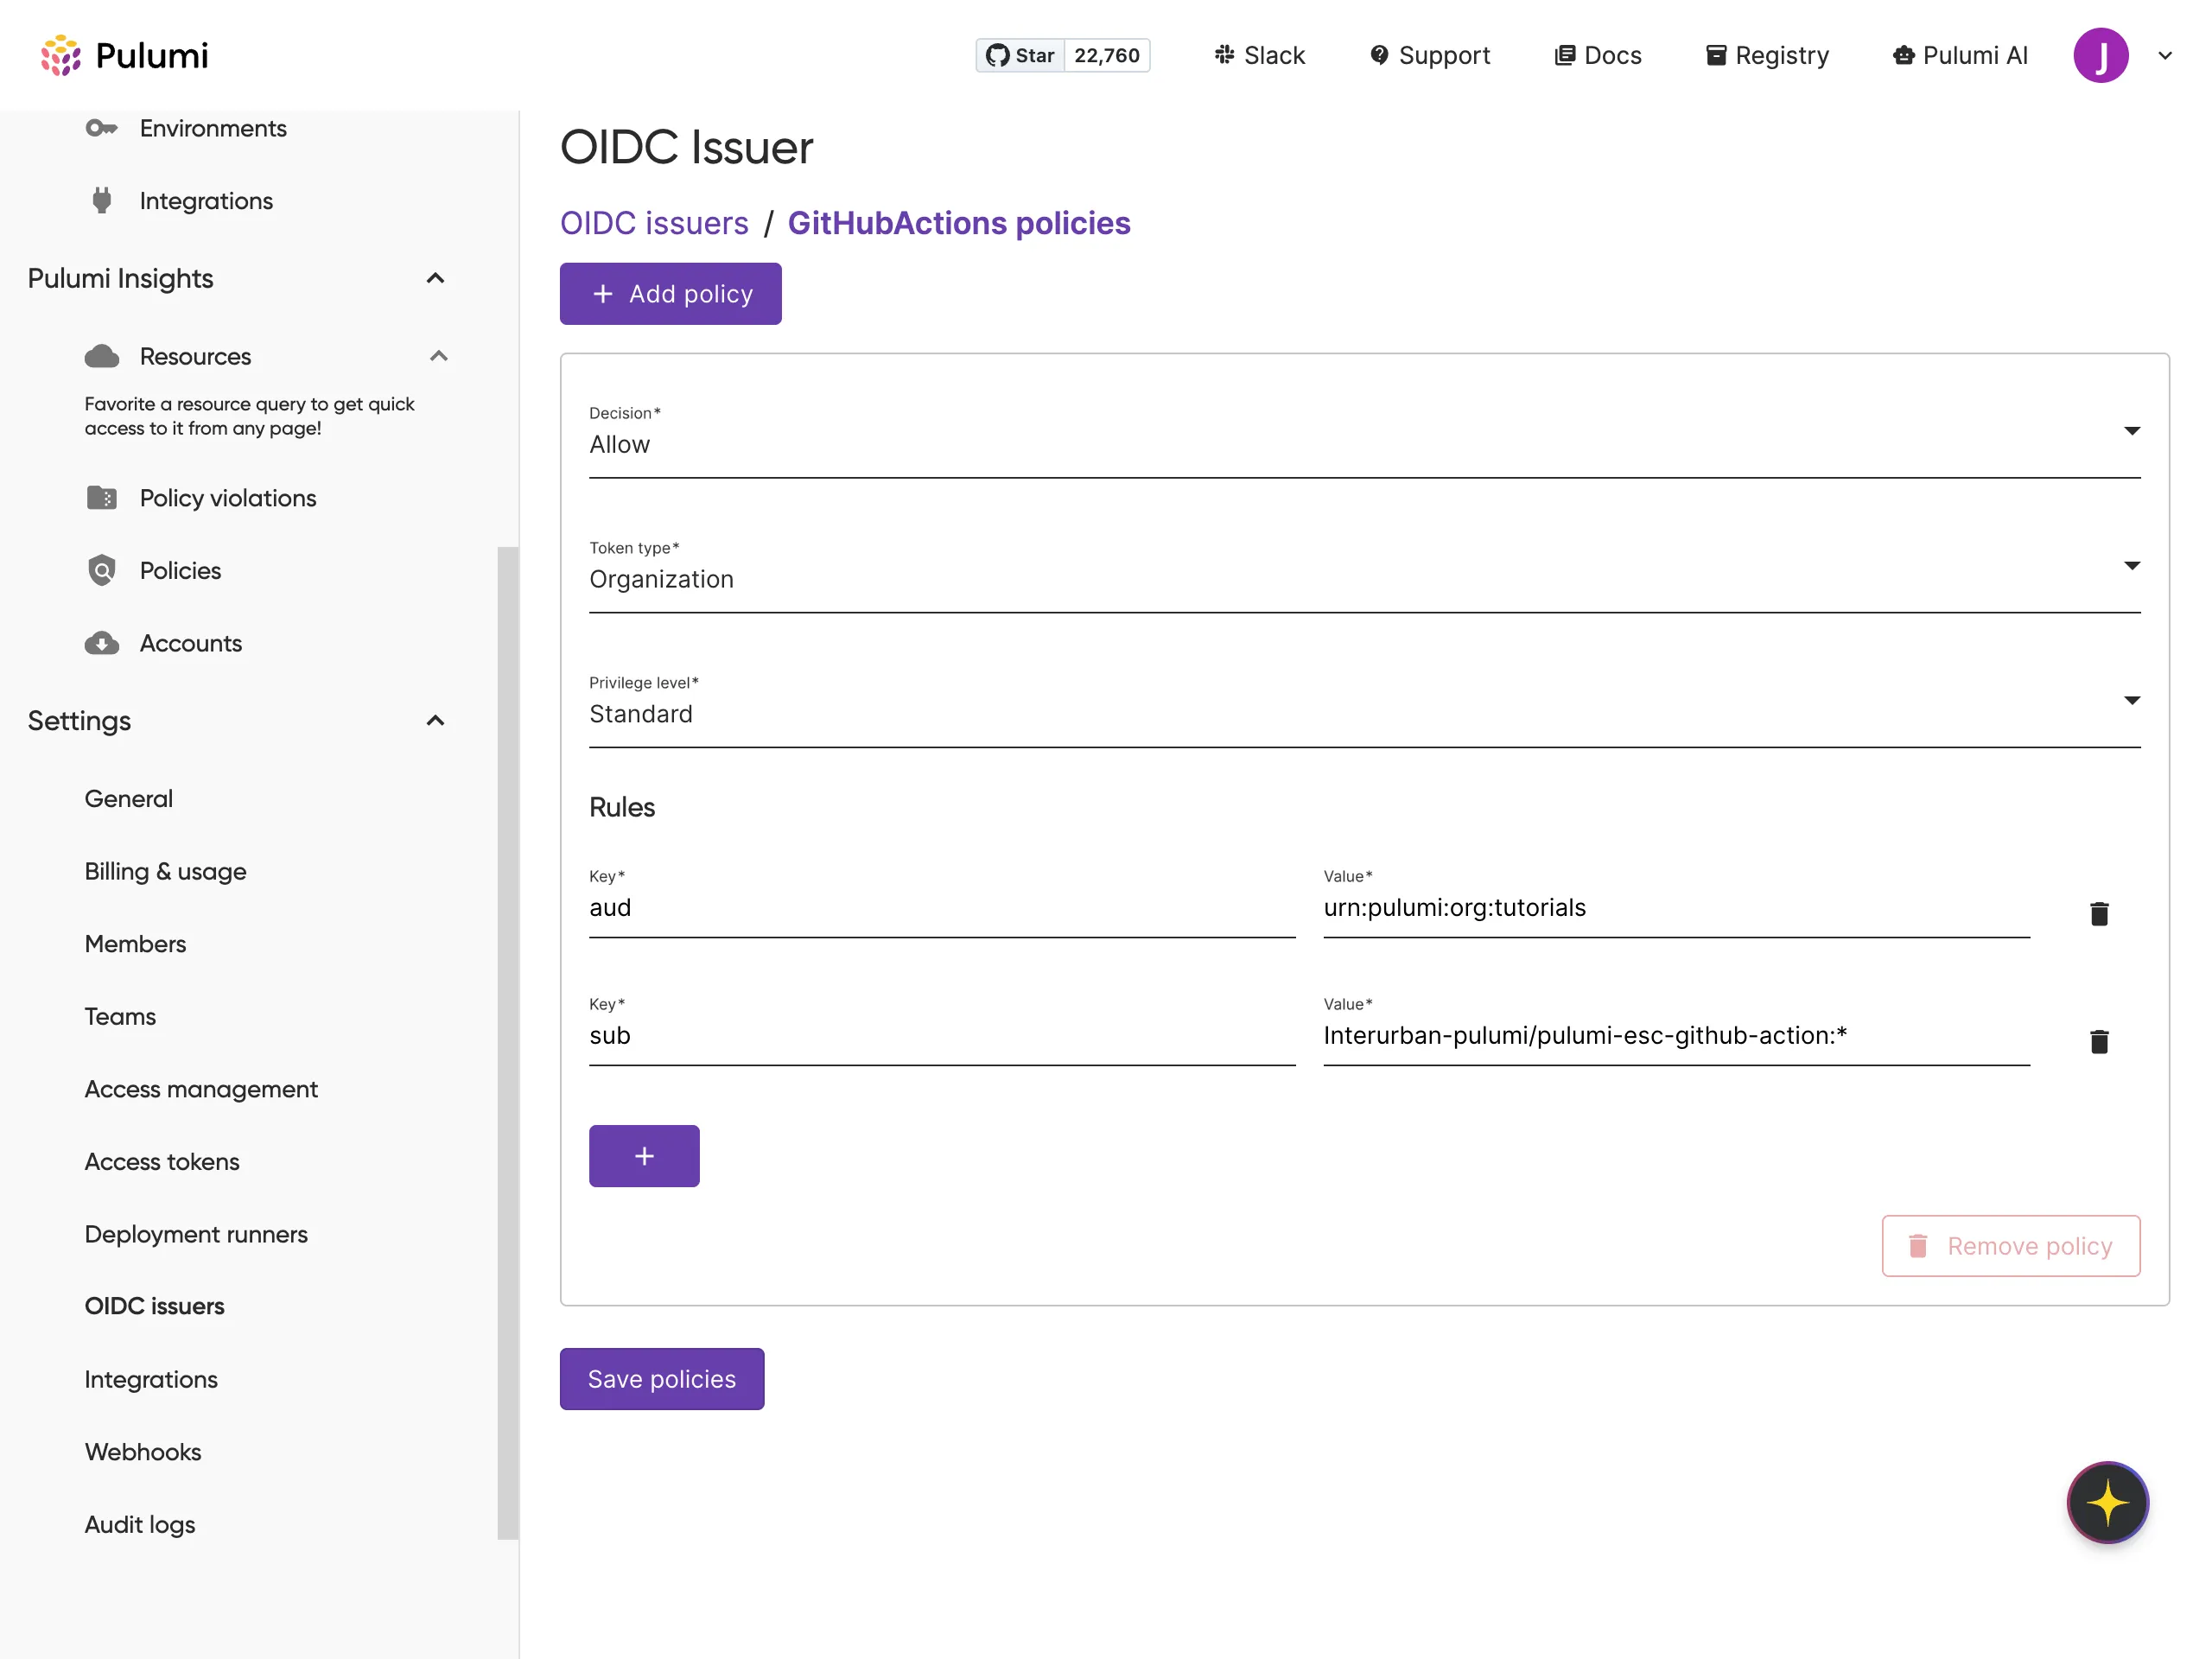
- Under Rules, do the following:
- Set Decision to Allow
- For the audience (
aud), useurn:pulumi:org:your-org - Set the subject (
sub) value torepo:<github-org>/<repo>:*, replacing with your actual GitHub values (case-sensitive)
- Click Save policy to finish.
Step 3: Create a Pulumi ESC environment that returns temporary AWS credentials#
You’ll now create an ESC environment in Pulumi Cloud that issues short-lived AWS credentials using the AWS role you configured for OIDC. These credentials will be injected into your GitHub Actions workflow at runtime.
- In Pulumi Cloud, go to Environments, then click Create Environment.
- Set the following values:
- Project:
my-github-action-deployment(or your preferred name) - Environment name:
shared-aws-dev - Description:
AWS credentials for GitHub OIDC deployments
- Project:
- Click Create to finish.
Next, define the environment by editing the YAML configuration. This definition tells Pulumi ESC how to authenticate to AWS using your OIDC role. This environment will be used in your GitHub Actions workflow to inject the AWS_ACCESS_KEY_ID, AWS_SECRET_ACCESS_KEY, and AWS_SESSION_TOKEN environment.
values: aws: login: fn::open::aws-login: oidc: duration: 1h roleArn: arn:aws:iam::123456789012:role/aws-esc-role sessionName: esc-${context.pulumi.user.login} environmentVariables: AWS_ACCESS_KEY_ID: ${aws.login.accessKeyId} AWS_SECRET_ACCESS_KEY: ${aws.login.secretAccessKey} AWS_SESSION_TOKEN: ${aws.login.sessionToken}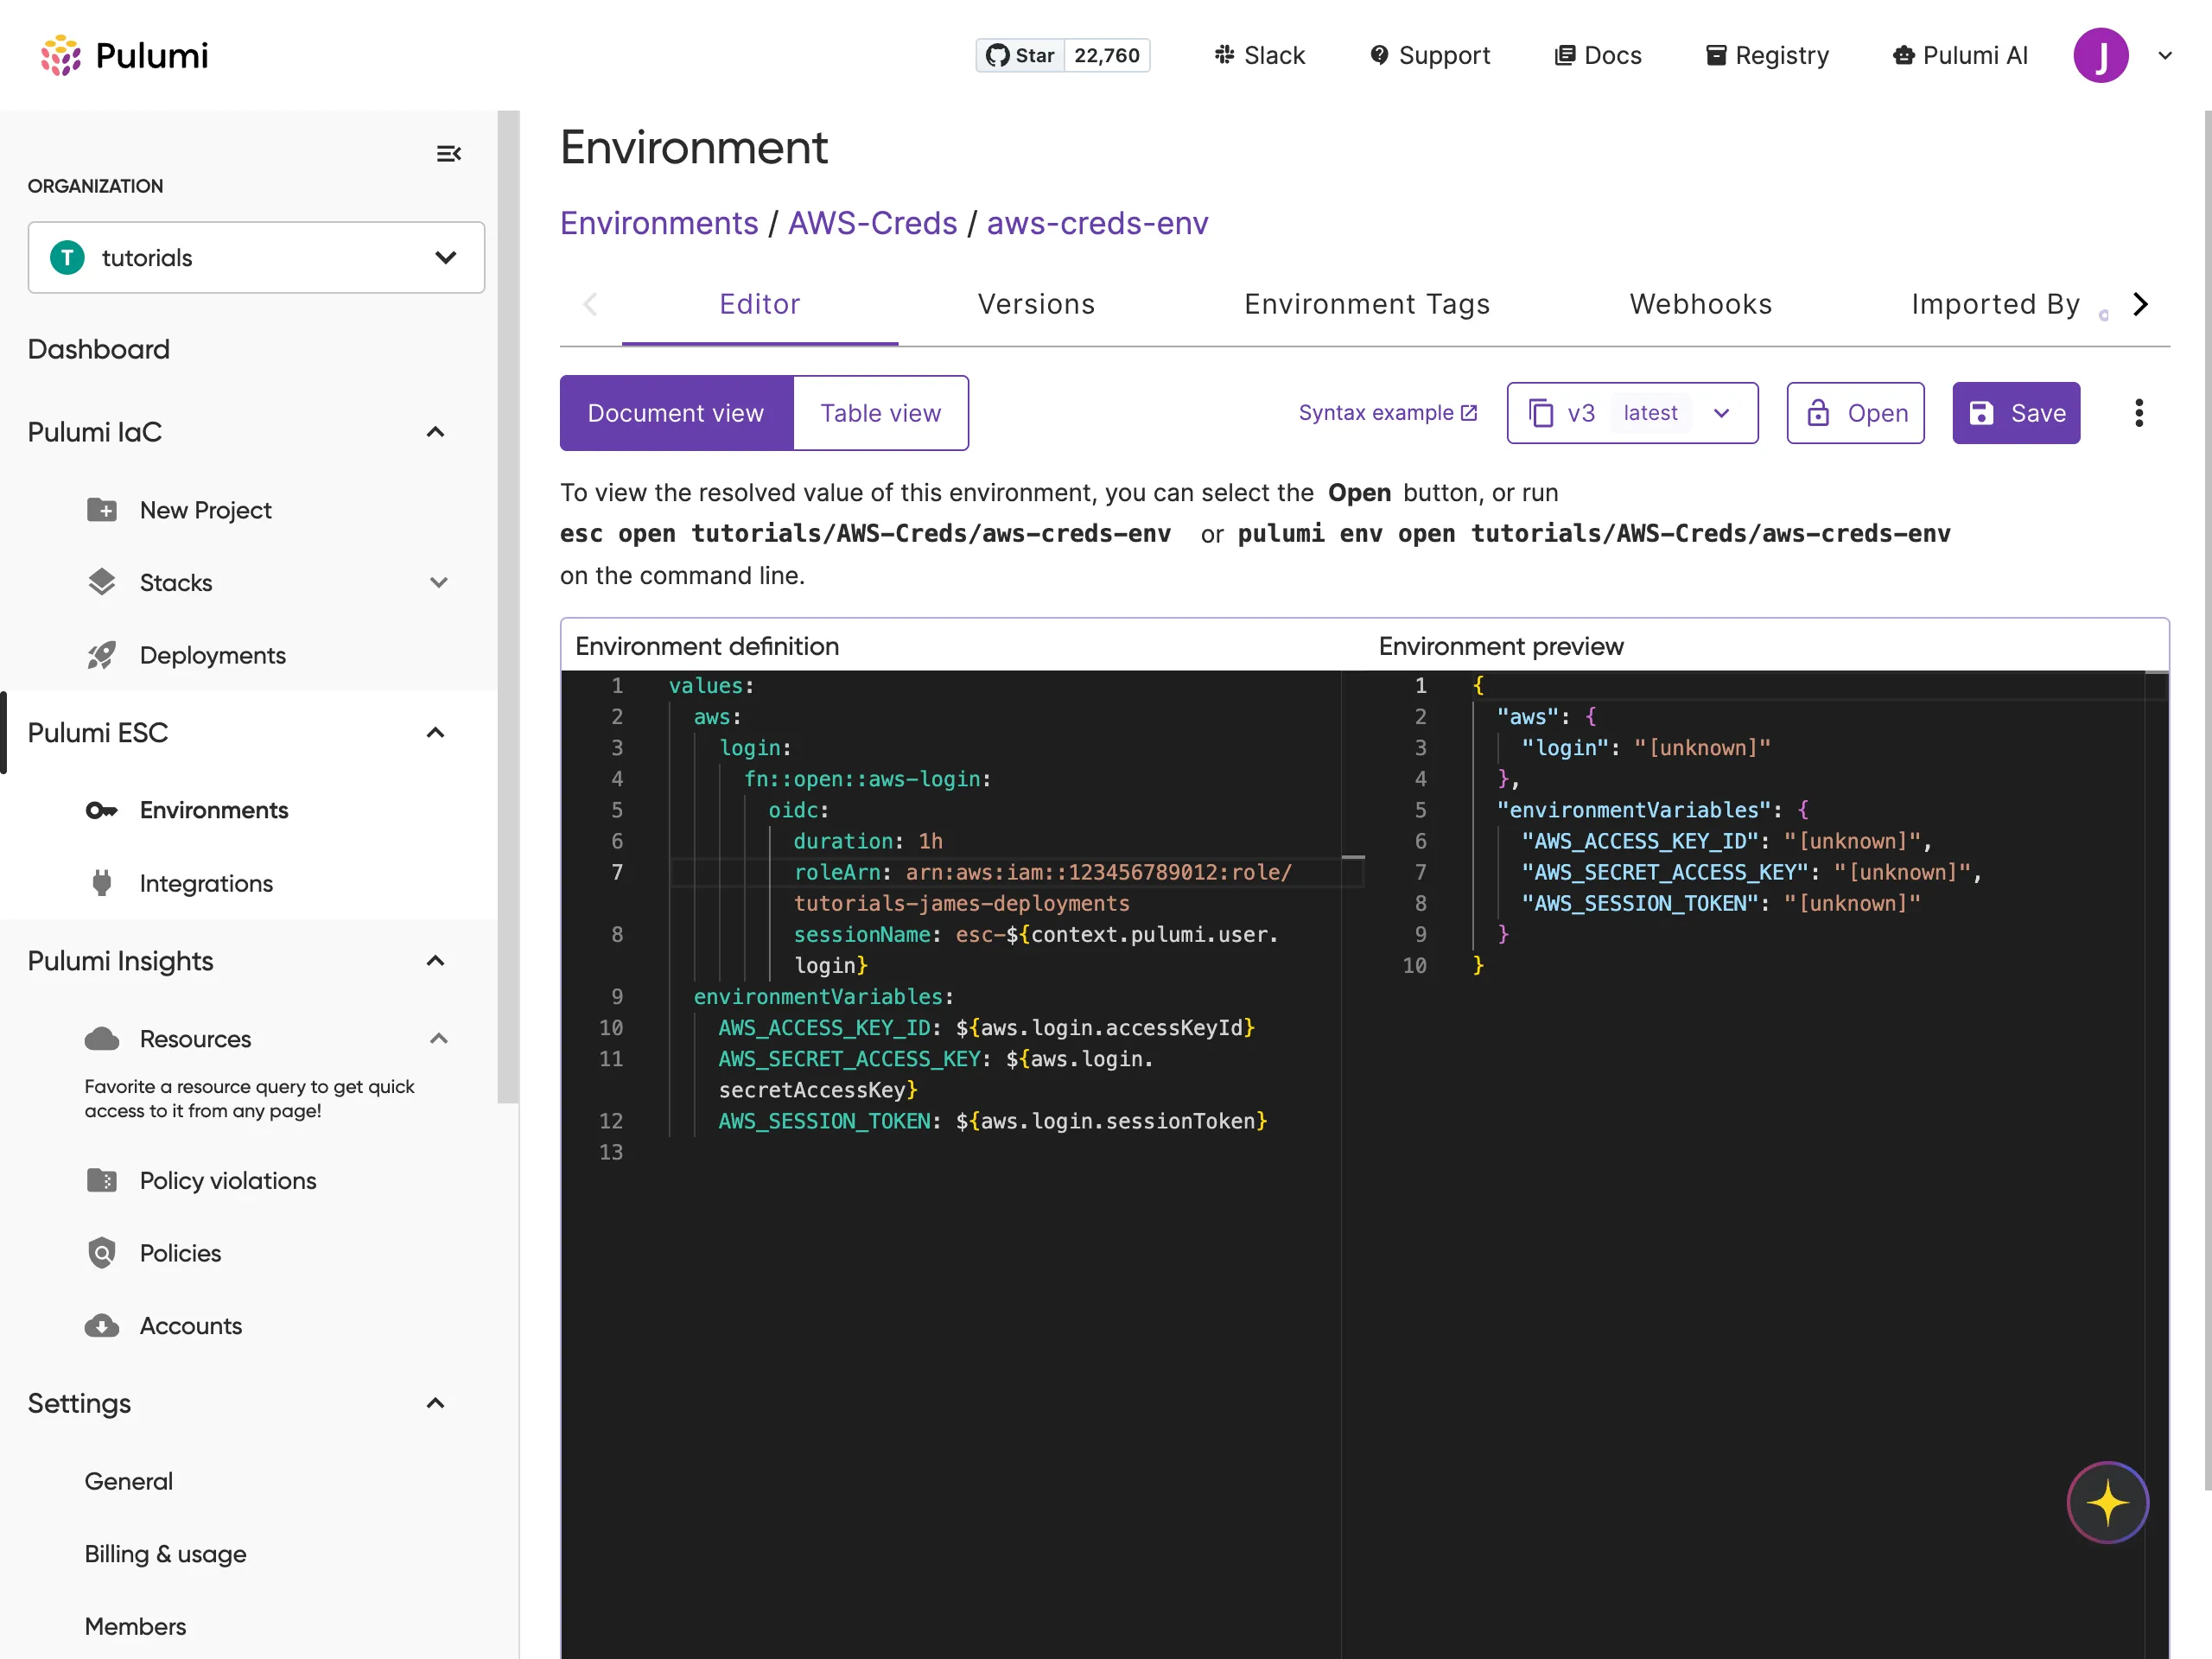
Step 4: Add a GitHub Actions workflow to deploy your stack#
Now you’ll create a GitHub Actions workflow that authenticates with Pulumi Cloud, retrieves AWS credentials from your ESC environment, and runs pulumi up to deploy your infrastructure.
- In your Pulumi project, create a new directory called
.github/workflows
mkdir -p .github/workflowsStep 4: Configure a deployment GitHub action#
- In your Pulumi project, create a new directory called
.github/workflows. - Inside that directory, create a new file named
pulumi.yaml. - Add the following workflow configuration:
name: Pulumi Deployment
on:  push:    branches:      - main  workflow_dispatch:
permissions:  id-token: write  contents: read
jobs:  deploy:    runs-on: ubuntu-latest    steps:      - name: Checkout Code        uses: actions/checkout@v4
      - name: Authenticate with Pulumi Cloud        uses: pulumi/auth-actions@v1        with:          organization: tutorials          requested-token-type: urn:pulumi:token-type:access_token:organization
      - name: Install and inject AWS credentials        uses: pulumi/esc-action@v3        with:          environment: '<your-organization>/<your-esc-env>'
      - name: Verify environment variables        run: |          echo "AWS_ACCESS_KEY_ID=$AWS_ACCESS_KEY_ID"
      - name: Pulumi Preview        uses: pulumi/actions@v6        with:          command: preview          stack-name: <your-org>/<stack-project>/<stack>
- name: Pulumi Up uses: pulumi/actions@v6 with: command: up stack-name: tutorials/pulumi-esc-github-action/dev up-args: --yesRun the GitHub actions workflow#
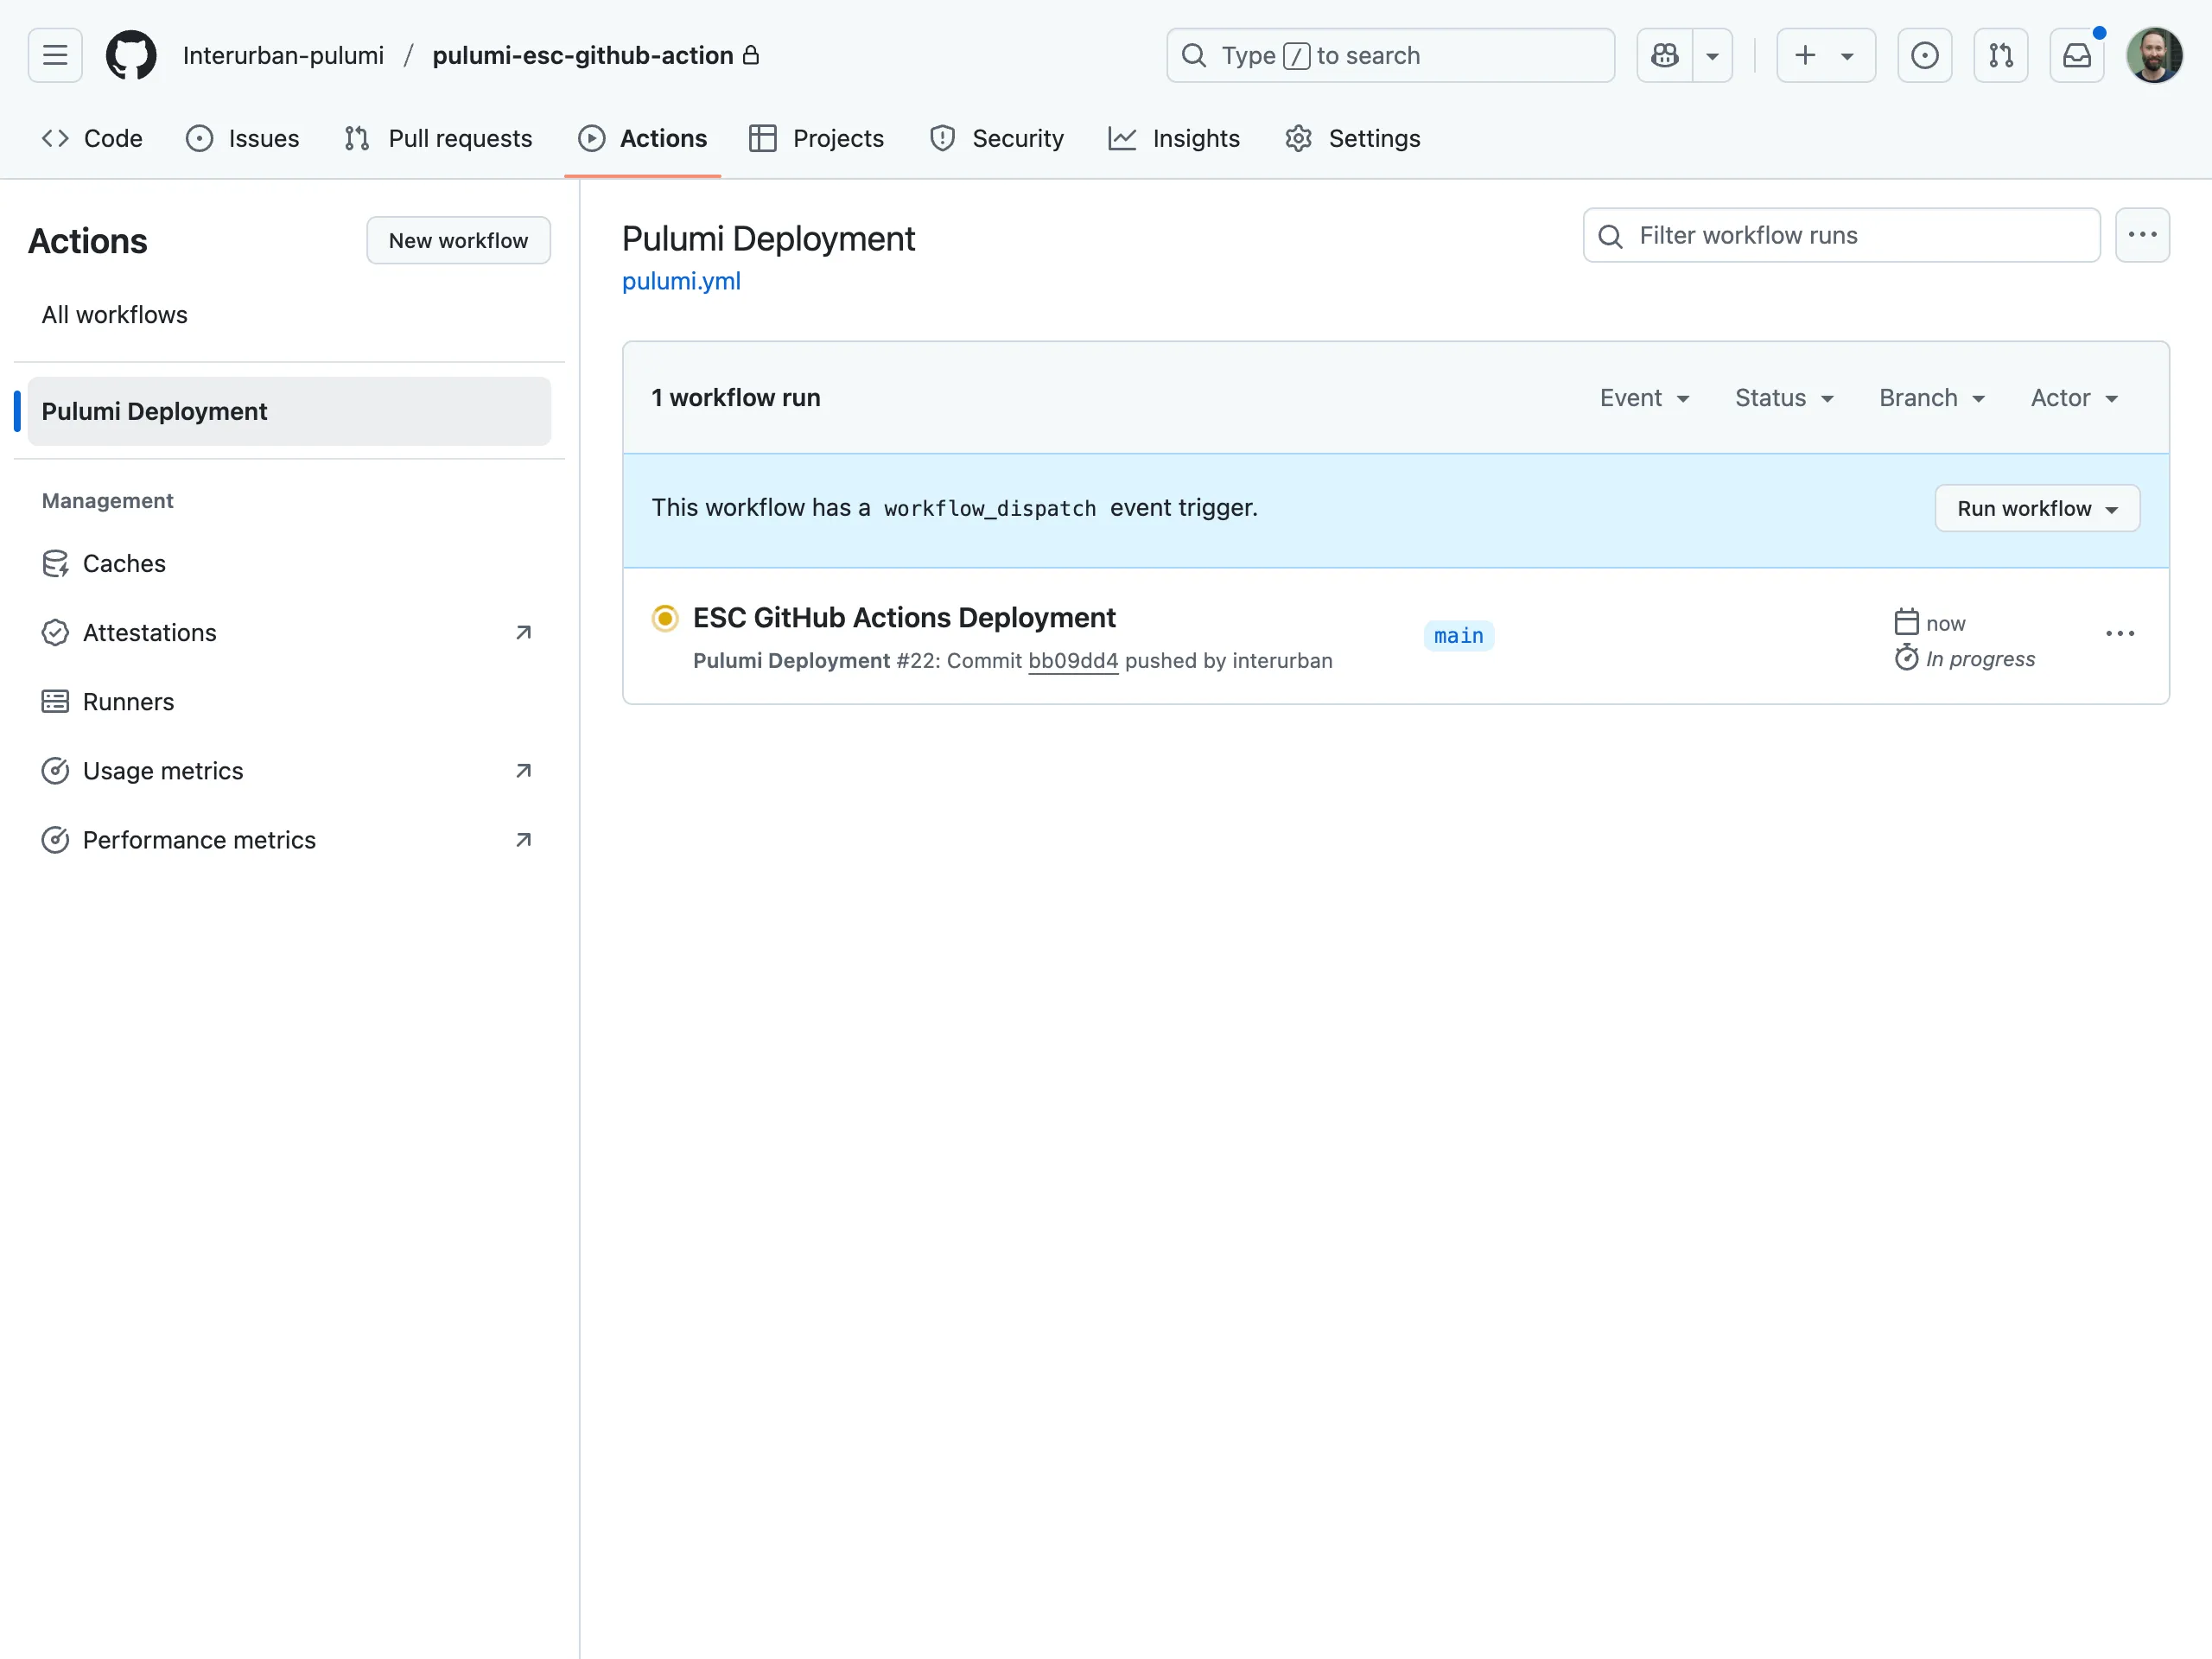
Commit and push the pulumi.yaml file to trigger the GitHub Actions workflow.
git add .github/workflows/pulumi.yamlgit commit -m "Add Pulumi GitHub Actions workflow" git pushGo to your repository’s Actions tab to view the running workflow and monitor its progress.
Conclusion#
Pulumi ESC can help you securely manage cloud credentials and configuration across your CI/CD pipelines. This tutorial covered how to use GitHub Actions and OIDC to deploy infrastructure using short-lived AWS credentials stored in a Pulumi ESC environment.
Explore other ESC tutorials to learn how to version your environments, tag and update configuration sets, and manage secrets across Kubernetes and cloud applications.