Secure Kubernetes Application Secrets with Pulumi ESC
15 minIn this tutorial, you’ll use Pulumi Environments, Secrets, and Configuration (ESC) to manage secrets and configurations for a Kubernetes application. You’ll set up two environments, securely store sensitive information like database credentials, and deploy a sample web application (a voting app) to a local Kubernetes cluster using Minikube. Using ESC ensures sensitive data like database passwords are safeguarded throughout the deployment process while simplifying modular environment management.
- How to securely manage secrets and configurations with Pulumi ESC
- How to create, manage, and import Pulumi environments for Kubernetes apps
- How to securely deploy a Kubernetes application using Minikube and Pulumi
- Completion of the Kubernetes Getting Started guide or familiarity with the basics of the Pulumi workflow
- A Pulumi Cloud account and an access token
- Install and configure Kubectl CLI
- Install and configure Minikube
Pulumi ESC helps you manage different environments (like development, staging, and production) while securely handling secrets and configurations. In this tutorial, you’ll create two environments: one for managing the Kubernetes infrastructure and one for application-specific configurations.
Initialize your Pulumi project#
Start by creating a new Pulumi project named esc-k8-tutorial. Open your terminal and use the following command to initialize your new Pulumi project:
pulumi new kubernetes-typescriptFollow the prompts, and use esc-k8-tutorial as the project name.
Install the Pulumi CLI#
Now, you will install the Pulumi CLI. Use an option below to install based on your operating system.
brew update && brew install pulumi/tap/pulumicurl -fsSL https://get.pulumi.com/ | shWindows Binary Download amd64
For more installation options, visit the Pulumi CLI installation docs.
Create your first environment#
Next, use the Pulumi CLI to create the first environment, which will manage the Kubernetes infrastructure. To create an environment named base, run the following command, adding [<org-name>/] with your organization name if applicable:
pulumi env init esc-k8-tutorial/basepulumi env init esc-k8-tutorial/dbThese environments will handle Kubernetes cluster configuration and database specific secrets and configuration.
Add secrets and configuration to the db environment#
Now that your base environment is created, you’ll securely store the necessary secrets and configurations for the voting app through Pulumi Cloud UI. Follow these steps to add secrets and configuration values using the Pulumi Cloud.
- Open your browser and log in to Pulumi Cloud.
- Select Environments from the ESC section of the console.
- Find and select the
dbenvironment under theproject: esc-k8-tutorial.
Using the Document view, remove the example environment definition add the following:
values: labels: component: db postgres: replicas: 1 image: name: postgres tag: 15-alpine port: 5432 user: postgres pulumiConfig: POSTGRES_USER: ${postgres.user} POSTGRES_PORT: ${postgres.port} LABELS: ${labels} POSTGRES_IMAGE: ${postgres.image.name}:${postgres.image.tag} POSTGRES_REPLICA: ${postgres.replicas}Click Save.
Now, you can add your postgres.password as a secret by:
- Selecting the Table view button
- Click on +Secret/config
- Add
postgres.passwordas the Path, enter your desired password as the Value, then change from Plaintext, to Secret in the drop-down.
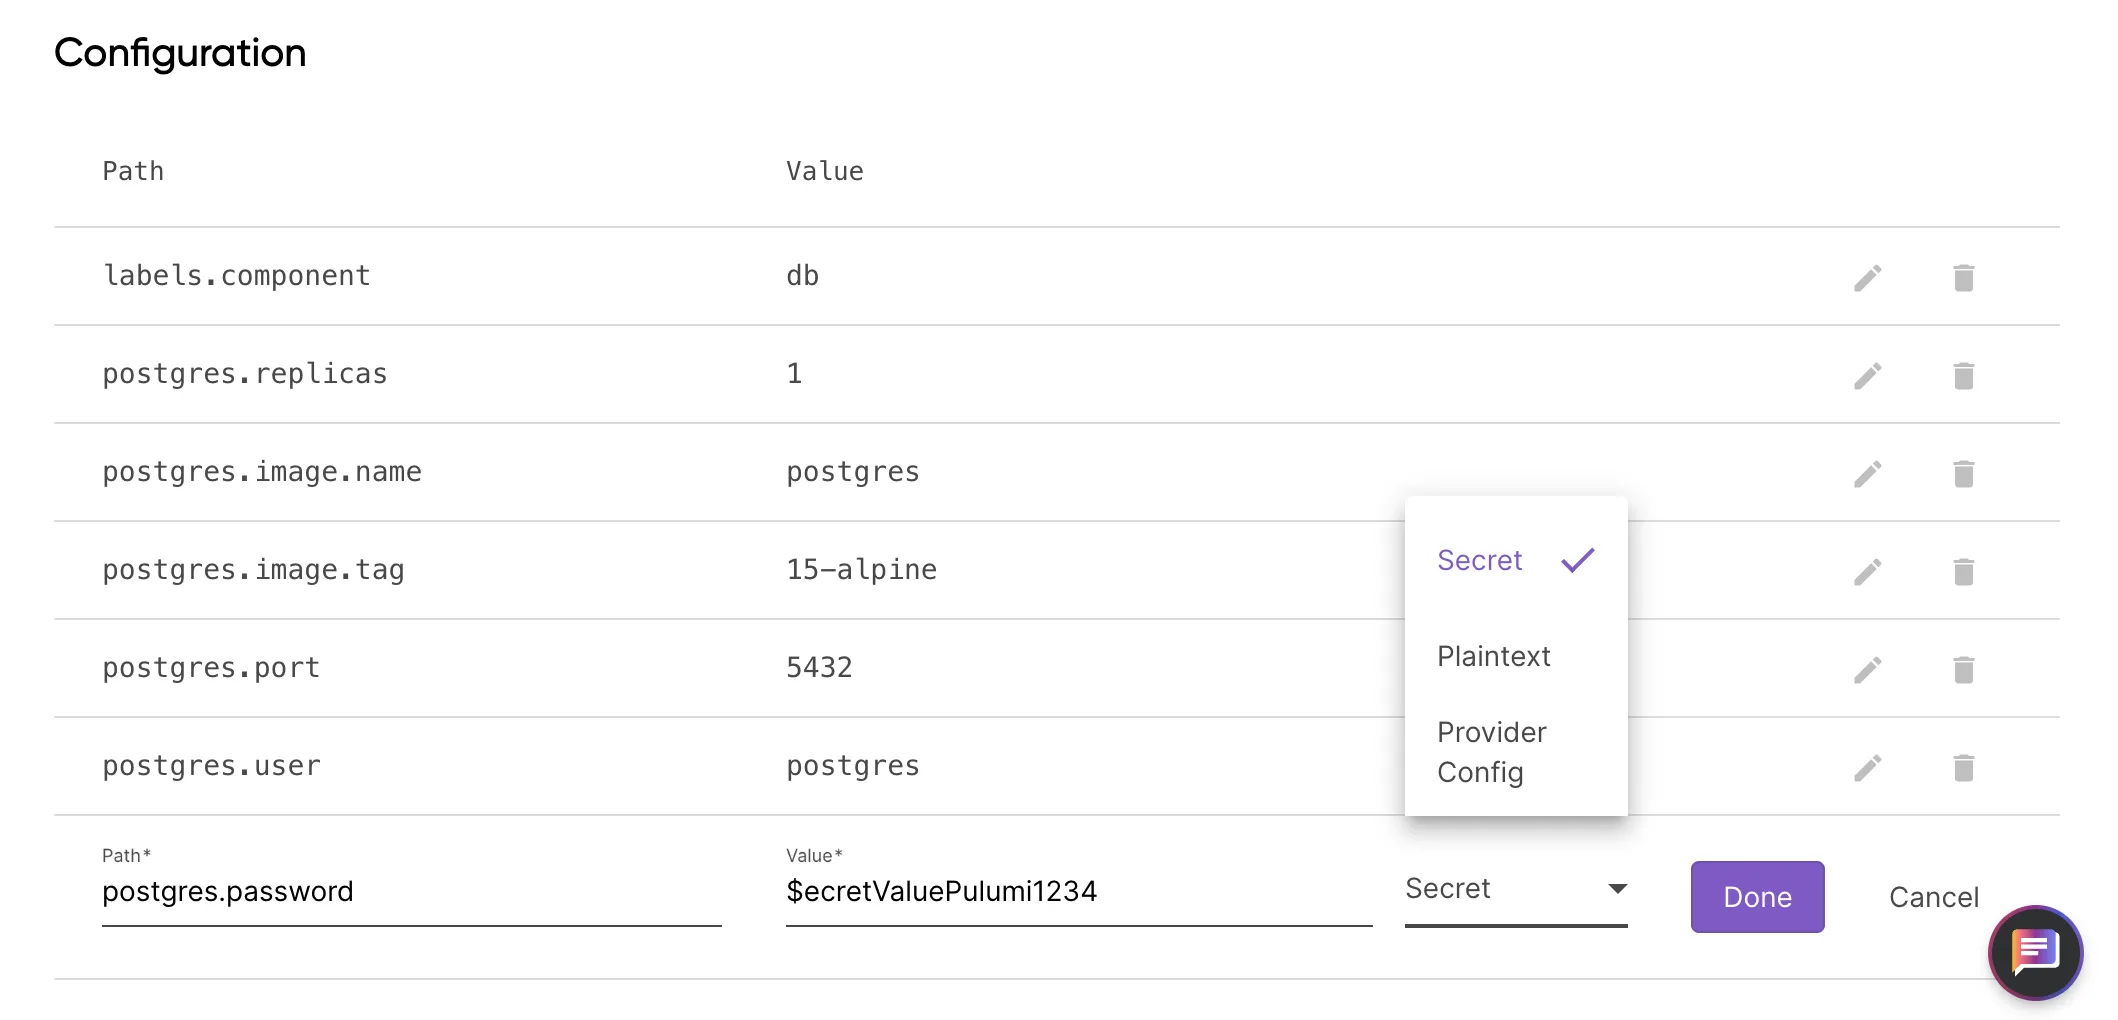
Click Done and then click Save.
Your password is now stored securely in Pulumi Cloud as a secret.
Composing and importing environments#
Pulumi ESC enables you to compose different environments for modularity and reusability via importing. In this scenario, your base environment might define Kubernetes cluster details across multiple environments. For example in a real-world application, environments can be set by a central DevOps team to maintain constancy, security and cost-control.
To import settings from the base environment into the app environment select the base environment and using the Document view, remove the example environment definition and copy in the following:
values: labels: app: votingClick Save.
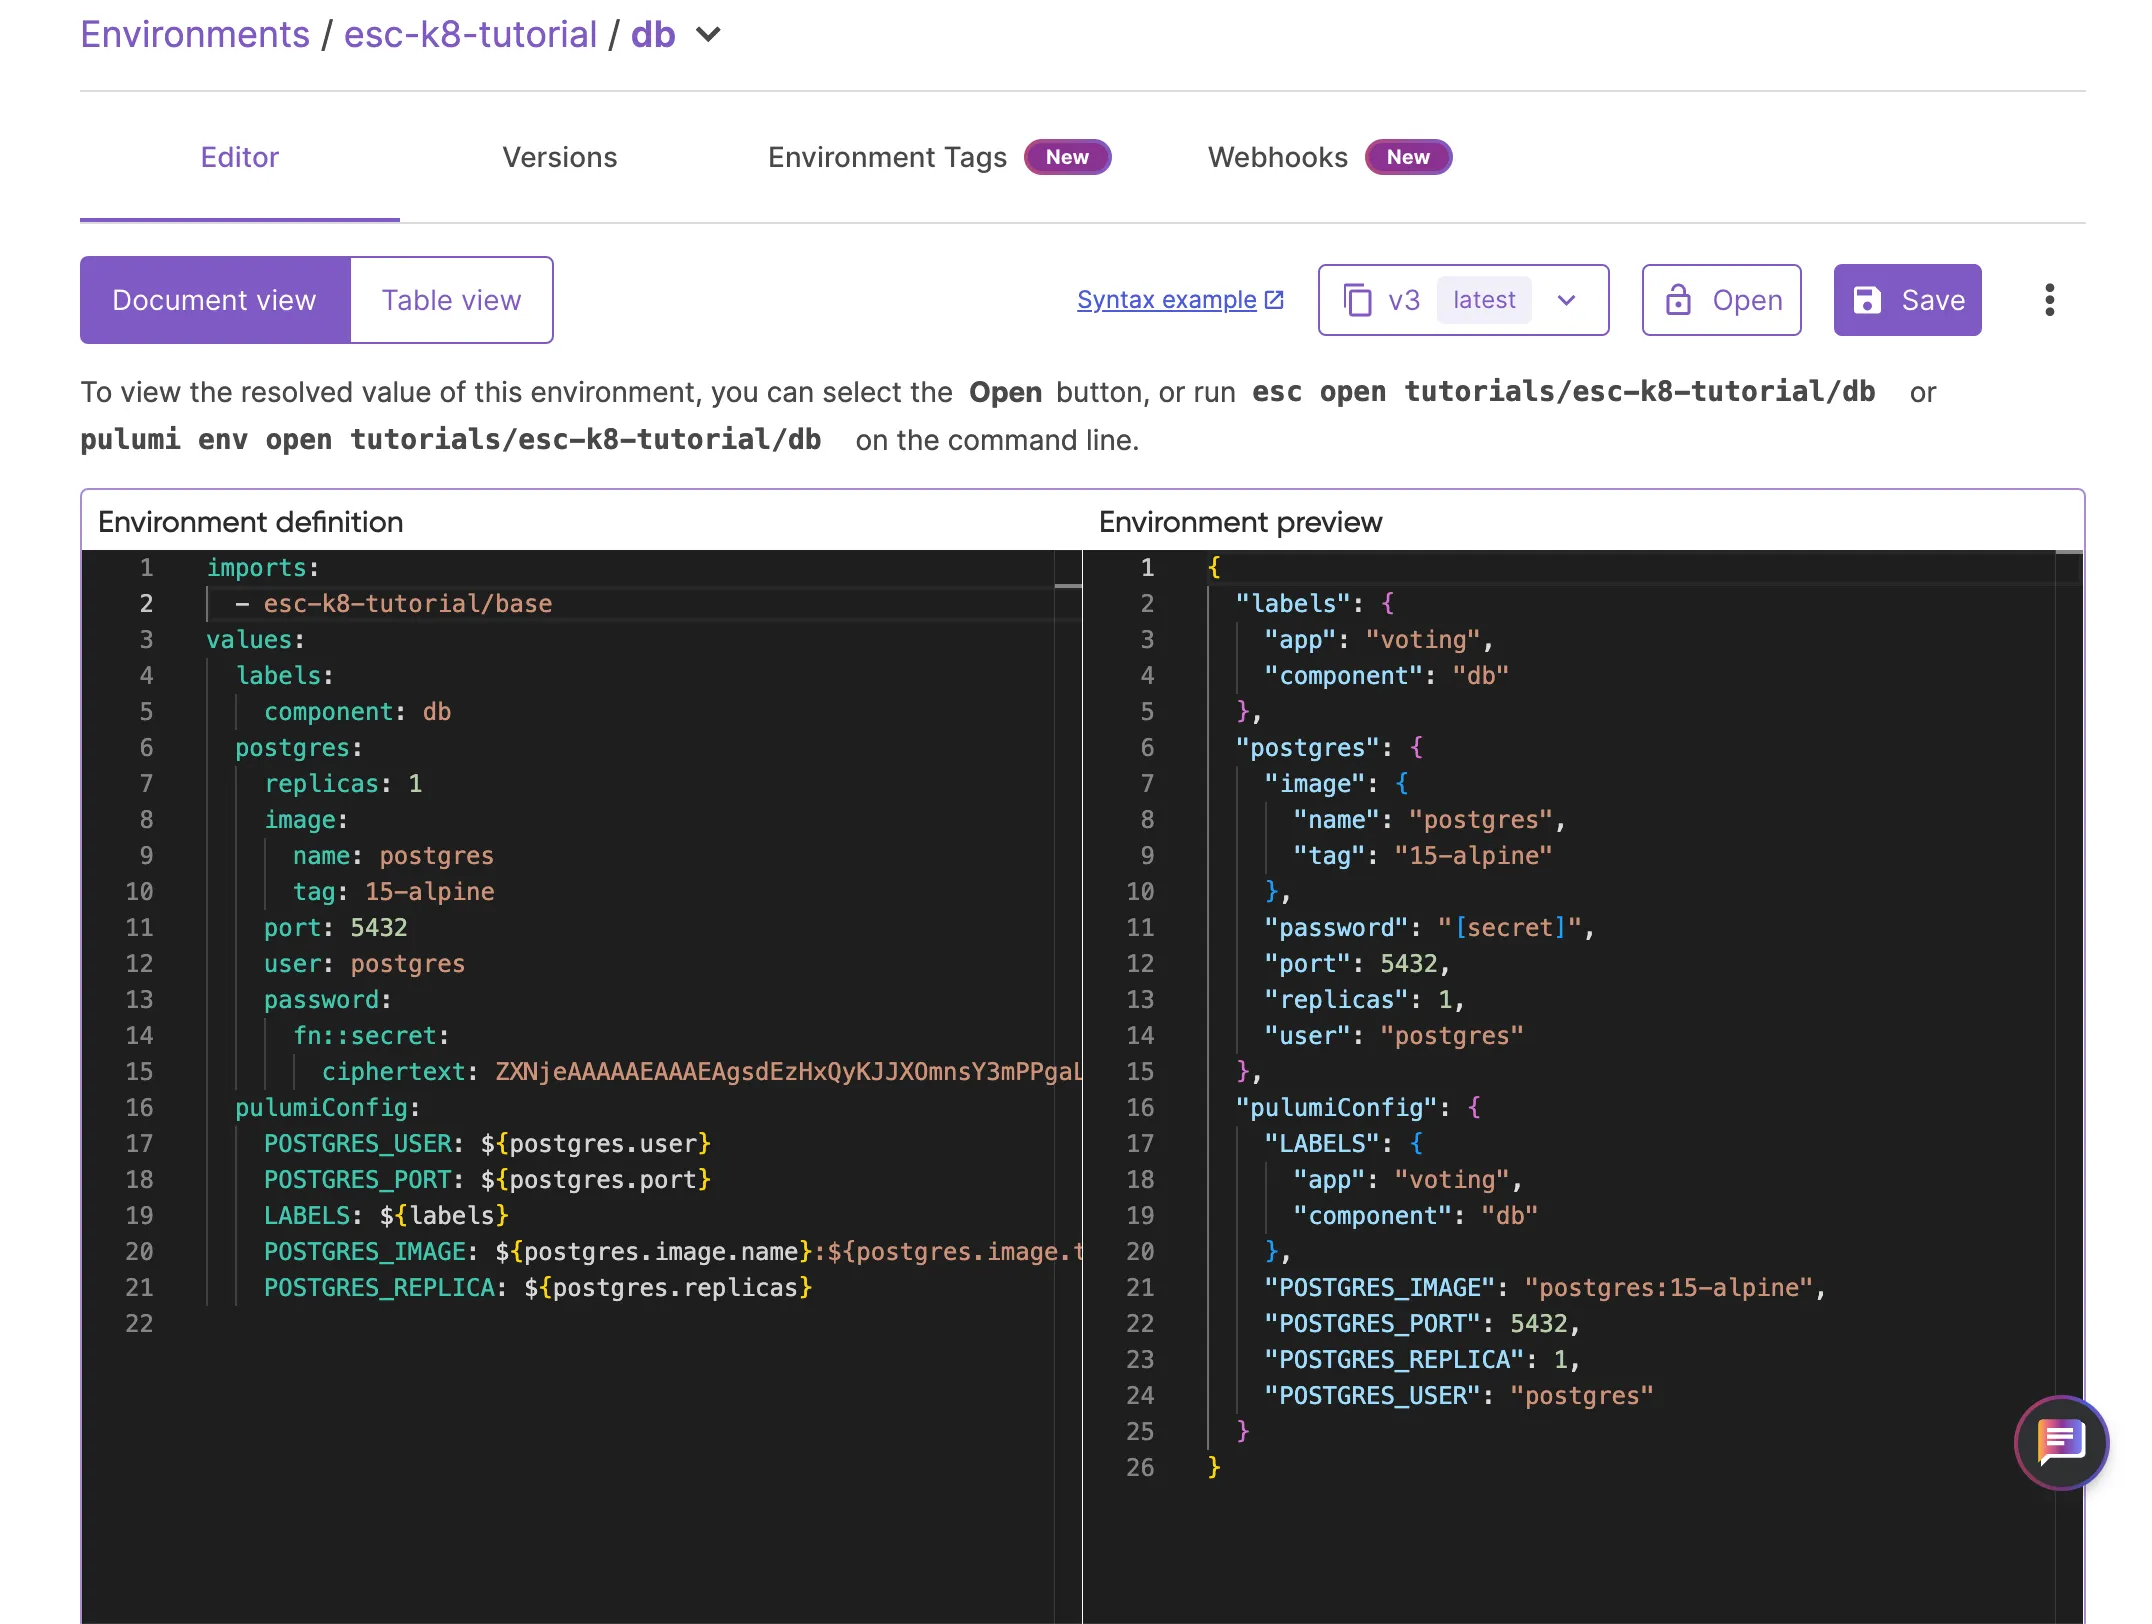
Return to your db environment and add the following to the top of your environment definition:
imports: - esc-k8-tutorial/baseClick Save.
Verify the environment import#
To confirm that the base environment has been imported successfully, you can see this reflected in the see an Environment preview of your db environment:
Deploying the voting app to Kubernetes#
With your Pulumi ESC environments set up and secrets configured, you’re ready to add and deploy the voting app to a Kubernetes cluster using Minikube.
Add the following code to the index.ts file located in your Pulumi project directory:
import * as k8s from "@pulumi/kubernetes";
// Define the voting app deploymentconst appLabels = { app: "voting-app" };
const deployment = new k8s.apps.v1.Deployment("voting-app", {    spec: {        selector: { matchLabels: appLabels },        replicas: 1,        template: {            metadata: { labels: appLabels },            spec: {                containers: [                    {                        name: "voting-app",                        image: "dockersamples/examplevotingapp_vote:latest",                        ports: [{ containerPort: 80 }],                    },                ],            },        },    },});
// Define a Kubernetes service to expose the appconst service = new k8s.core.v1.Service("voting-app-service", {    metadata: {        labels: appLabels,    },    spec: {        type: "ClusterIP",        ports: [{ port: 80, targetPort: 80 }],        selector: appLabels,    },});
This code defines and deploys a simple TypeScript voting application on a Kubernetes cluster using Pulumi that creates and defines:
Deployment Definition: The code creates a Kubernetes
Deployment. It specifies that the app should use thedockersamples/examplevotingapp_vote:latestDocker image. The deployment has:- One replica (or instance) of the voting app running.
- The app listens on port 80 inside the container.
Service Definition: The code also defines a Kubernetes
Serviceof typeClusterIP. This service exposes the voting app inside the cluster and forwards traffic to the app’s container, which listens on port 80.
Deploy the app with Pulumi#
Once the Kubernetes resources are defined, deploy the voting app with Pulumi by running:
pulumi upPulumi will ask for confirmation before deploying the voting app to your Kubernetes cluster.
Access the application#
After the app is deployed, access it locally by forwarding the Kubernetes service to a local port:
Run the following command to see all services across namespaces:
kubectl get svc --all-namespacesNote your voting app name in the output.
❯ kubectl get svc --all-namespacesNAMESPACE NAME TYPE CLUSTER-IP EXTERNAL-IP PORT(S) AGEdefault db ClusterIP 10.97.4.236 <none> 5432/TCP 18hdefault kubernetes ClusterIP 10.96.0.1 <none> 443/TCP 363ddefault redis ClusterIP 10.100.7.66 <none> 6379/TCP 23hdefault result NodePort 10.106.91.25 <none> 5001:31001/TCP 23hdefault vote NodePort 10.103.1.134 <none> 5000:31002/TCP 23hdefault voting-app-service-c7f2a549 ClusterIP 10.104.116.64 <none> 80/TCP 2m15skube-system kube-dns ClusterIP 10.96.0.10 <none> 53/UDP,53/TCP,9153/TCP 363dRun kubectl port-forward svc/voting-app-service-<id> 8080:80 adding your unique voting-app-service-<id>.
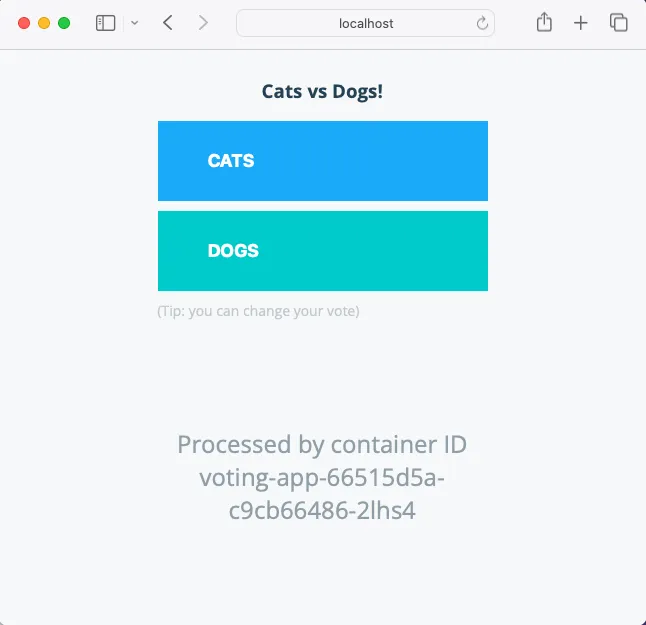
kubectl port-forward svc/voting-app-service-c7f2a549 8080:80Open your browser and go to http://localhost:8080 to view the voting app.
Cleanup#
To remove the resources and clean up your local environment, follow these steps:
Destroy the Pulumi stack by running:
Terminal window pulumi destroyIf you no longer need the project, remove it from your local machine by deleting the project folder:
Terminal window rm -rf esc-k8-tutorial
This ensures that all resources are properly cleaned up, and your local environment remains organized.
Next steps#
In this tutorial, you secured Kubernetes application secrets using Pulumi Environments, Secrets, and Configuration (ESC). You set up environments, securely stored sensitive data, and deployed a sample voting app to a Kubernetes cluster.
To dive deeper into using Pulumi ESC for advanced scenarios, check out the following resources:
Environment Composition: Learn more about to effectively compose multiple environments to manage configurations across your infrastructure. Explore the Pulumi documentation on environment imports.
Managing Secrets: Learn how to securely manage and adopt dynamic, short-lived secrets on demand using Pulumi ESC, ensuring sensitive information is protected across different environments. Read more in the Pulumi ESC documentation.