Deployments Mini-Challenge!
Pulumi Deployments is a new Deployments-as-a-Service technology through which Pulumi fully manages the execution of infrastructure as code programs for users of the platform. One feature of Pulumi Deployments is "Git Push to Deploy", which allows you to connect a Git repo and drive deployments on any push. Pulumi Deployments helps you ship infrastructure faster and manage 10x the scale.
In this mini-challenge, you will create a project in the Pulumi Service console to select an Architecture Template, create a Pulumi program, connect GitHub to Pulumi Deployments, and initiate a stack update through the Pulumi Service. If you write a blog or post a quick video about it, then be sure to tag us on social media or email us at da@pulumi.com and we'll help amplify your post or video!
Prerequisites
In order to complete this challenge, you'll need a couple things set up in advance.
- A Pulumi account
- The Pulumi CLI
- The Pulumi Deployments preview enabled
- Python 3.9 or higher
- AWS, Azure, or Google Cloud account
- AWS, Azure, or Google Cloud CLI
- GitHub account
Challenge
Step 1. Create a Project
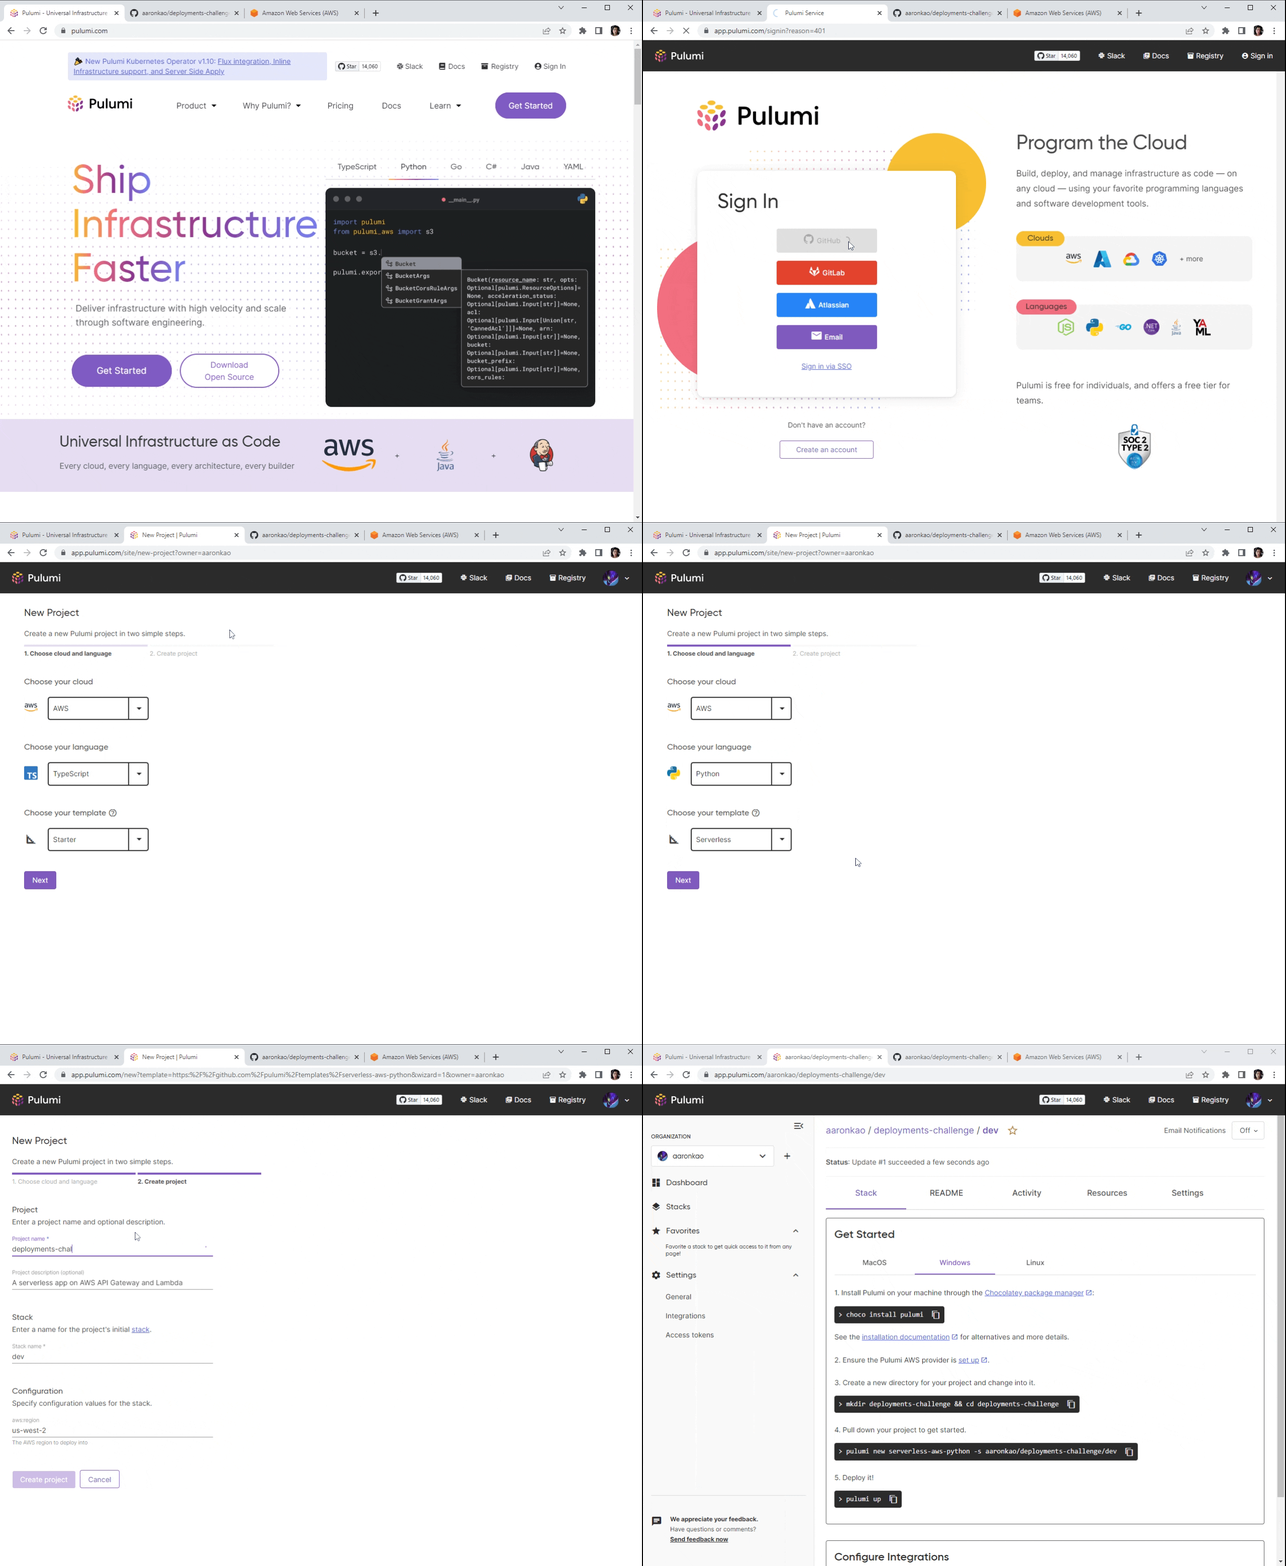
We will first create a project in the Pulumi Service console. Navigate to app.pulumi.com and sign in. Select Stacks on the left navigation, and select the “Create project” button. Then select the cloud you want to deploy to, the language you want to use, and a template. Please select one of the templates other than the starter. Select next and provide in your project details: project name, stack name, and configuration values for the template. Select Create project, and you will be brought to the Overview page of your new stack.
Step 2. Pull Down Your Project Locally
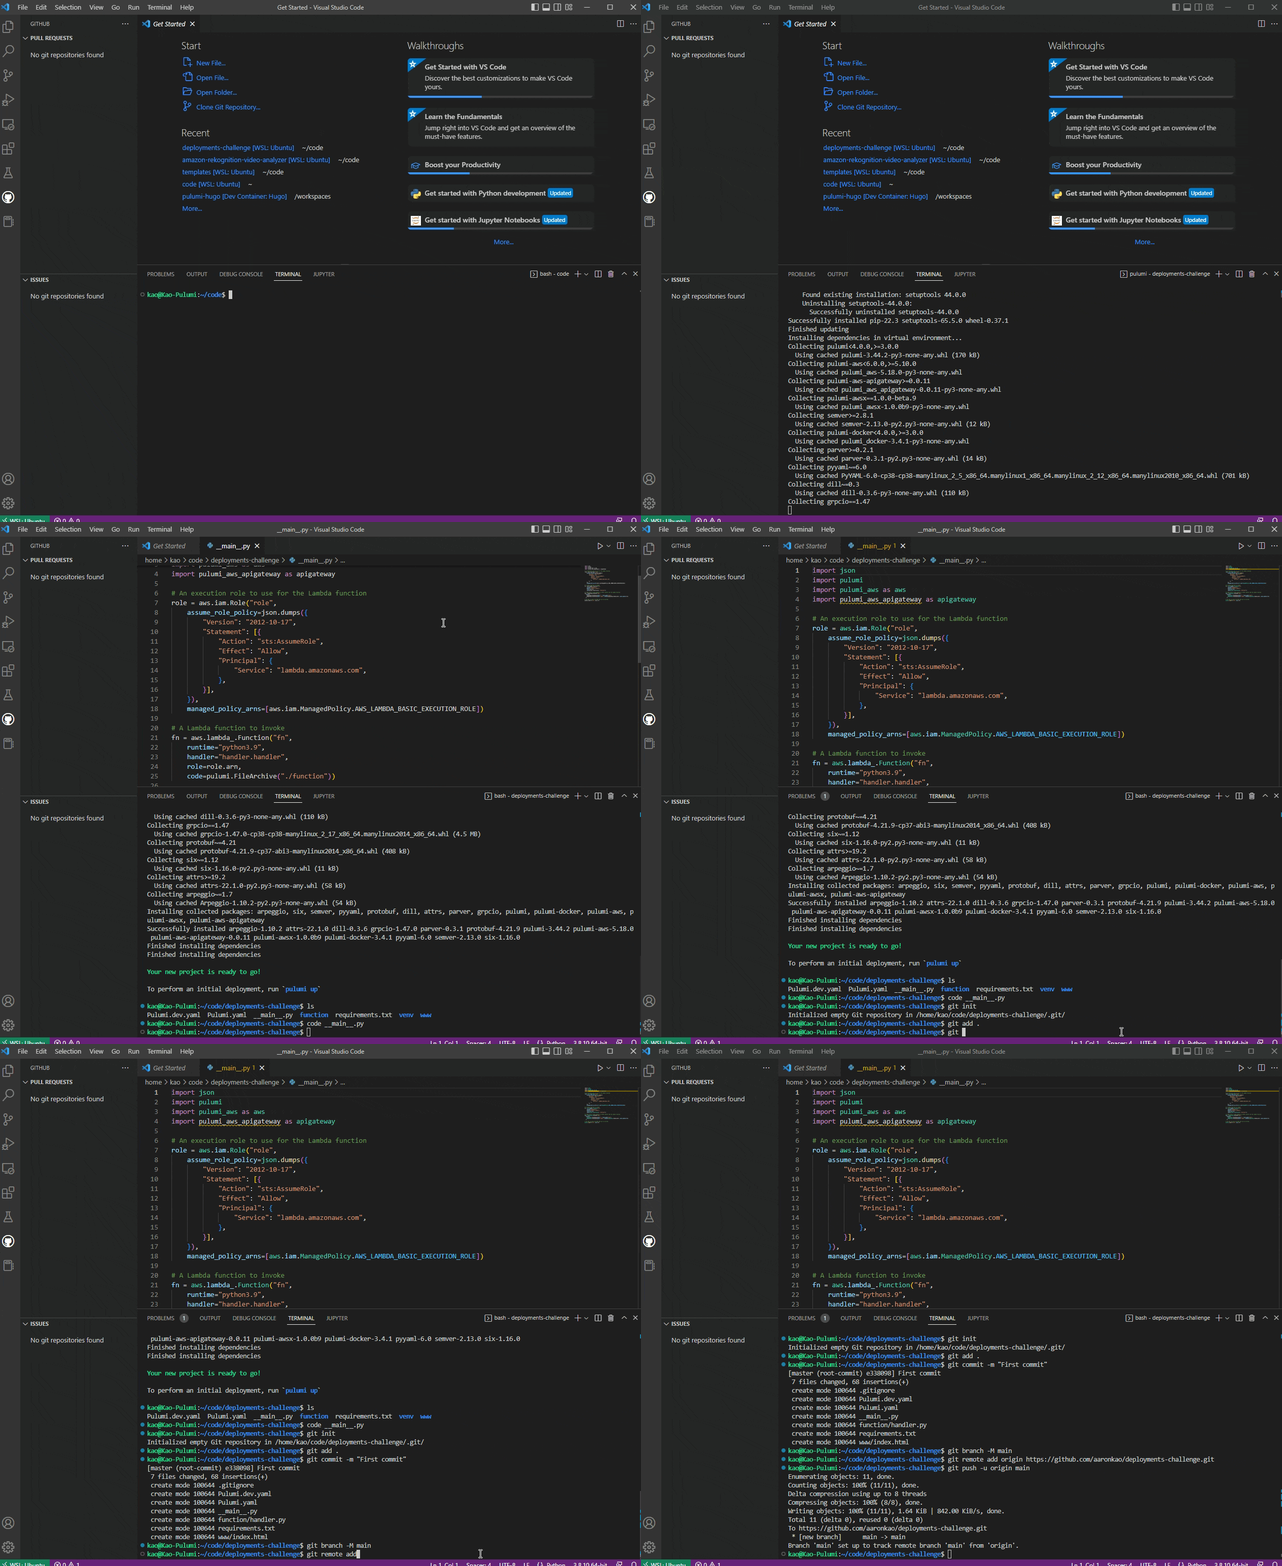
Follow the Get Started commands on the Overview page of your new stack. Create a new directory for your project in your CLI, and then pull down your project. Don’t run pulumi up just yet. Next, create a git repository in your project directory and push it to GitHub.
Step 3. Set Up Pulumi Push to Deploy
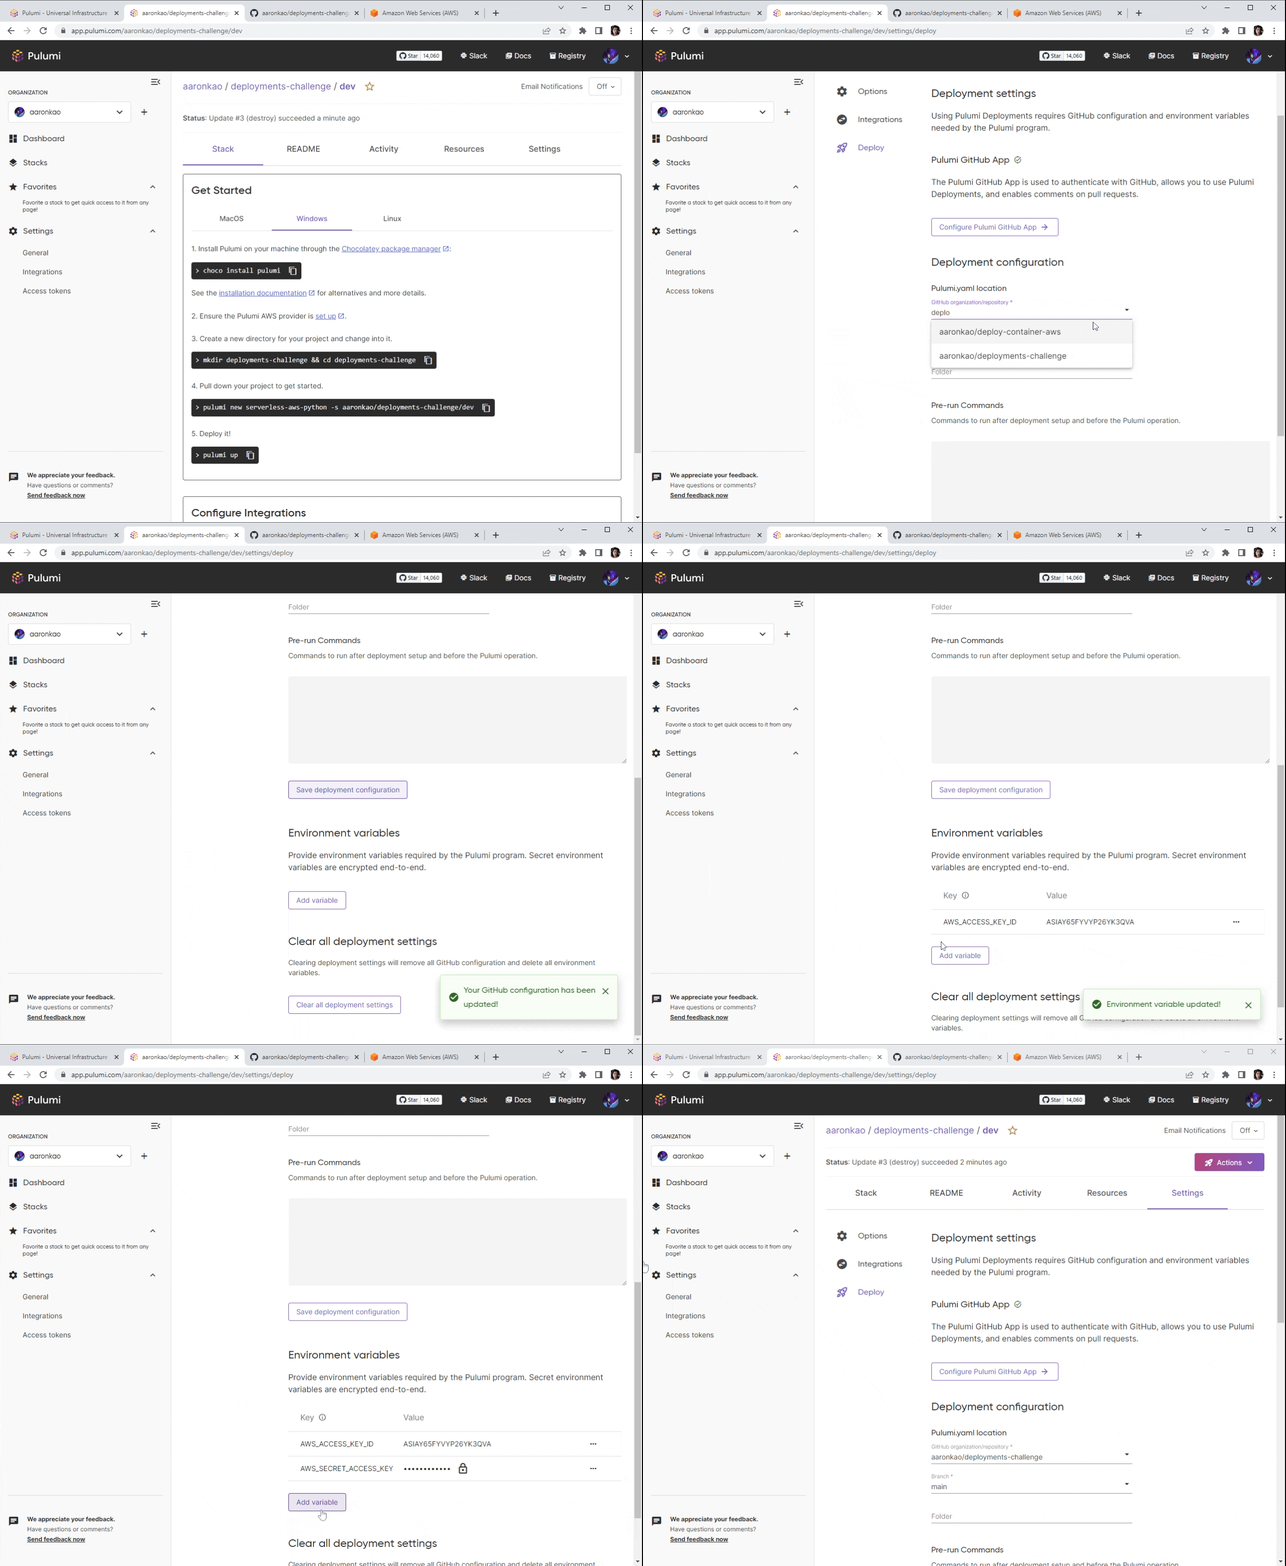
Return to the Pulumi Service console, select the Settings tab, and then select Deploy. To enable Pulumi Deployments, first install the Pulumi GitHub App. Once installed, you will be presented with Deployment settings. Select your GitHub organization/repository, the branch, and the folder you want to connect. Scroll down to the Environment variable and provide your cloud credentials (e.g., for AWS, it would be AWS_ACCESS_KEY_ID, AWS_SECRET_ACCESS_KEY, AWS_SESSION_TOKEN).
Step 4. Deploy Stack with Pulumi Deployments
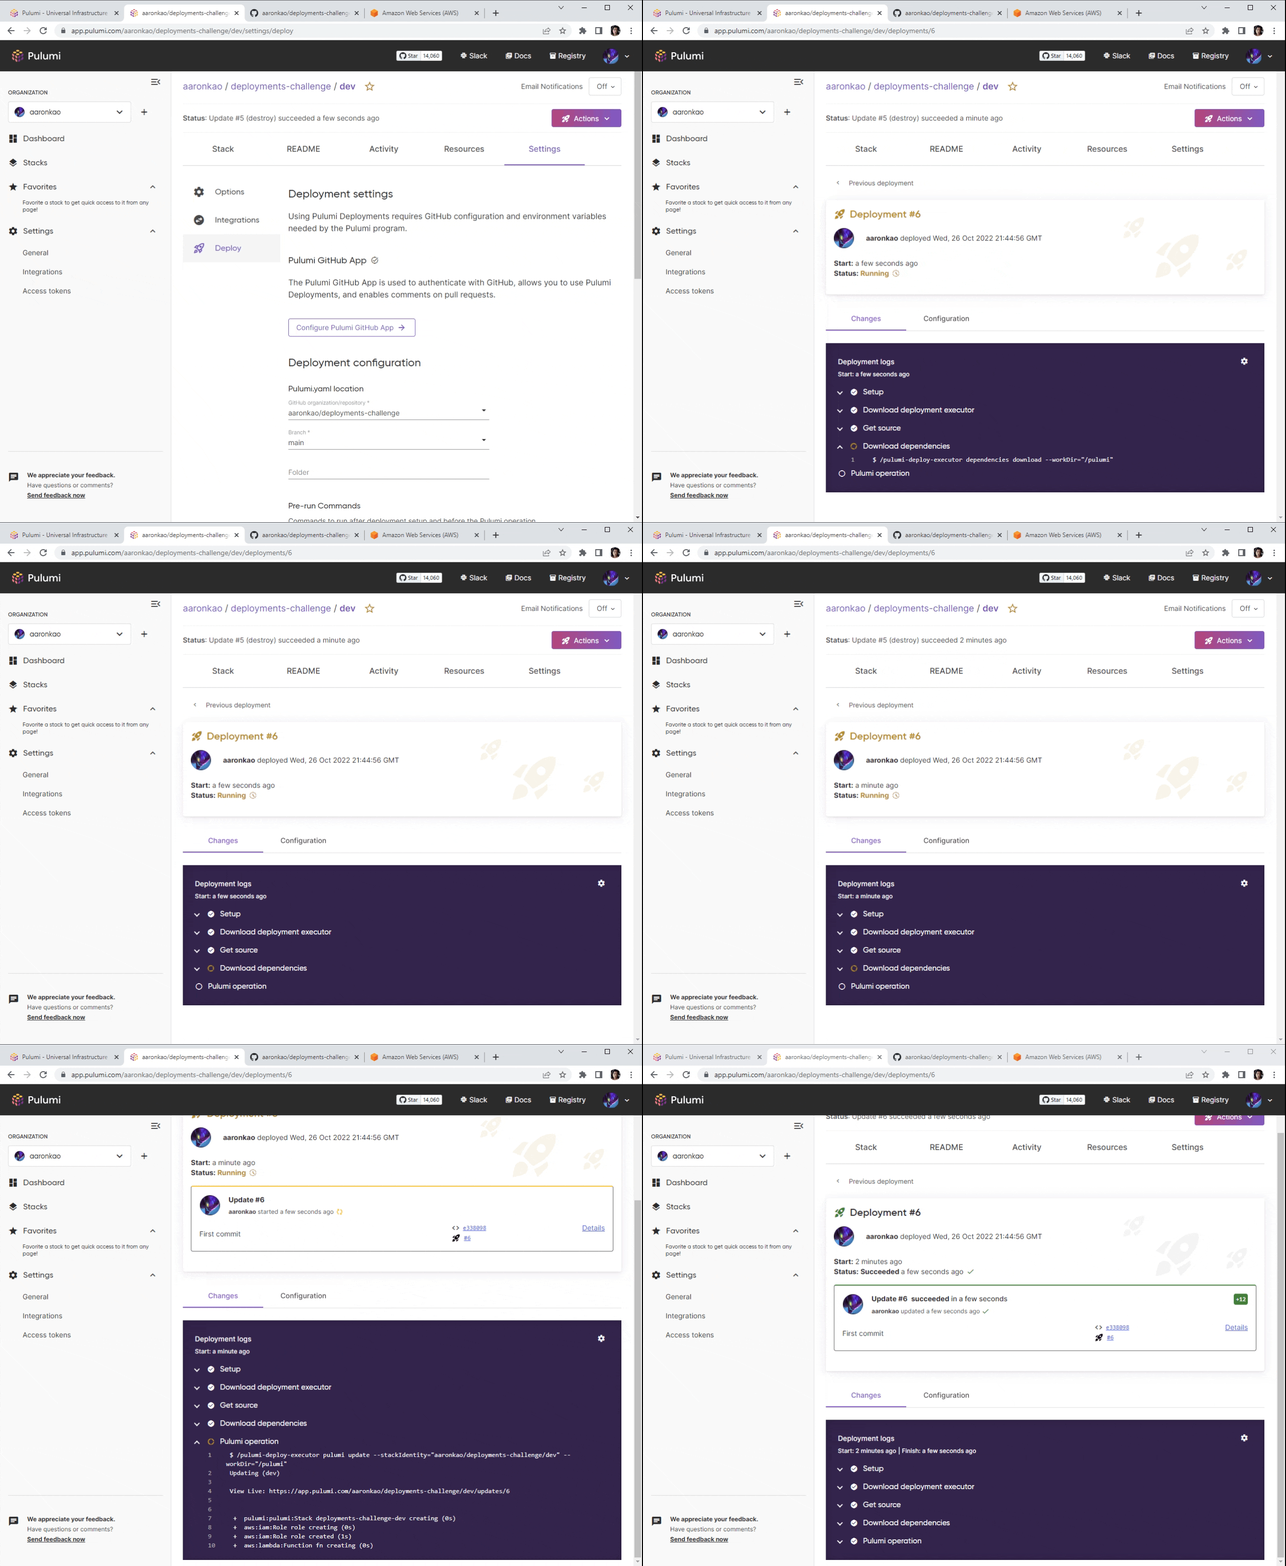
Select the Actions button, then select “Update”, and Deploy to start a deployment. You will be brought over to the Activity tab. Select the new Deployment, and you will be presented with Deployment logs showing you the details of the deployment.
Step 5. Validate Endpoints
Lastly, validate that the endpoints of your deployed infrastructure is working. You can copy out the endpoint URL string from the deployment logs or under the Outputs section of the Overview tab.
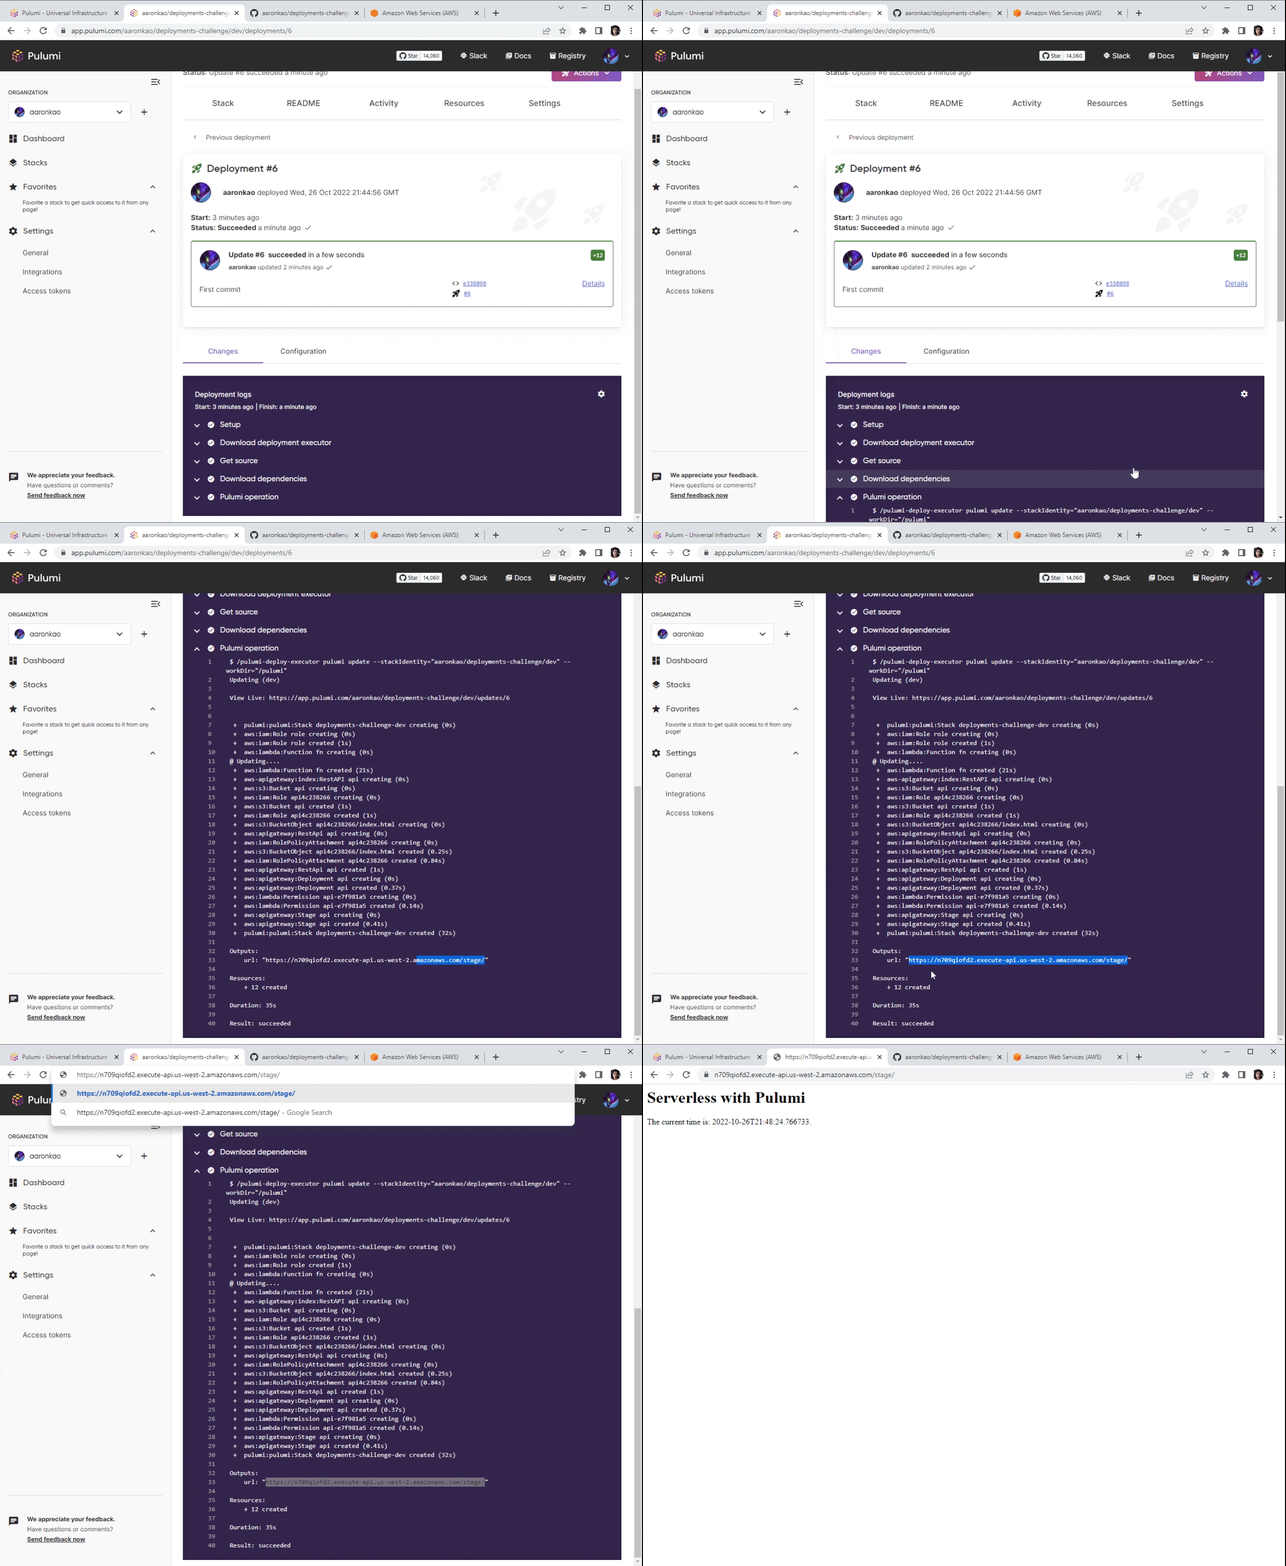
Congratulations!. You’ve completed this Pulumi Challenge. If you’d like to tear down all of these resources, run pulumi destroy -y. Otherwise, have fun playing around with your infrastructure stack! Add whatever you like, and with Pulumi Deployments, committing a change to the git repo will kick off a new deployment. :)
Don’t forget: If you write a blog or post a quick video about your experience, then be sure to tag us on social media or email us at da@pulumi.com so we can help spread the word.
