
Containers solved the problem of moving software from one environment to another because they encapsulate all the software dependencies. However, an orchestration platform is needed to manage containers at scale. Kubernetes is a popular open-source solution that uses declarative configuration to specify the desired state of the application. Configuring and deploying an application on Kubernetes is often accomplished with YAML files to define the state and command line tools to manage and control the Kubernetes API. This article demonstrates how to use infrastructure as code to create basic Kubernetes objects and higher-level abstractions that build upon the basic objects.
This is the first article of a multi-part series covering deploying Kubernetes and applications using infrastructure as code. We’ll take a top-down approach starting from clusters to high-level abstractions such as deployments. This article aims to provide a step-by-step example of deploying an application in Kubernetes using infrastructure as code. For this example, we’ll use Typescript for the programming language and provide sample code for AWS, Azure, GCP, and Kubernetes.
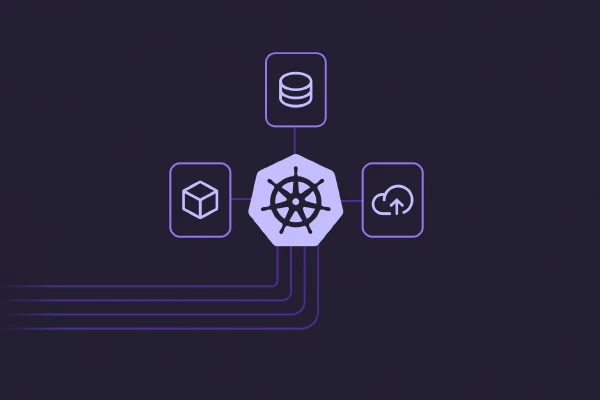
Clusters and Nodes
A cluster is formed with a control plane and a collection of nodes, the smallest unit of computing in Kubernetes. A node can be either a physical or virtual that contains the necessary components to run containers. A cluster has one or more nodes designated to the control plane, which controls the worker nodes where the application containers are deployed. A control plane node has:
- the Kube-APIServer, which provides communication to the cluster
- a Kube-Controller-Manager that provides governance for the cluster
- etcd, which is the cluster state database
- Kube-Scheduler, which schedules worker nodes based on events in etcd
To create a cluster for Kubernetes on a cloud provider, we need to create a VPC that will host the nodes required to deploy the Kubernetes cluster. Each cloud provider requires configuration specific to their implementation, and we’ll cover their particular requirements.
We declare a VPC to host our Kubernetes cluster and specify a public subnet, which is the gateway for the Kube-APIServer. We create the Kubernetes cluster with the VPC we declared and the VPC’s default public subnets. The desiredCapacity parameter sets the desired number of EC2 t2.medium nodes. We also export the kubeconfig file which we can use with kubectl to communicate with our Kubernetes cluster.
import * as awsx from "@pulumi/awsx";
import * as eks from "@pulumi/eks";

// Create a VPC for our cluster.
const vpc = new awsx.ec2.Vpc("vpc", { subnets: [{ type: "public" }] });

// Create the EKS cluster itself and a deployment of the Kubernetes dashboard.
const cluster = new eks.Cluster("cluster", {
    vpcId: vpc.id,
    subnetIds: vpc.publicSubnetIds,
    instanceType: "t2.medium",
    desiredCapacity: 2,
    minSize: 1,
    maxSize: 2,
});

// Export the cluster's kubeconfig.
export const kubeconfig = cluster.kubeconfig;
You can try out the code by following the complete tutorial.
In this example, we store the configuration variables in the Pulumi.
$ pulumi config set password [value]
$ pulumi config set location [value]
$ pulumi config set nodeCount [value]
$ pulumi config set nodeSize [value]
$ pulumi config set sshPublicKey [value]
We retrieve the values with config.ts for use in our main program.
config.ts
import * as azure from "@pulumi/azure";
import * as pulumi from "@pulumi/pulumi";

// Parse and export configuration variables for this stack.
const config = new pulumi.Config();
export const password = config.require("password");
export const location = config.get("location") || azure.Locations.EastUS;
export const nodeCount = config.getNumber("nodeCount") || 2;
export const nodeSize = config.get("nodeSize") || "Standard_D2_v2";
export const sshPublicKey = config.require("sshPublicKey");
export const resourceGroup = new azure.core.ResourceGroup("aks", { location });
In Azure, we have to create a service principal, which is an identity for accessing Azure resources. Note that in this example, the service principal password is stored as a secret in the project config file. Azure allocates a VPC when creating a Kubernetes cluster based on the values set in the config file. For example, the default number of nodes is two and uses Standard_D2_v2 virtual machine if these are not set in the config file. We also export the kubeconfig file which we can use with kubectl to communicate with our Kubernetes cluster.
cluster.ts
import * as azure from "@pulumi/azure";
import * as azuread from "@pulumi/azuread";
import * as k8s from "@pulumi/kubernetes";
import * as pulumi from "@pulumi/pulumi";
import * as config from "./config";

// Create the AD service principal for the K8s cluster.
const adApp = new azuread.Application("aks");
const adSp = new azuread.ServicePrincipal("aksSp", { applicationId: adApp.applicationId });
const adSpPassword = new azuread.ServicePrincipalPassword("aksSpPassword", {
    servicePrincipalId: adSp.id,
    value: config.password,
    endDate: "2099-01-01T00:00:00Z",
});

// Now allocate an AKS cluster.
export const k8sCluster = new azure.containerservice.KubernetesCluster("aksCluster", {
    resourceGroupName: config.resourceGroup.name,
    location: config.location,
    defaultNodePool: {
        name: "aksagentpool",
        nodeCount: config.nodeCount,
        vmSize: config.nodeSize,
    },
    dnsPrefix: `${pulumi.getStack()}-kube`,
    linuxProfile: {
        adminUsername: "aksuser",
        sshKey: {
            keyData: config.sshPublicKey,
        },
    },
    servicePrincipal: {
        clientId: adApp.applicationId,
        clientSecret: adSpPassword.value,
    },
});

// Expose a K8s provider instance using our custom cluster instance.
export const k8sProvider = new k8s.Provider("aksK8s", {
    kubeconfig: k8sCluster.kubeConfigRaw,
});
The code above is an abbreviated example of this AKS deployment on GitHub.
In this example, we store the configuration variables in the Pulumi.
$ pulumi config set password [value]
$ pulumi config set nodeCount [value]
$ pulumi config set nodeMachineType [value]
$ pulumi config set username [value]
$ pulumi config set masterVersion [value]
We retrieve the values with config.ts for use in our main program.
config.ts
import * as gcp from "@pulumi/gcp";
import { Config } from "@pulumi/pulumi";
import * as random from "@pulumi/random";

const config = new Config();

// nodeCount is the number of cluster nodes to provision. Defaults to 3 if unspecified.
export const nodeCount = config.getNumber("nodeCount") || 3;

// nodeMachineType is the machine type to use for cluster nodes. Defaults to n1-standard-1 if unspecified.
// See https://cloud.google.com/compute/docs/machine-types for more details on available machine types.
export const nodeMachineType = config.get("nodeMachineType") || "n1-standard-1";

// username is the admin username for the cluster.
export const username = config.get("username") || "admin";

// password is the password for the admin user in the cluster.
// If a password is not set, a strong random password will be generated.
export const password = config.get("password") || new random.RandomPassword(
    "password", { length: 20, special: true }).result;

// GKE master version
// Default to the latest available version.
export const masterVersion = config.get("masterVersion") ||
    gcp.container.getEngineVersions().then(it => it.latestMasterVersion);
We create the Kubernetes cluster using the variables we set in the configuration file. Note that for the nodes, we specify the oauthScopes, which are the Google API scopes available to all of the node VMs under the “default” service account. Because GKE uses gcloud to authenticate to the service, we have to create a kubeconfig file that uses gcloud. The kubeconfig file lets us communicate with our Kubernetes cluster.
import * as gcp from "@pulumi/gcp";
import * as k8s from "@pulumi/kubernetes";
import * as pulumi from "@pulumi/pulumi";
import { masterVersion, nodeCount, nodeMachineType, password, username } from "./config";

// Create the GKE cluster and export it.
export const k8sCluster = new gcp.container.Cluster("gke-cluster", {
    initialNodeCount: nodeCount,
    nodeVersion: masterVersion,
    minMasterVersion: masterVersion,
    masterAuth: { username, password },
    nodeConfig: {
        machineType: nodeMachineType,
        oauthScopes: [
            "https://www.googleapis.com/auth/compute",
            "https://www.googleapis.com/auth/devstorage.read_only",
            "https://www.googleapis.com/auth/logging.write",
            "https://www.googleapis.com/auth/monitoring",
        ],
    },
});

// Manufacture a GKE-style Kubeconfig. Note that this is slightly "different" because of the way GKE requires
// gcloud to be in the picture for cluster authentication (rather than using the client cert/key directly).
export const k8sConfig = pulumi.
    all([ k8sCluster.name, k8sCluster.endpoint, k8sCluster.masterAuth ]).
    apply(([ name, endpoint, auth ]) => {
        const context = `${gcp.config.project}_${gcp.config.zone}_${name}`;
        return `apiVersion: v1
clusters:
- cluster:
    certificate-authority-data: ${auth.clusterCaCertificate}
    server: https://${endpoint}
  name: ${context}
contexts:
- context:
    cluster: ${context}
    user: ${context}
  name: ${context}
current-context: ${context}
kind: Config
preferences: {}
users:
- name: ${context}
  user:
    auth-provider:
      config:
        cmd-args: config config-helper --format=json
        cmd-path: gcloud
        expiry-key: '{.credential.token_expiry}'
        token-key: '{.credential.access_token}'
      name: gcp
`;
    });

// Export a Kubernetes provider instance that uses our cluster from above.
export const k8sProvider = new k8s.Provider("gkeK8s", {
    kubeconfig: k8sConfig,
});
You can try out the code by following the complete tutorial.
Conclusion
This article covers how to set up a Kubernetes cluster on AWS, Azure, and GCP using Pulumi. Creating a cluster differs among cloud providers, but the process is generally the same. We defined configuration parameters such as node type, number of nodes, and passwords to instantiate the cluster then exported a kubeconfig file that we can use with kubectl.
This is the first in a series of articles on using infrastructure as code for Kubernetes. In the next article, we’ll cover basic Kubernetes objects such as pods, services, and volumes. We’ll also cover higher-level abstractions such as deployments and replicasets. Stay tuned! In the meantime, learn more about Pulumi:
- Watch educational content on Pulumi TV
- Learn more about Pulumi’s support for Kubernetes
- Practice Kubernetes Tutorials using Pulumi
