
Running models from Hugging Face on Amazon SageMaker is a popular deployment option for AI/ML services. While the SageMaker console allows for provisioning these cloud resources, this deployment pattern is labor intensive to document and vulnerable to human errors when reproducing as a regular operations practice. Infrastructure as Code (IaC) offers a reliable and easy to duplicate deployment practice. By developing this IaC with Pulumi, practitioners can choose to write their infrastructure code in Python and seamlessly develop both AI application code and IaC code in the same language.
In this short tutorial we will deploy a publicly available Meta AI LlaMa 2 based model from Hugging Face, on Amazon SageMaker. Then we will test it with a natural language prompt using a short Python script.
Pulumi makes AI/ML Easy?
We will use the sagemaker-aws-python Pulumi Template to bootstrap our Python SageMaker IaC. Templates allow you to quickly bootstrap new Pulumi projects from a working scaffold which you can then customize further to your needs. Out of the box, this template provisions Amazon IAM Roles to assign SageMaker privileges, CloudWatch alarms to alert in case of latency or error spikes for the endpoint, and of course a Meta AI LlaMa 2 based LLM (NousResearch/Llama-2-7b-chat-hf) hosted on Hugging Face.
Requirements
- Python3 (3.9+)
- Pulumi CLI
- Pulumi Account
- AWS CLI
- AWS Credentials (pre-configured)
Instructions
1. Login to Pulumi Cloud and initialize stack
Let’s begin by logging into Pulumi Cloud:
# There are many ways to store Pulumi state, here we use Pulumi Cloud
# Other state backends include S3, local file, and more
pulumi login
If you’re unsure of which Pulumi state backend you’re using, you can check by running
pulumi whoami(orpulumi whoami -vfor more info).
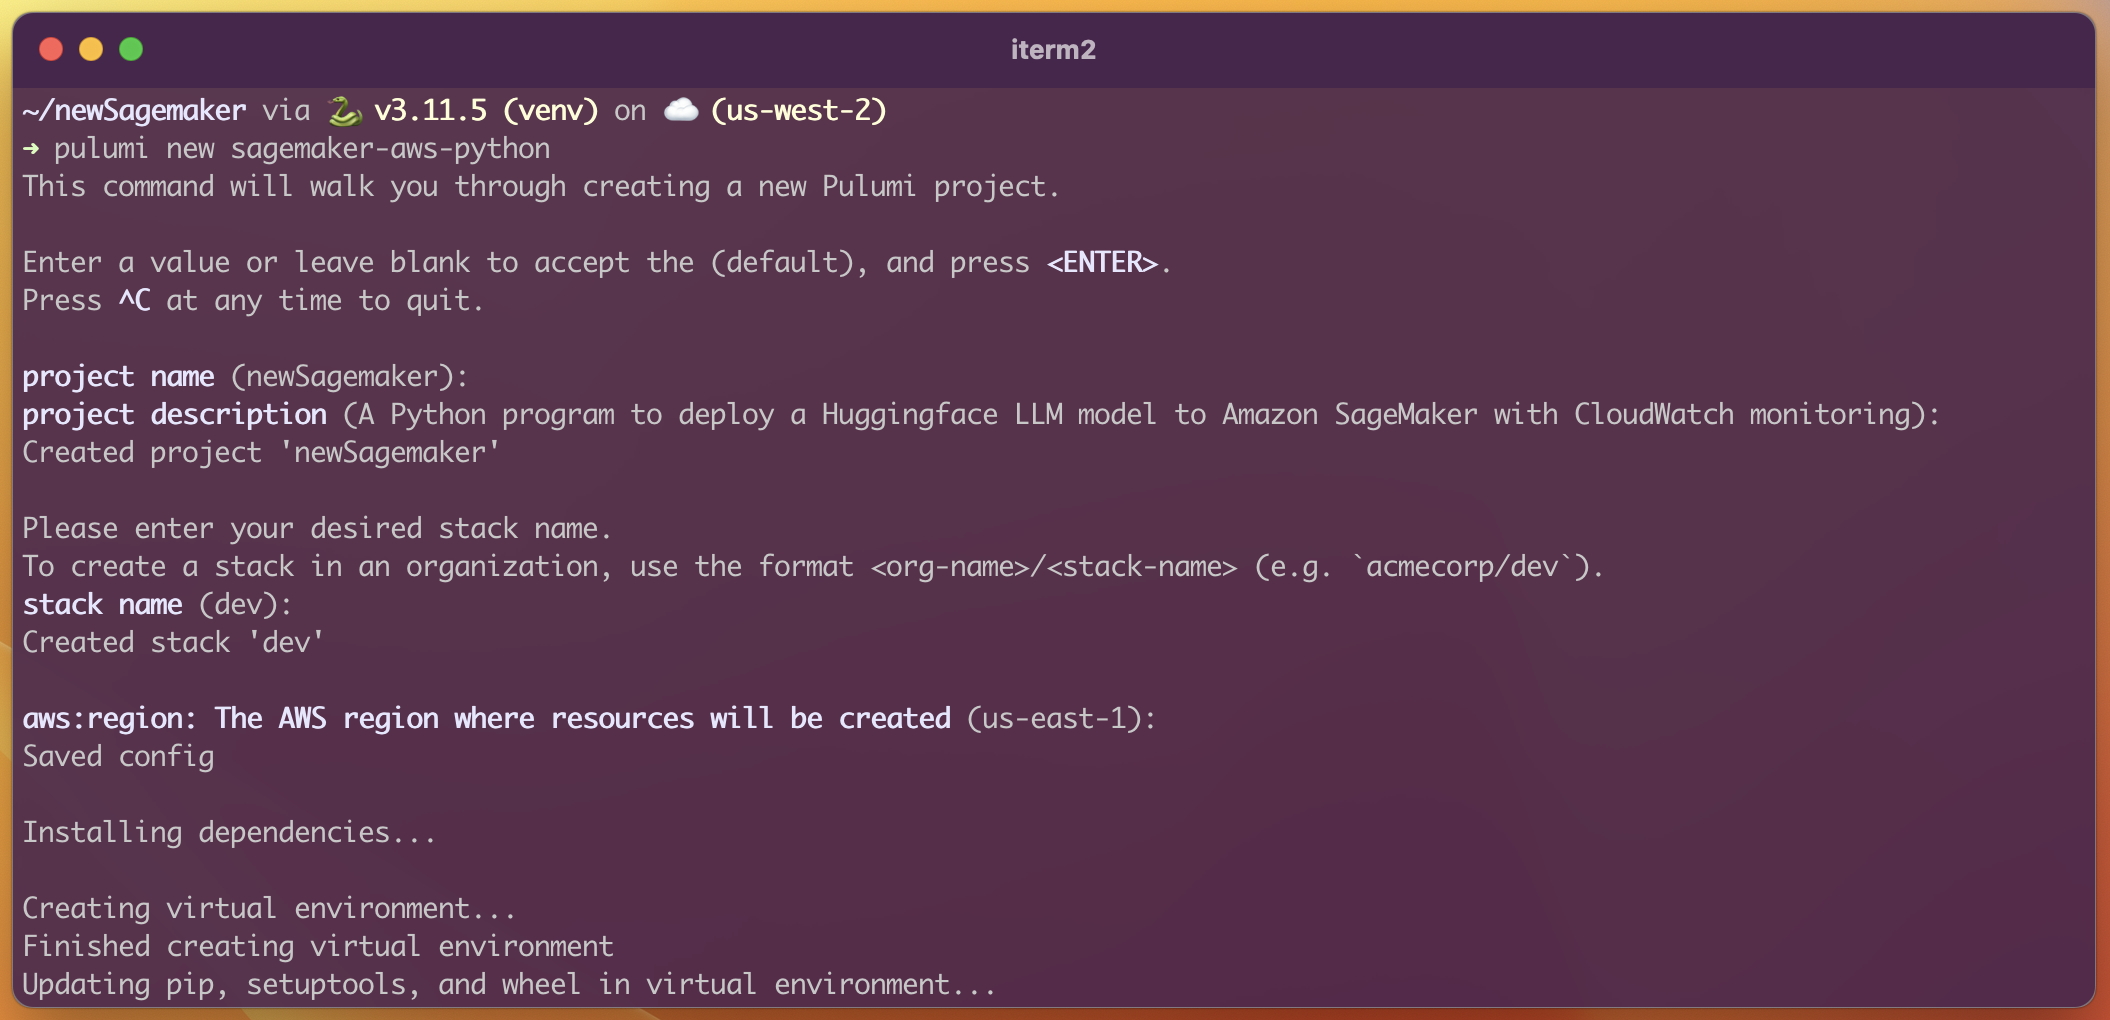
2. Prepare a new Pulumi project
Here we create our new Pulumi project directory and populate it from the sagemaker-aws-python Pulumi template
# Create a new directory & change directories into it
mkdir newSageMaker && cd newSageMaker

# Start your project from the sagemaker-aws-python template
# Follow along with the prompts to create your new project and initialize a stack
pulumi new sagemaker-aws-python
While creating a new project from the sagemaker-aws-python Pulumi template, you will be prompted for a project name, description, stack name, and Amazon Web Service Region. You can proceed with defaults, or supply your own.
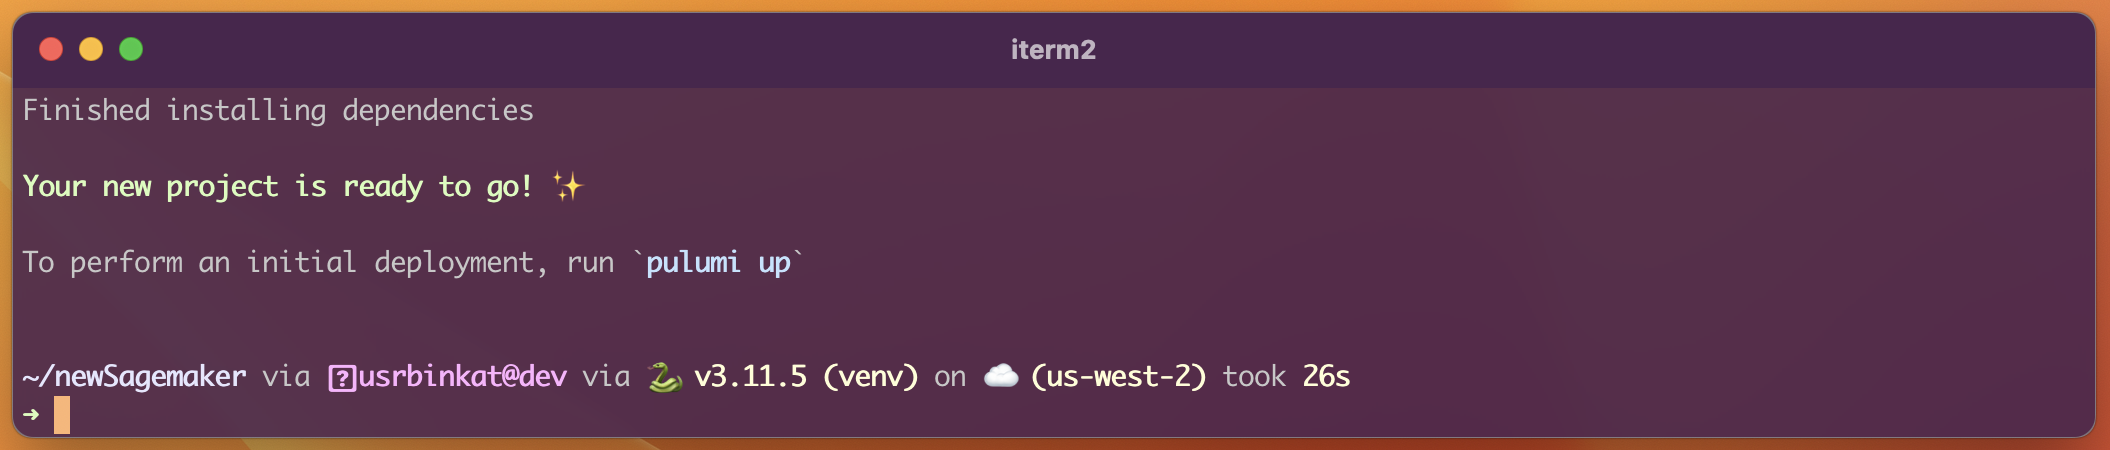
After responding to all prompts, the pulumi new command will proceed to setup a Python Virtual Environment (venv) and download all dependencies into the venv.
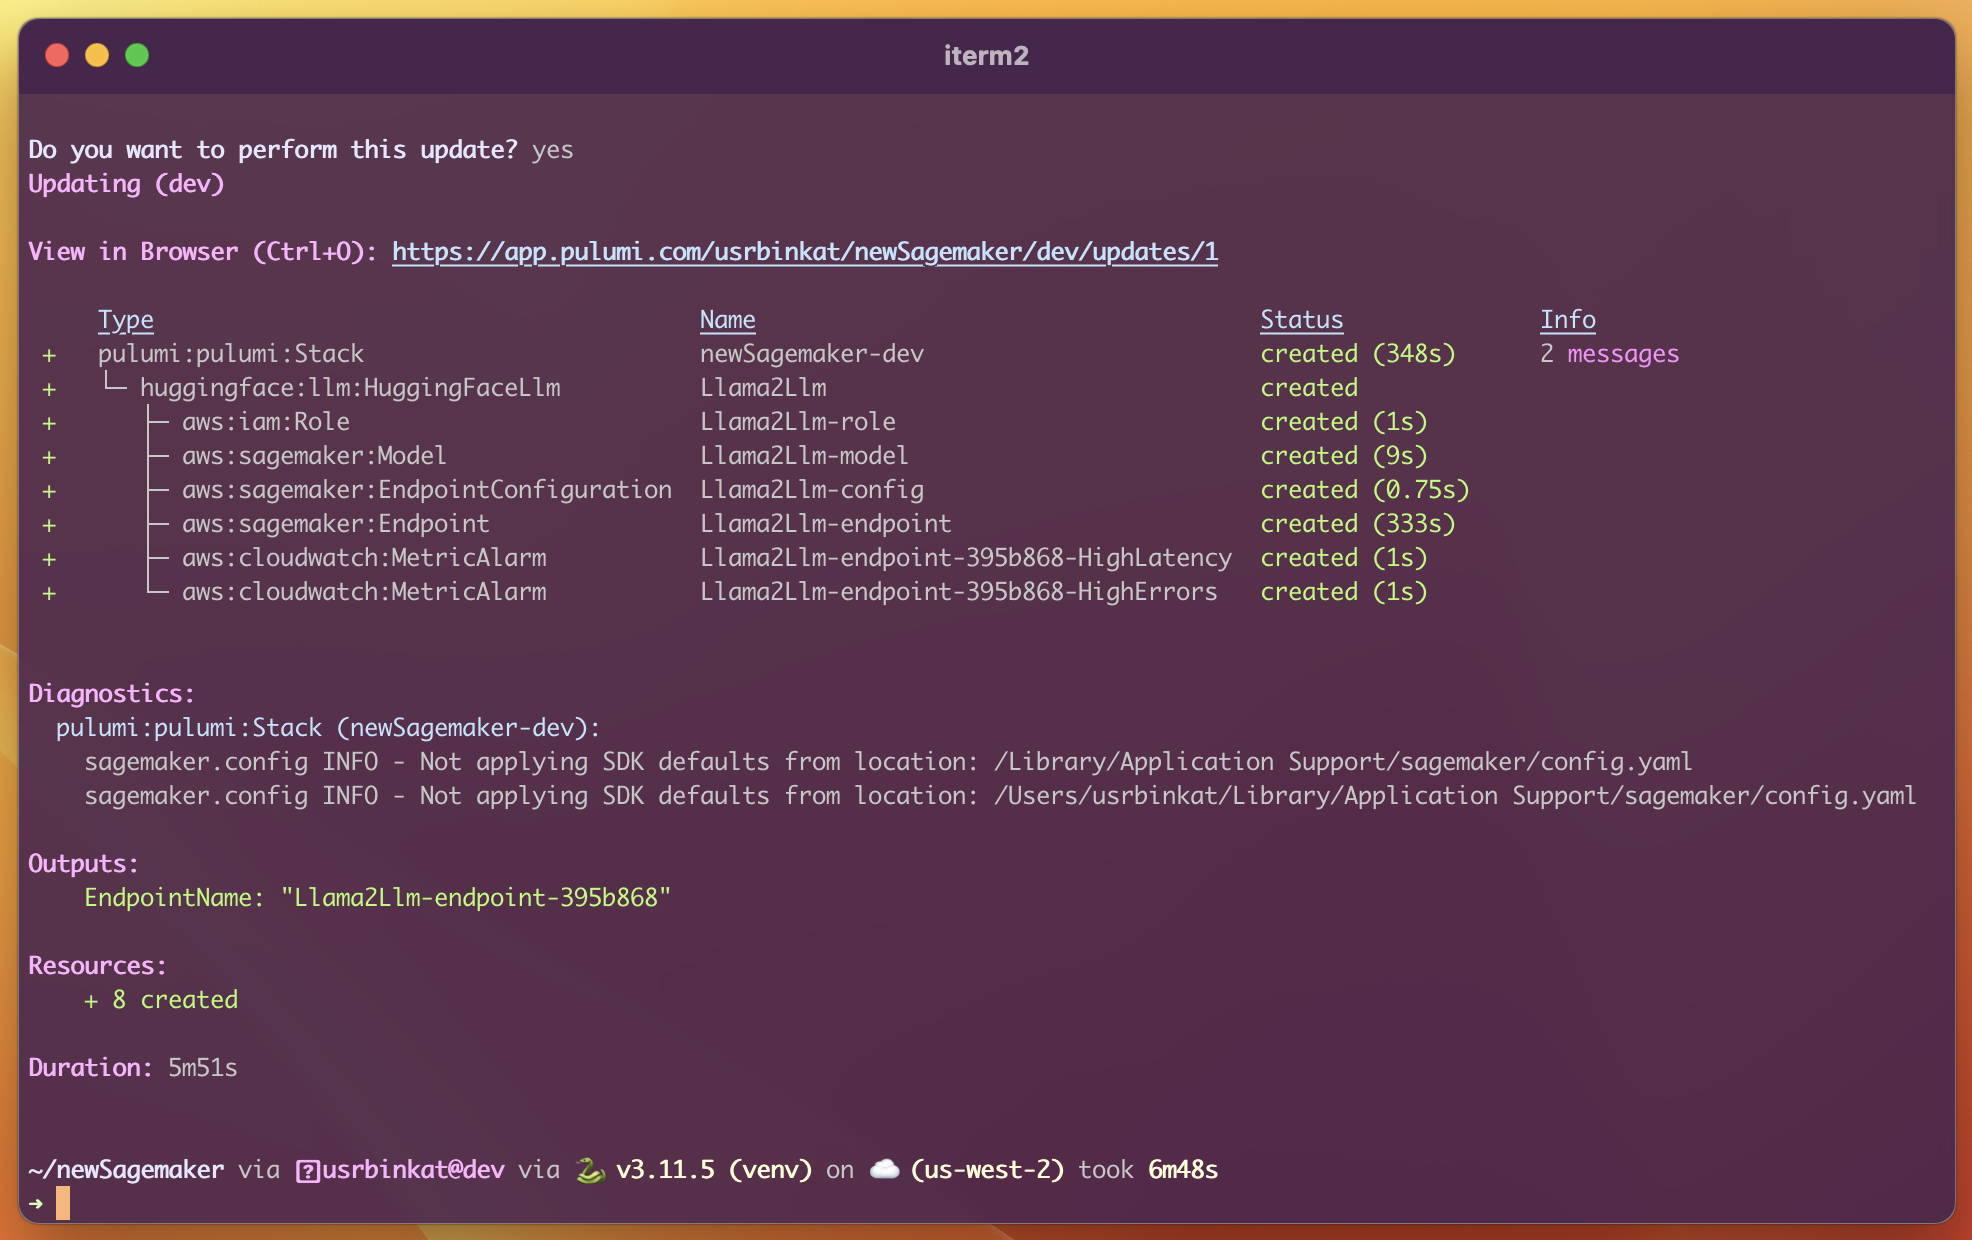
3. Deploy your model as a new SageMaker endpoint
This step may take between 10 and 20 minutes while Amazon builds your infrastructure and deploys the configured model. You can follow along in the console as resources are provisioned, or open the link displayed in terminal to view the deployment status and other stack information in Pulumi Cloud.
pulumi up
4. Try your new SageMaker endpoint
Once your stack has finished deploying, use this rudimentary Python snippet to test the deployed SageMaker endpoint.
NOTE: Notice that we are using
us-east-1in this script. Be sure to change the region in Python to match the region you deployed the SageMaker endpoint into.
First, save the following python snippet as test.py:
import json, boto3, argparse

def main(endpoint_name):
    client = boto3.client('SageMaker-runtime', region_name='us-east-1')
    payload = json.dumps({"inputs": "In 3 words, name the biggest mountain on earth?"})
    response = client.invoke_endpoint(EndpointName=endpoint_name, ContentType="application/json", Body=payload)
    print("Response:", json.loads(response['Body'].read().decode()))

if __name__ == "__main__":
    parser = argparse.ArgumentParser()
    parser.add_argument("endpoint_name")
    main(parser.parse_args().endpoint_name)
Once you have the test.py script created, source the Python virtual environment named venv (created automatically by Pulumi) and run the script using the name of your new endpoint, taken directly from the Pulumi stack output:
# Source the venv
# On Linux & MacOS
source venv/bin/activate

# Execute test.py
python3 test.py $(pulumi stack output EndpointName)

5. Cleanup all resources
Finally, when you’re finished with testing your Hugging Face model on SageMaker, you can easily clean up un-used resources with one easy command.
pulumi destroy
Conclusion
To recap, in a few commands, we created a new Pulumi Python project from a ready-to-roll template, deployed an LLM endpoint on Amazon SageMaker, and tested it with a short Python script to generate a response from our model!
AI and ML is rapidly becoming a necessity with every new day. It may appear daunting or out of reach at first glance, but with the power of IaC written as Pulumi Python programs, getting started has never been easier.
If you followed along then tell us how it worked out for you! We would love to know what you are looking forward to, or if you have ideas for future installments of the Pulumi Python #PulumiMLOps series!
Join us on Twitter, and on the Pulumi Community Slack to decide what #PulumiMLOps we take on next!


