
Building low-code LLM applications just got easier! With Flowise, LocalAI, and Pulumi, you can quickly create, deploy, and manage AI-powered workflows on AWS EKS—without writing complex code.
In this guide, you’ll learn how to:
- Set up a low-code LLM application using Flowise & LocalAI
- Deploy it on AWS EKS with Pulumi & TypeScript
- Create a chatbot workflow and expose it via API
Flowise simplifies LLM orchestration with a drag-and-drop interface, while LocalAI enables local inference without requiring a GPU. Pulumi streamlines cloud infrastructure deployment with just a few lines of code.
Whether you’re a developer looking to experiment with LLMs on AWS or an AI enthusiast exploring serverless AI applications, this step-by-step tutorial will guide you through the entire process. Let’s dive in!
Flowise: The Low-Code Tool for LLM Orchestration
Flowise is an open-source low-code/node tool for developers to build customized LLM orchestration workflows and AI agents. The low-code approach helps developers to cut down on the time and effort required to build LLM applications by delivering quick iterations to from testing to production. In Flowise nodes are referred to as integrations, and you can build a customized LLM orchestration flow, chatbot, or AI agent by dragging and dropping these integrations. There are plenty of ready-to-use integrations available in Flowise, like LangChain or LlamaIndex.
LocalAI: Open-Source LLM Inference for AWS & On-Prem

LocalAI is a free and Open Source alternative to OpenAI. It acts as a drop-in replacement for OpenAI’s REST API that is fully compatible with the OpenAI API specifications for local inference. It allows you to run LLMs, generate images, or audio locally or on-prem with consumer grade hardware supporting multiple model families and architectures. And the clue: It does not require a GPU, it runs on CPU only (optional GPU acceleration is still available).
Once LocalAI loaded the model the first time, it keeps it in memory for faster inference. It does not shell-out, but use bindings to the model for faster inference and better performance. It is a great way to test and benchmark different models directly on your local machine or on-prem. Additionally, you are not sending your data to a third-party service, which may contain sensitive information. This is a big advantage, especially in large enterprises or in the public sector where data privacy is a big concern.
Deploying Flowise & LocalAI on AWS with Pulumi
Covered a lot of the basics, but let’s get started with the real thing. To quickly get started, you can use the example project from the Pulumi examples repository.
The AWS architecture of the example project is as follows:
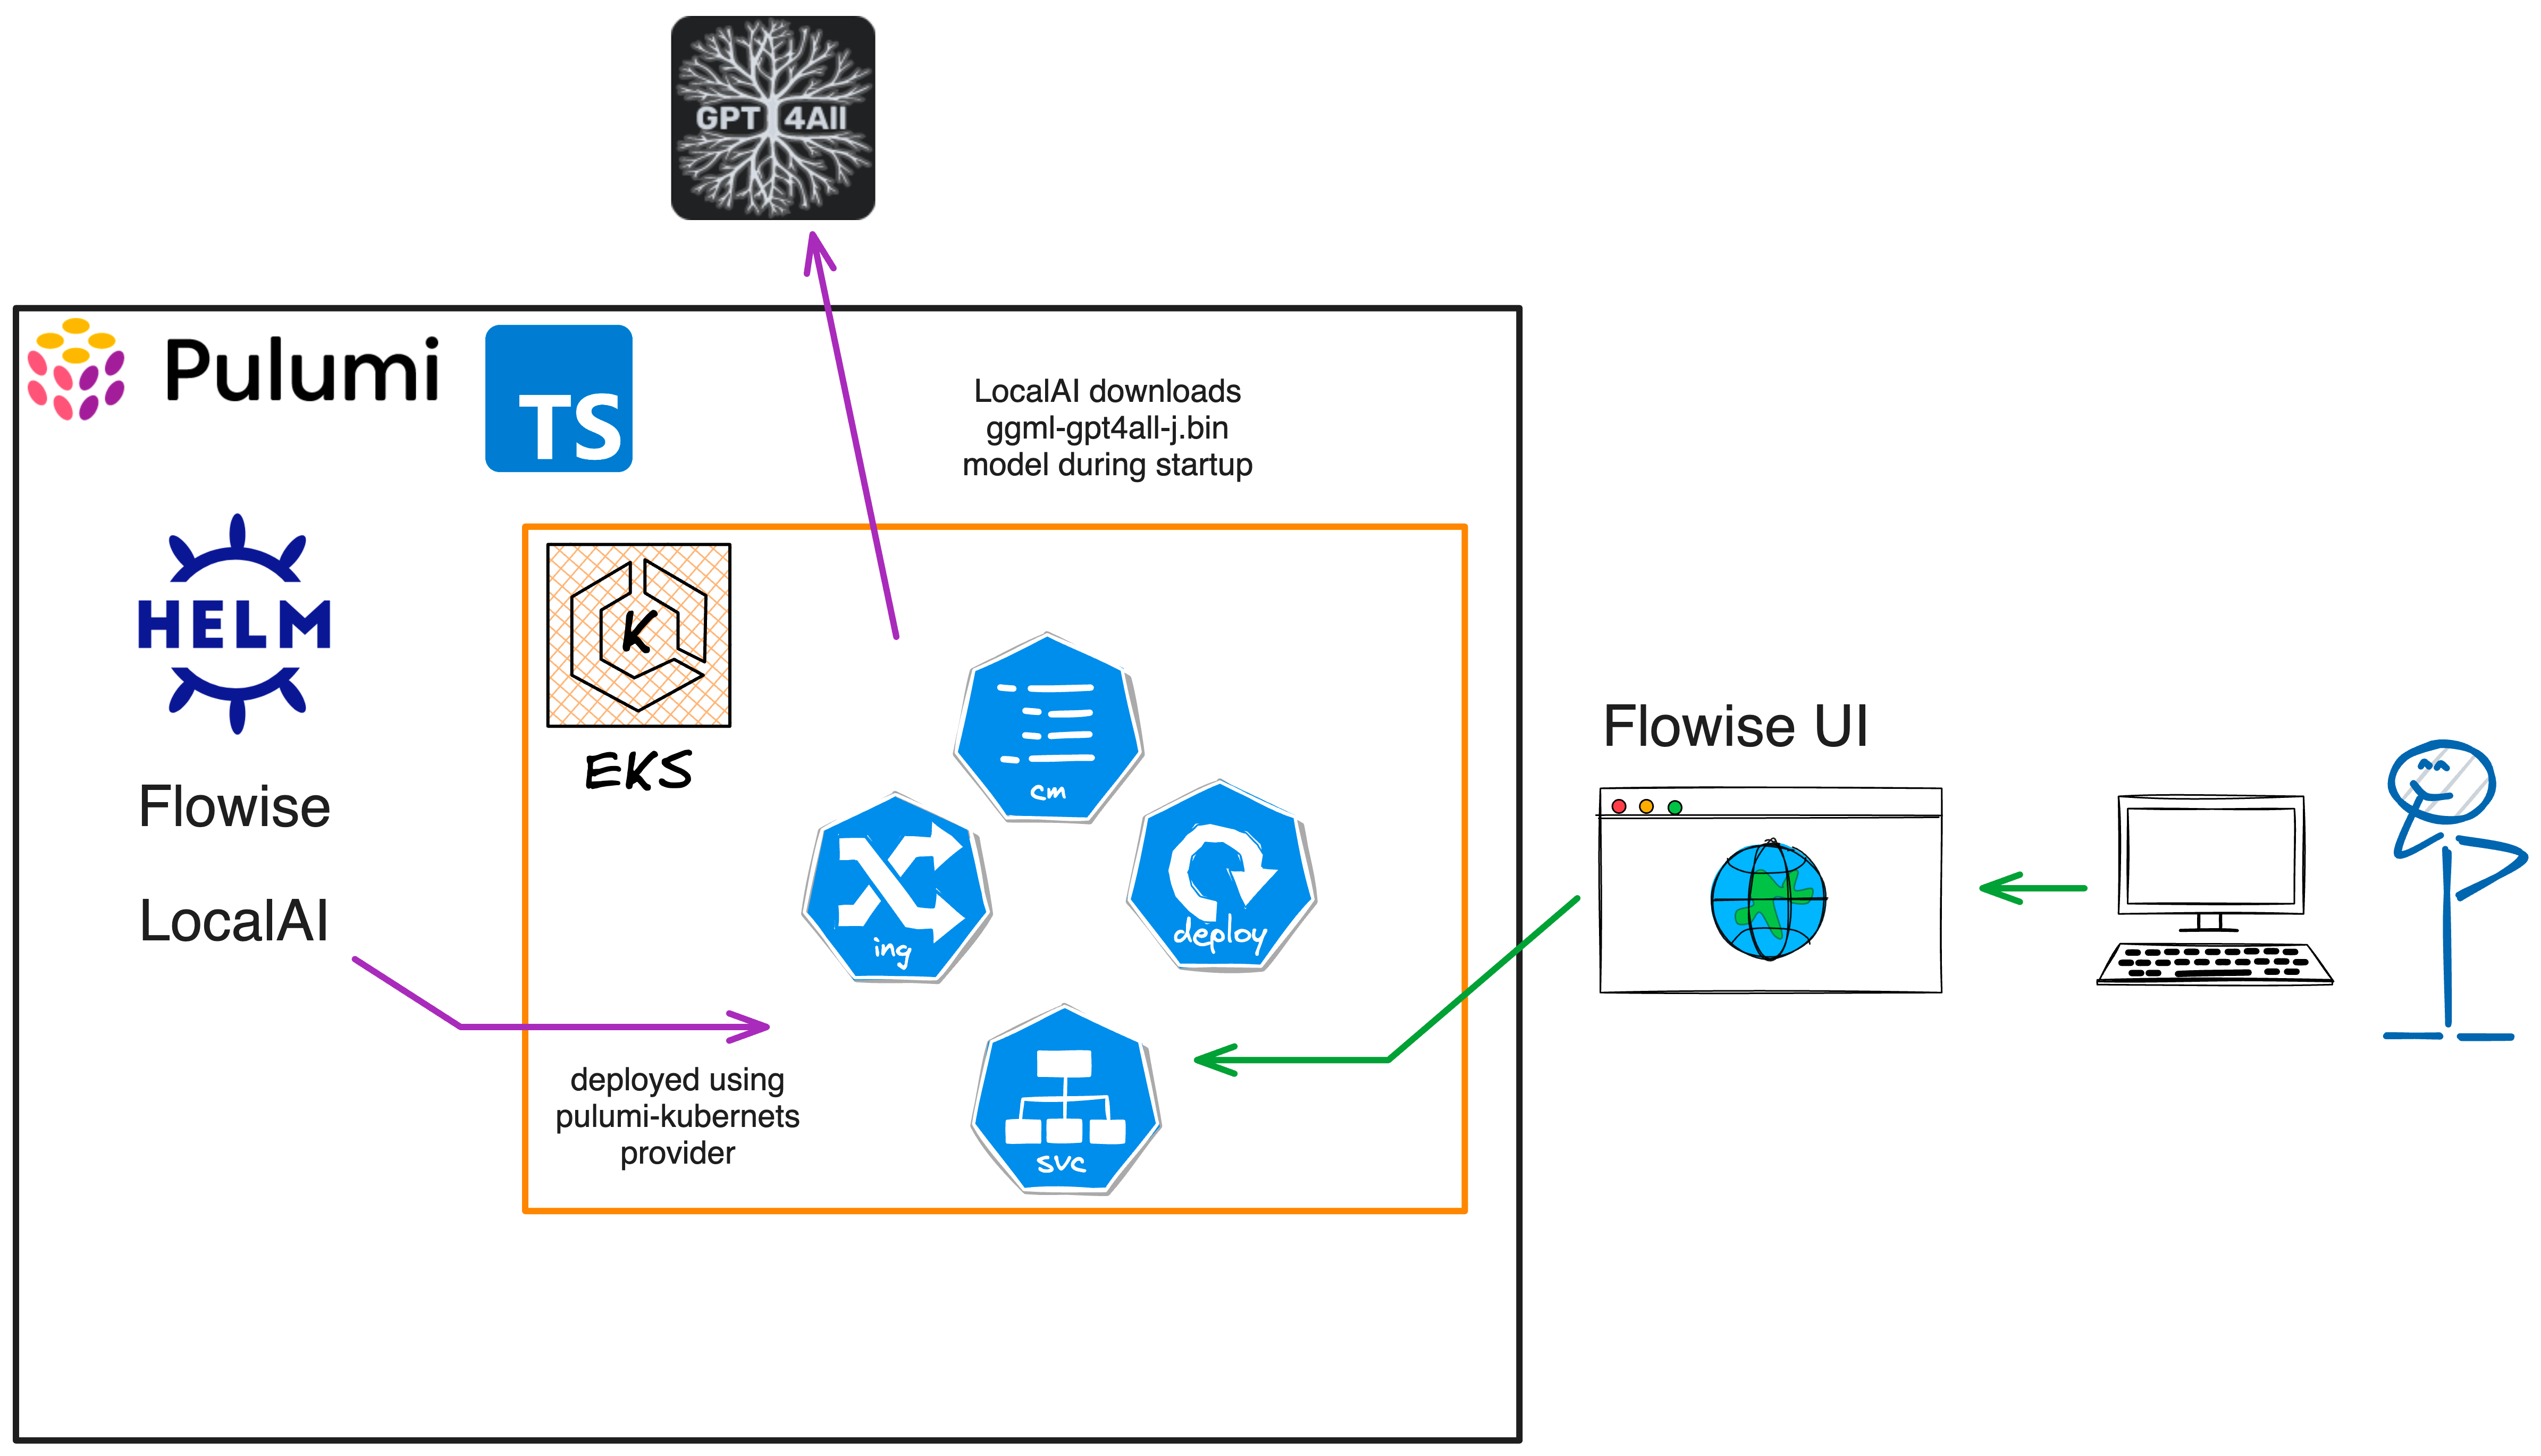
The Pulumi AWS architecture consists of the following resources:
- An EKS cluster with a managed node group.
- EBS volume support for the EKS cluster to store the downloaded LocalAI models.
- Deployment of the Helm chart for Flowise and LocalAI.
- A VPC, two subnets in different availability zones, and an internet gateway, and security groups for the EKS cluster.
As programming language, I will use TypeScript, but you can use any other language supported by Pulumi. Rewriting the example code should be straightforward. Feel free to reach out to us if you need help.
Create a Flowise Chatbot
Our first Flowise workflow will be a simple chatbot. This simple LLM chain will be stateless (no memory) with a prompt template and our LocalAI LLM model attached.
Deploy the Infrastructure with Pulumi
First clone the example repository, and head to the aws-ts-localai-flowise
directory:
git clone https://github.com/pulumi/examples.git
cd examples/aws-ts-localai-flowise
To deploy the infrastructure with Pulumi, you can use the following command:
pulumi login # if you haven't logged in yet
pulumi up
Next to the definition of the AWS EKS cluster, the Pulumi program uses the pulumi-kubernetes provider to deploy the
Helms charts for Flowise and LocalAI.
// imports omitted for brevity
import * as k8s from "@pulumi/kubernetes";

// code omitted for brevity

// Manually creation of the Kubernetes provider, with the kubeconfig from the EKS cluster and the enableServerSideApply set to true
const provider = new k8s.Provider("k8s", {
    kubeconfig: cluster.kubeconfigJson,
    enableServerSideApply: true,
});

// Deploy the Helm charts for LocalAI
const localai = new k8s.helm.v3.Release("local-ai", {
    chart: "local-ai",
    version: "3.2.0",
    repositoryOpts: {
        repo: "https://go-skynet.github.io/helm-charts",
    },
    forceUpdate: true,
    namespace: "local-ai",
    createNamespace: true,
    values: {
        deployment: {
            image: {
                repository: "quay.io/go-skynet/local-ai",
                tag: "latest",
            },
            env: {
                debug: "true",
                context_size: 512,
                modelsPath: "/models",
            },
        }, resources: {
            requests: {
                cpu: "8",
                memory: "32Gi",
            },
        },
        models: {
            list: [
                {
                    url: "https://gpt4all.io/models/ggml-gpt4all-j.bin",
                    name: "ggml-gpt4all-j",
                },
            ],
        },
        persistence: {
            models: {
                size: "50Gi",
                storageClass: "gp2",
                accessModes: "ReadWriteOnce",
            },
            output: {
                size: "10Gi",
                storageClass: "gp2",
                accessModes: "ReadWriteOnce",

            },
        },
    },
}, {
    provider: provider,
});

// Deploy the Helm charts for Flowise
const flowise = new k8s.helm.v3.Release("flowise", {
    chart: "flowise",
    version: "2.5.0",
    repositoryOpts: {
        repo: "https://cowboysysop.github.io/charts/",
    },
    namespace: "flowise",
    createNamespace: true,
}, {
    provider: provider,
});
Depending on your AWS region, the deployment can take a few minutes. Once the deployment is complete, you will have
access to kubeconfig file to access the EKS cluster for the next steps.
To retrieve the kubeconfig file, you can use the following command:
pulumi stack output kubeconfig --show-secrets > kubeconfig.yaml
Now you can use the kubeconfig.yaml file either with kubectl or with the KUBECONFIG environment variable to access
the EKS cluster.
As we are not using a load balancer, we will use the kubectl port-forward command to access the Flowise UI. The
command is:
kubectl port-forward svc/$(kubectl get svc -n flowise | grep flowise | awk '{print $1}') 3000:3000 -n flowise
Start modeling the Chatbot with Flowise
Open the Flowise UI in your browser with the following URL: http://localhost:3000 and click
the Chartflows menu item in the left sidebar. And then click the blue button + Add New
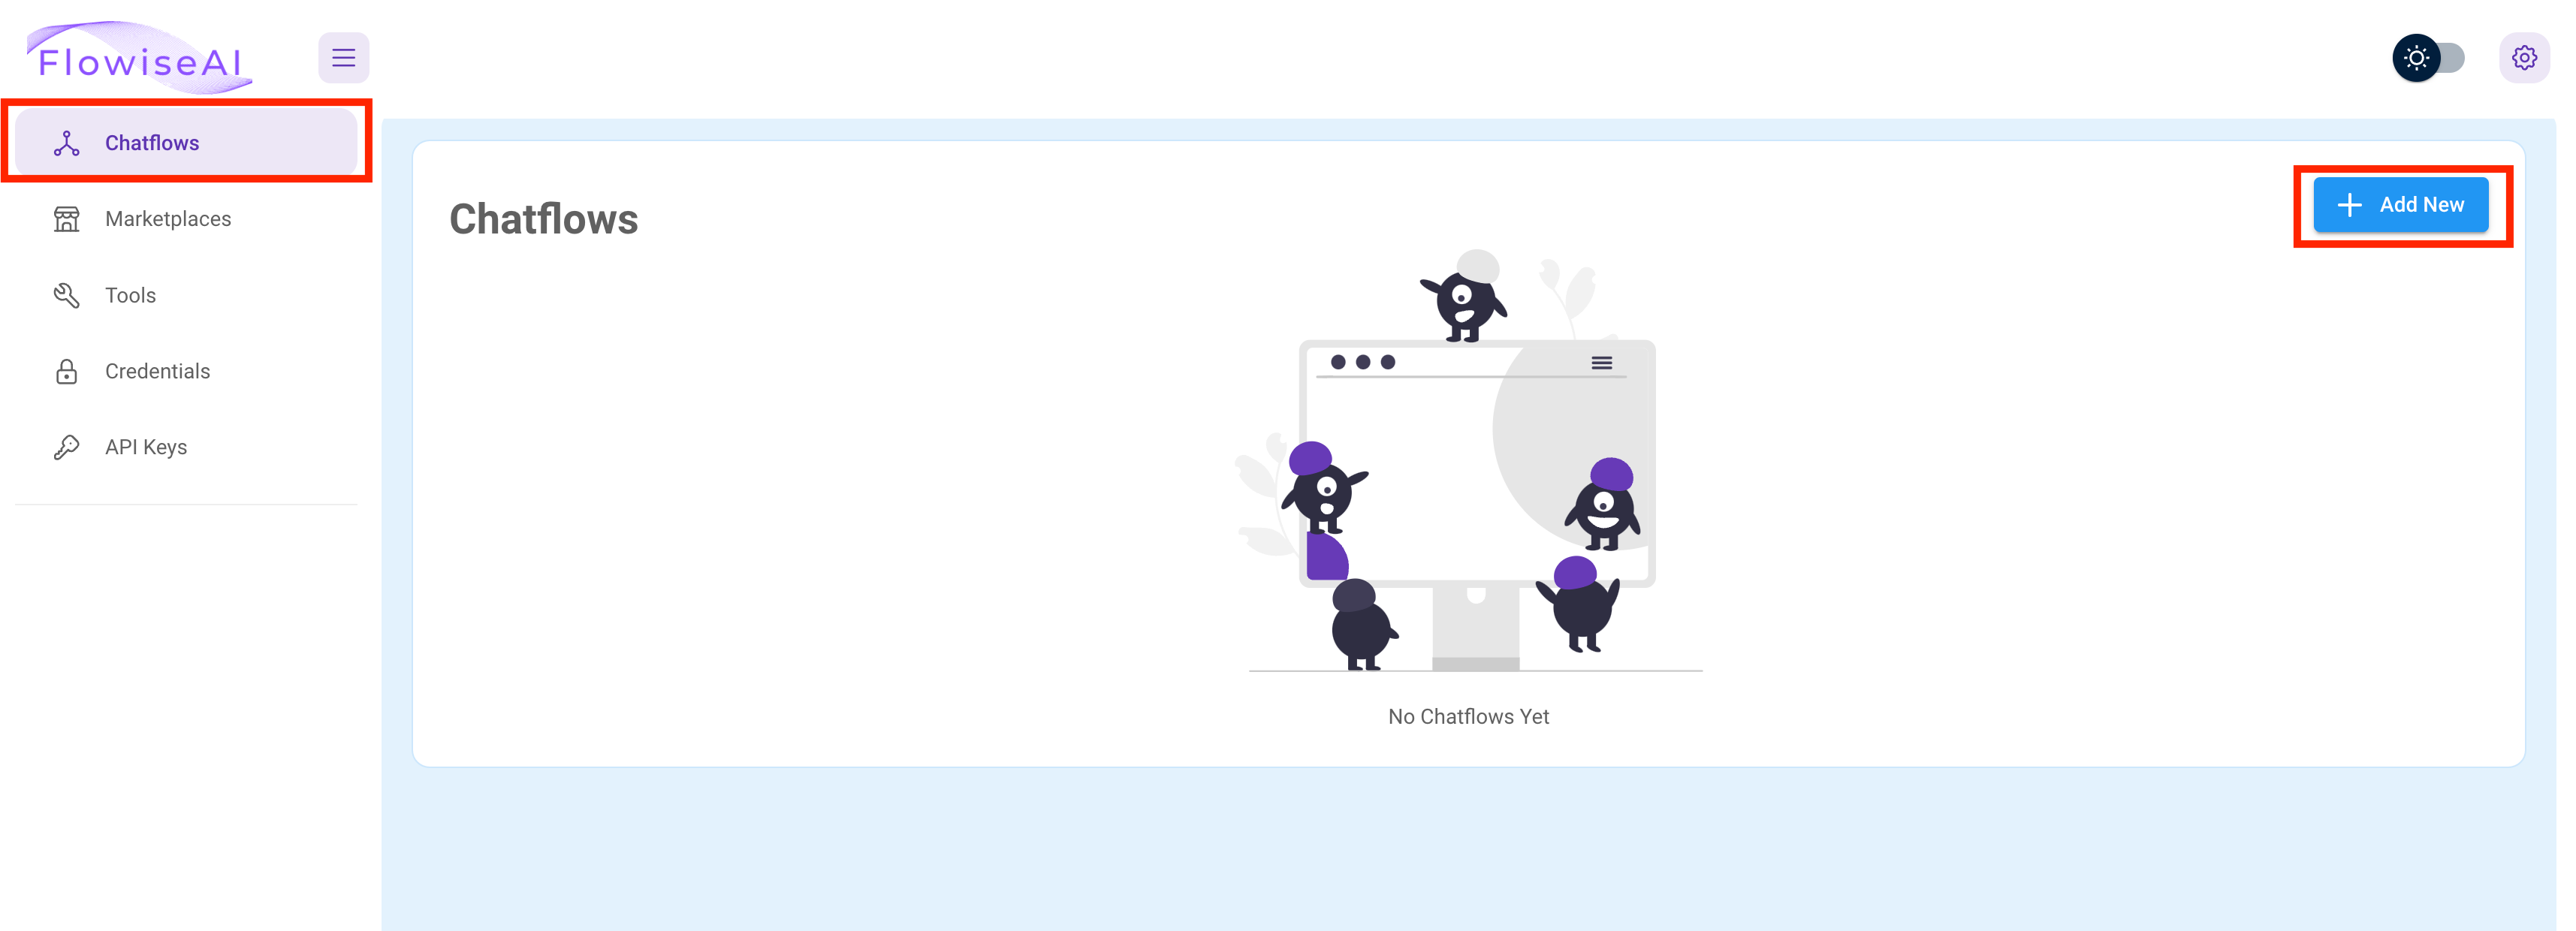
This should open a new window where you can drag and drop the nodes to the main window. To display
the available nodes, click the + button on the left.
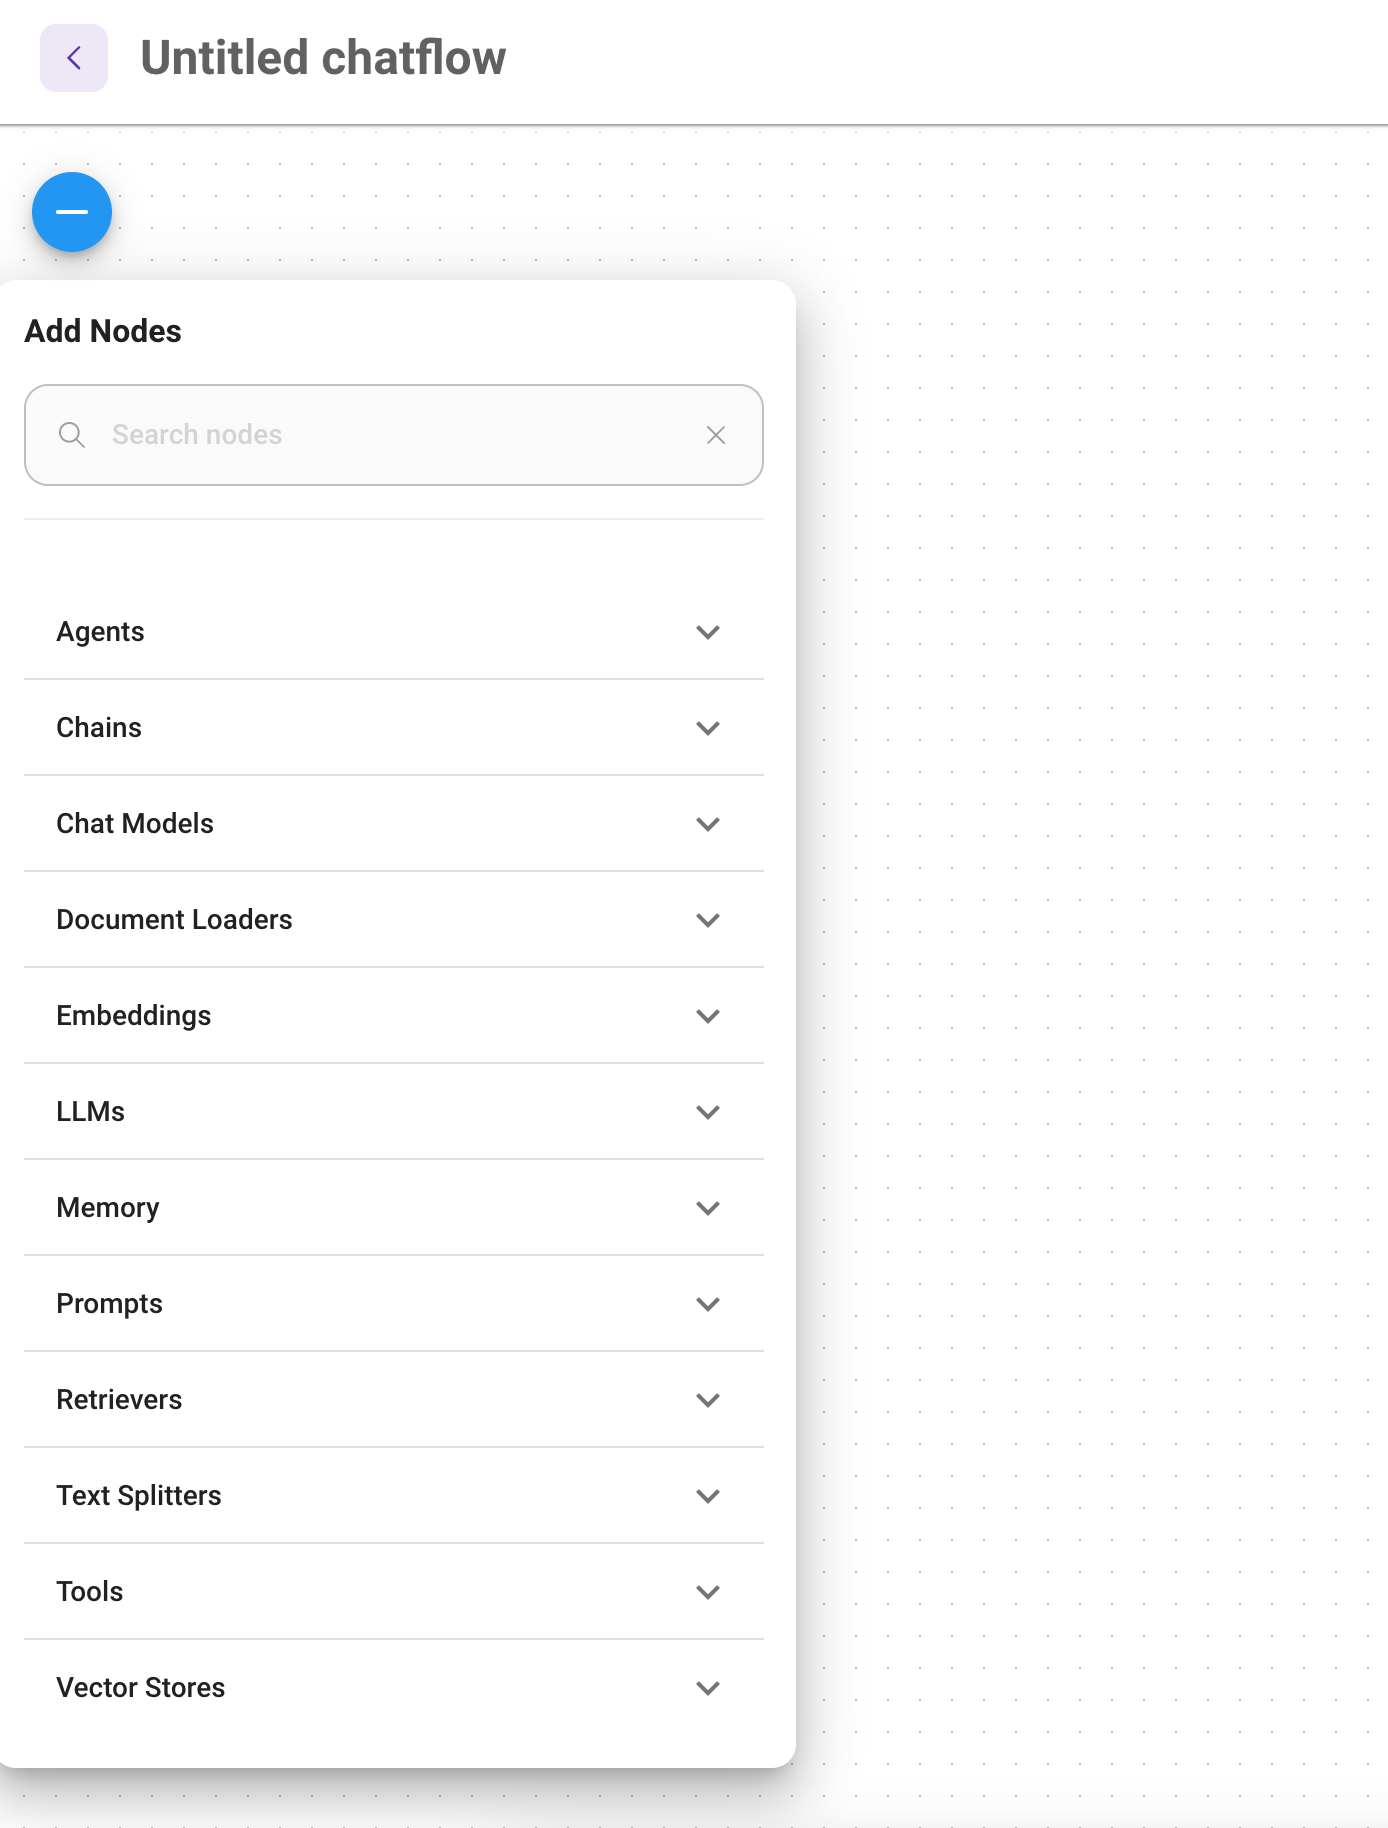
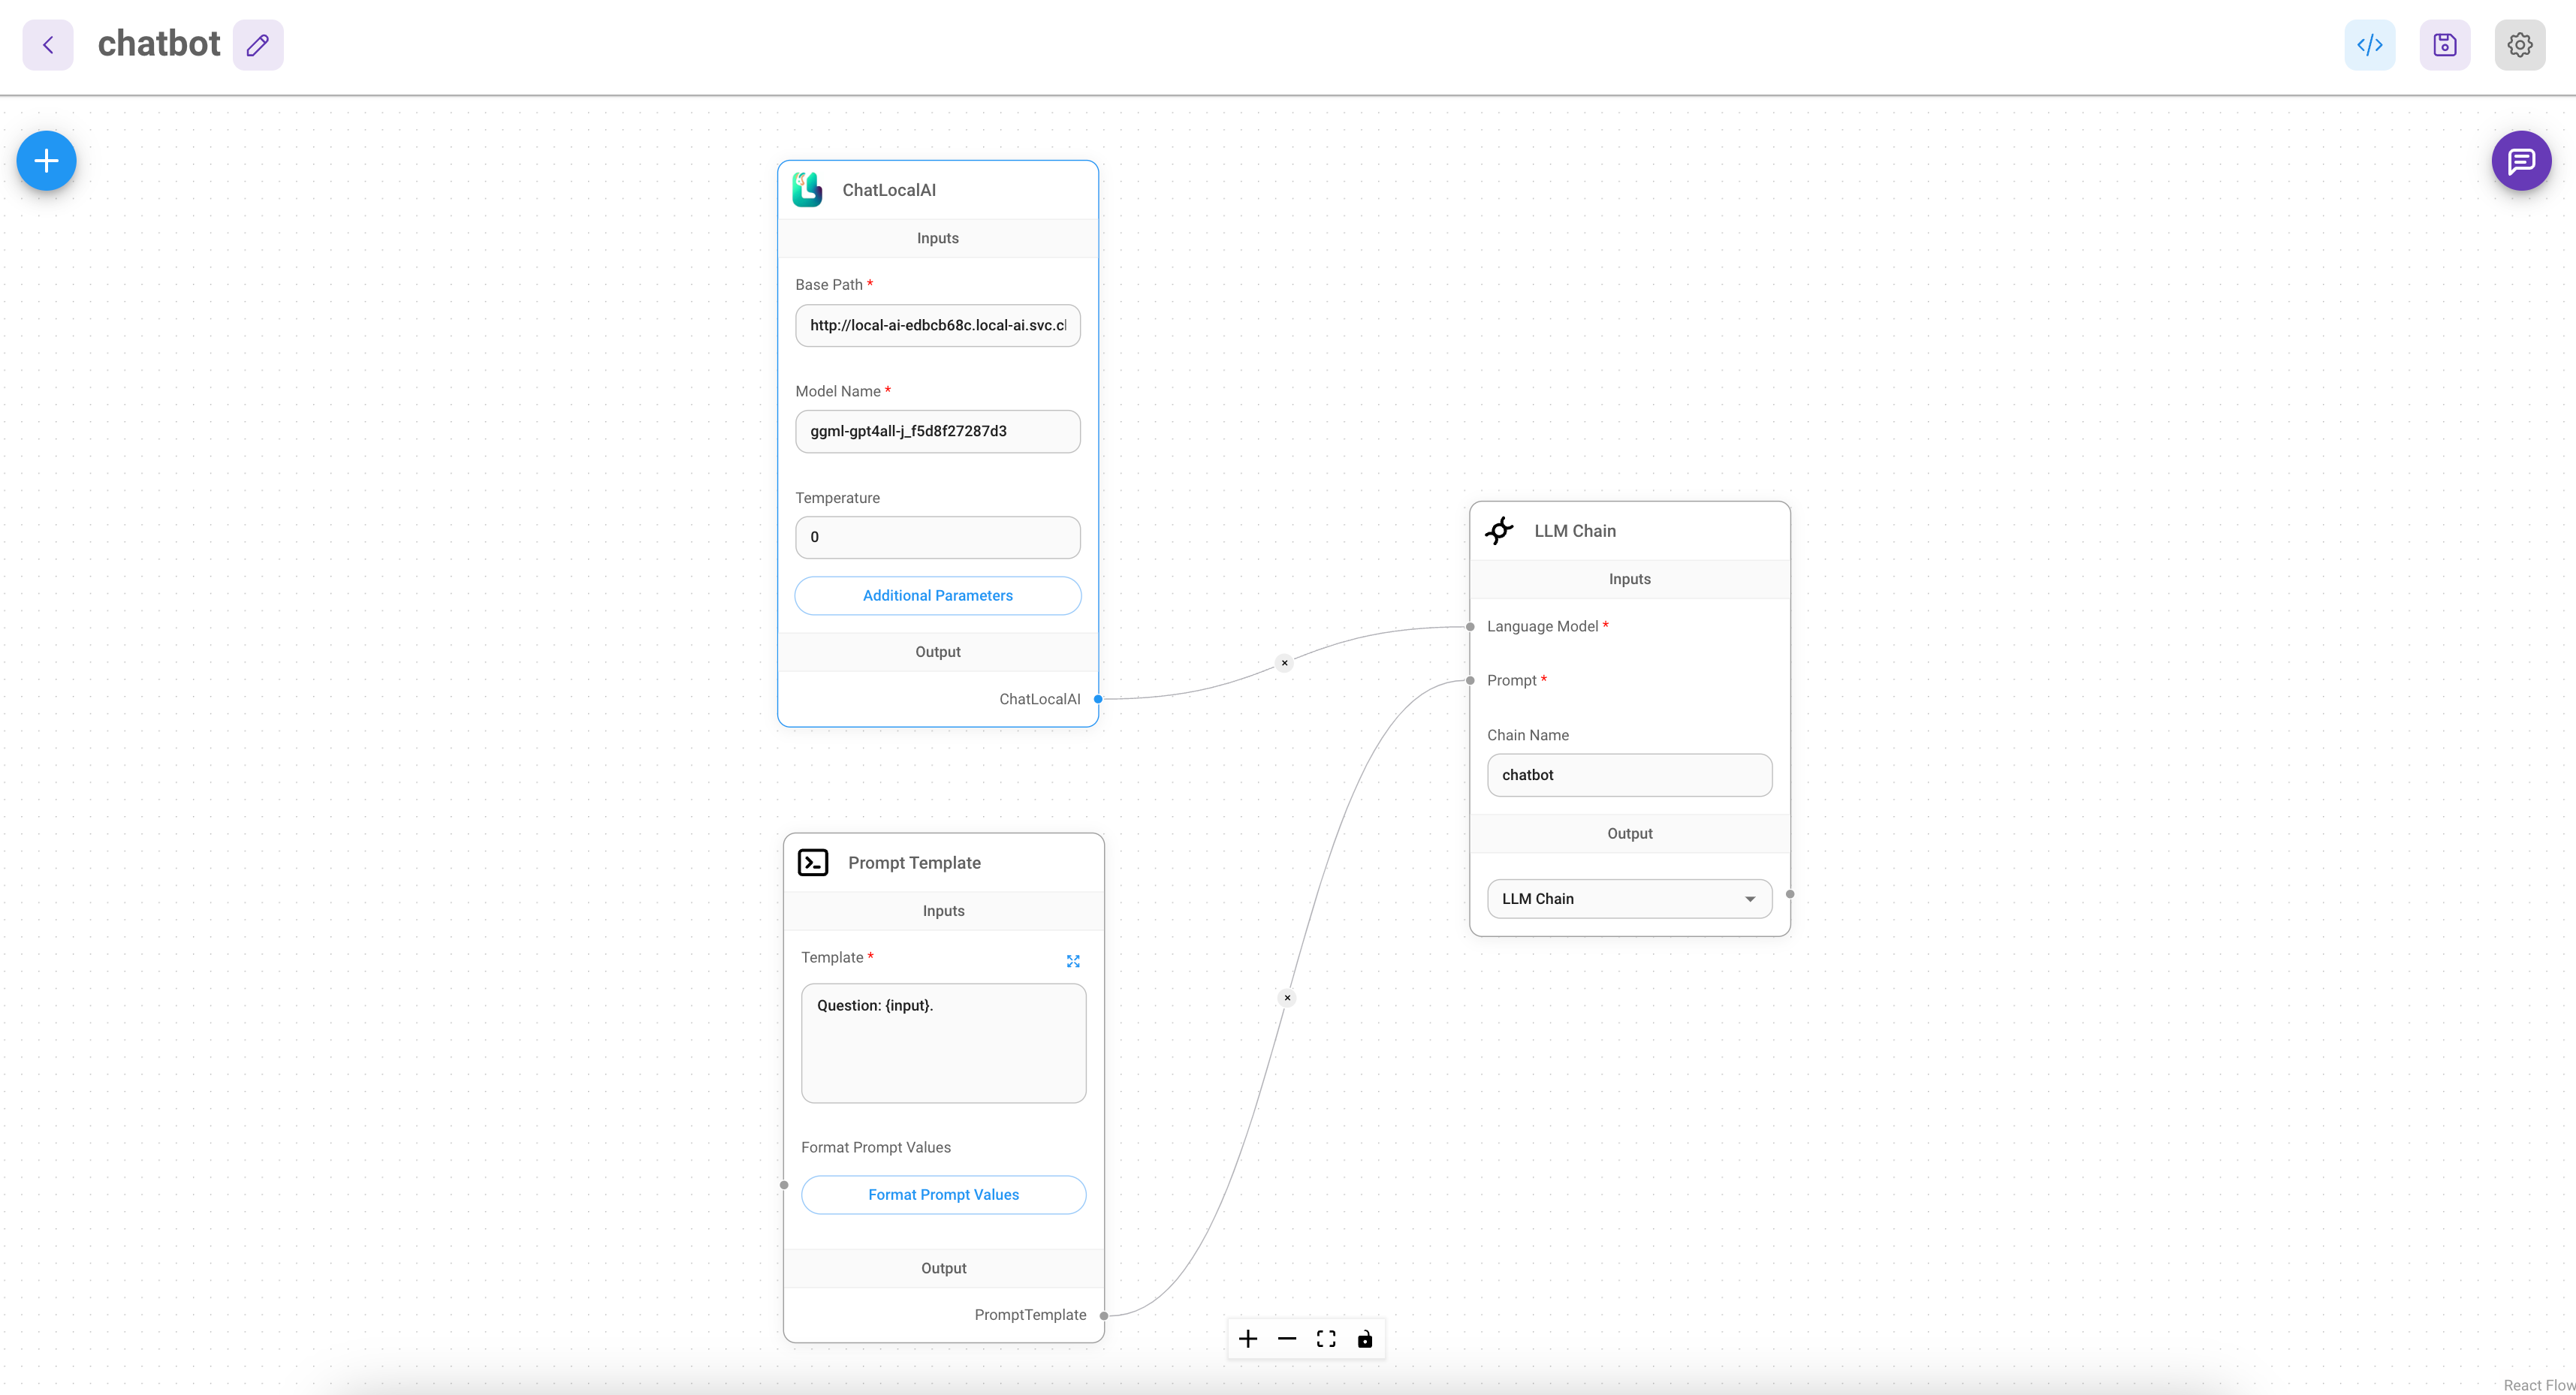
First we add our LocalAI node to the chartflow. Look under Chat Models for the ChatLocalAI node and drag it to the
main canvas.
Fill out the form with the following values:

Base Path: This should be name ouf your
LocalAIKubernetes service. You can find it with the following command:kubectl get svc -n local-aiAnd should be in the form of
http://<svc-name>.local-ai.svc.cluster.local:80Model Name: The name of the model you want to use. You can find the available models with the following command:
kubectl exec -it $(kubectl get pods -n local-ai | grep local-ai | awk '{print $1}') -n local-ai -- curl http://localhost:8080/models | jq '.data[0].id'This will return the name of the model you can use. For example
ggml-gpt4all-j_f5d8f27287d3Temperature: The temperature of the model. This is a float value between 0 and 1. The higher the value, the more creative the model will be. The lower the value, the more conservative the model will be. Keep the default value of
0.9for now.
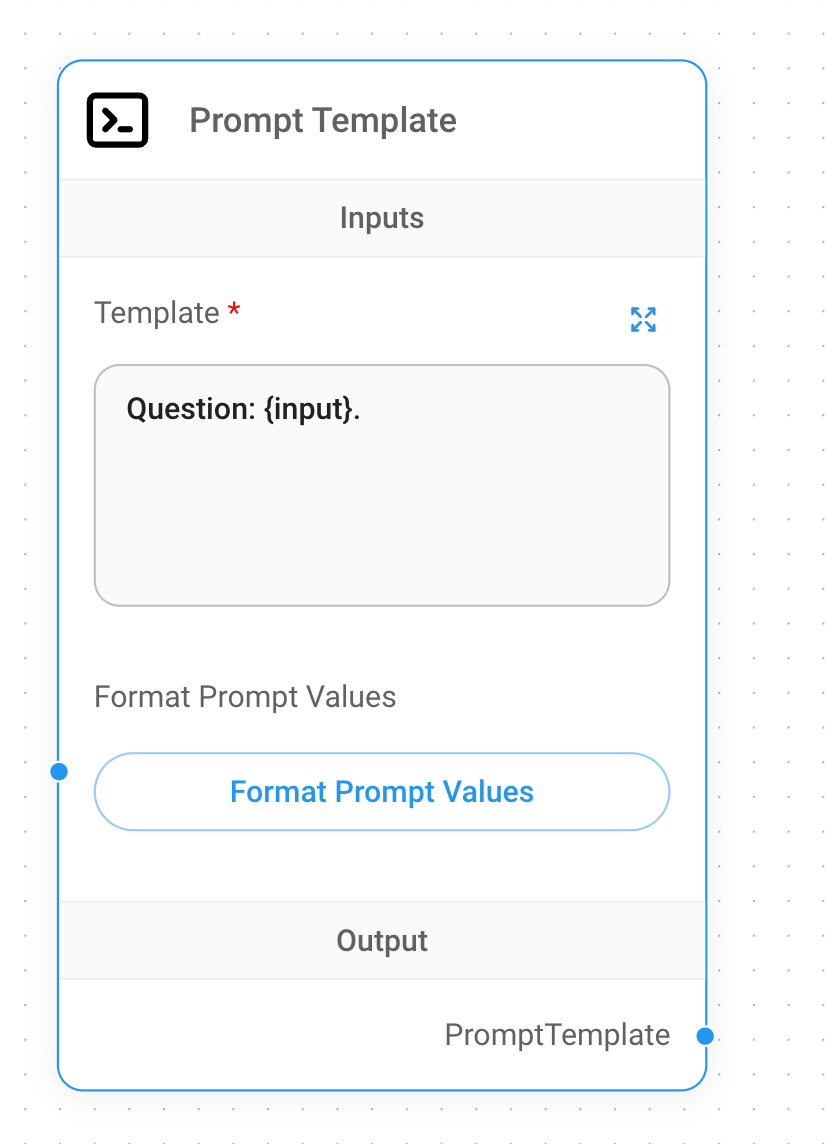
Now we can add the next node to our workflow. Search for Prompt Template and drag this node to the main canvas as
well. You can fill out the Template field with the following value:
Question: {input}.
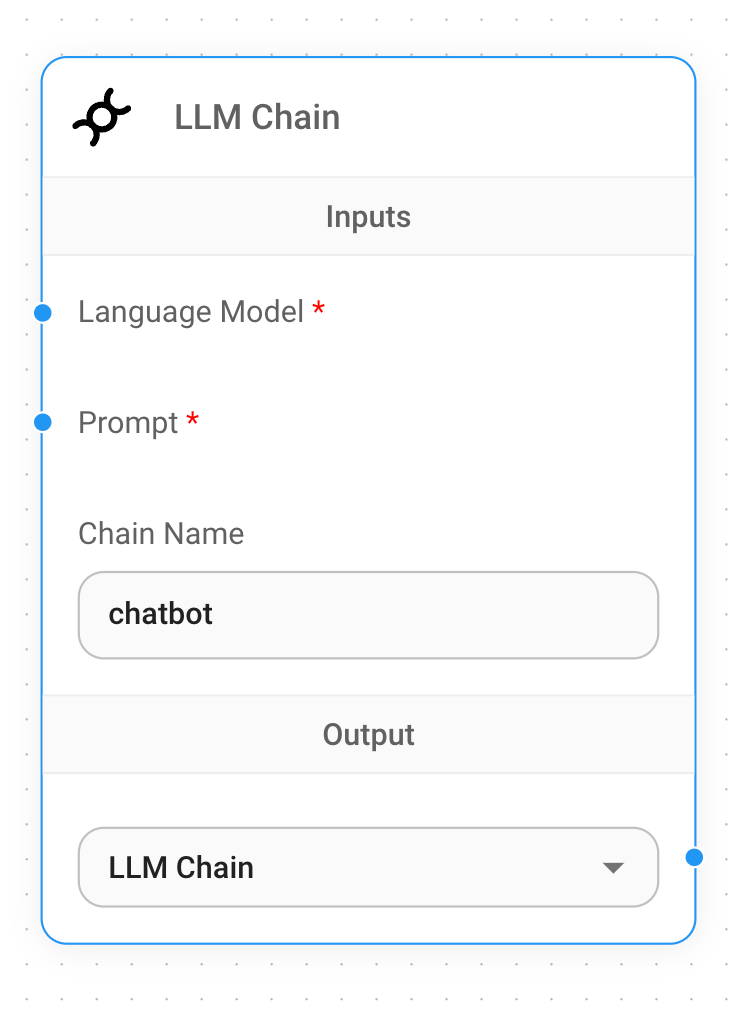
As a last step we need to add the LLM Chain node to the workflow. Head over to the Chains section of our nodes
menu and drag the LLM Chain node to the main canvas. Give the chain a name chatbot.
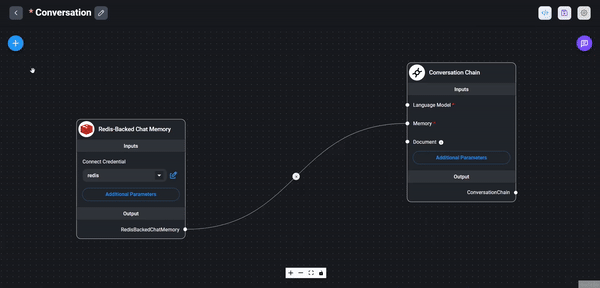
This done, we can start to connect different nodes to each other. Start with the Prompt and Language Model nodes by
dragging the arrow from the Language Model dot to the ChatLocalAI node. Same for the Prompt dot to
the Prompt Template node.
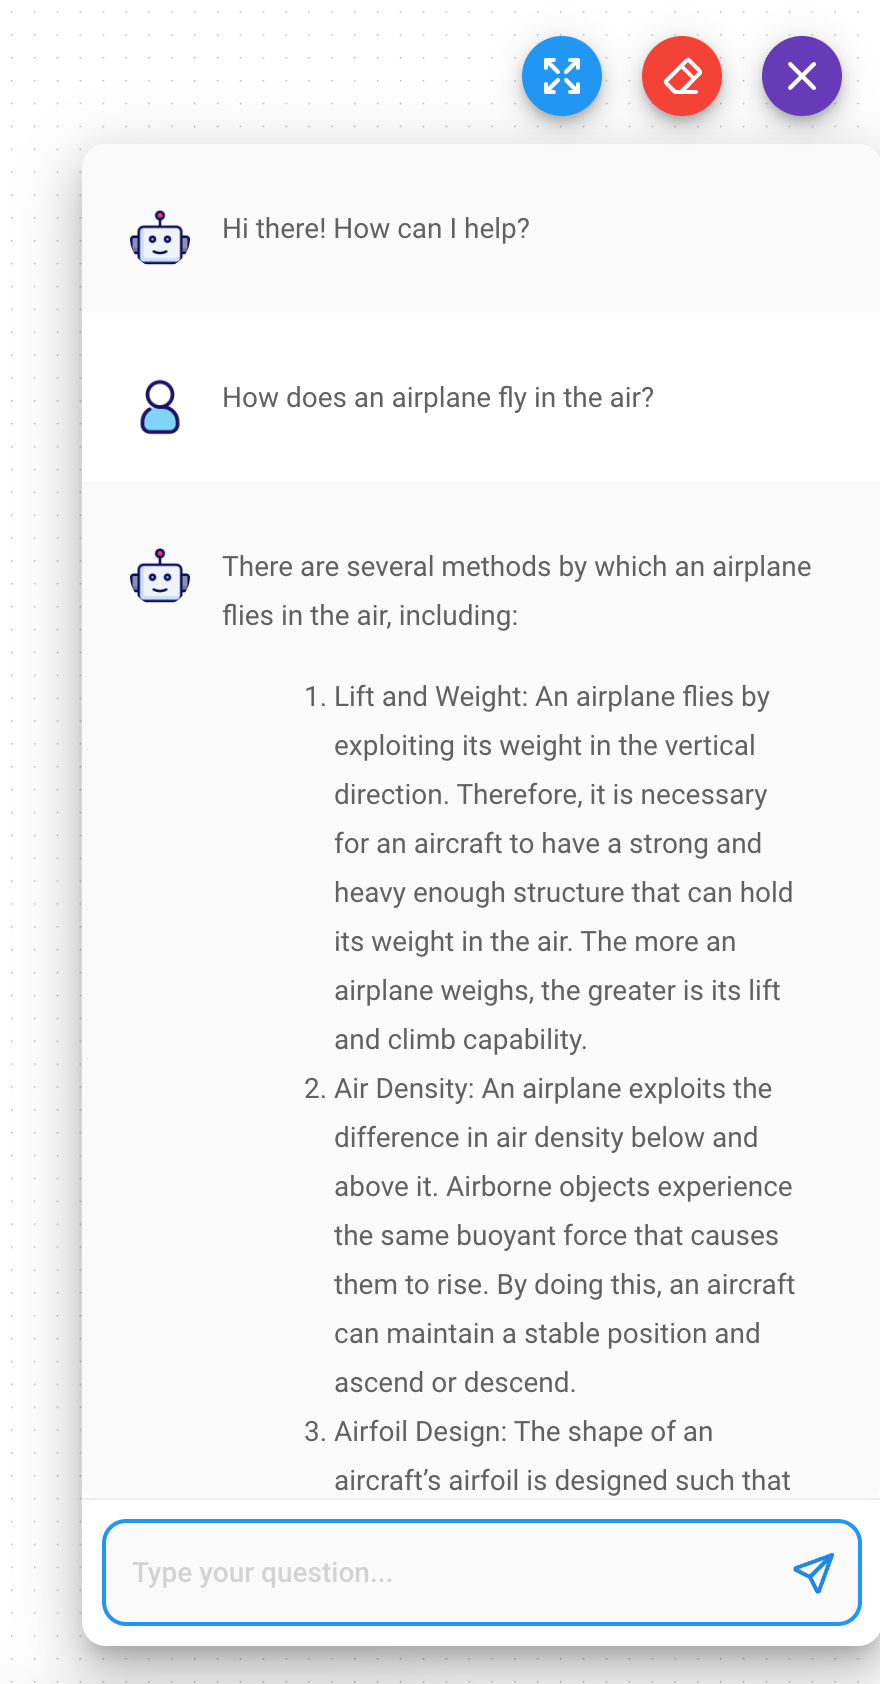
Now we can save the chartflow and test it. Click the Save icon in the top right corner and then click the Dialog
button to display the chatbot. You can now test the chatbot by typing a question in the input field and see the
response. In my case, I asked the chatbot How does an airplane fly in the air? and got the following response:
There are several methods by which an airplane flies in the air, including:

Lift and Weight: An airplane flies by exploiting its weight in the vertical direction. Therefore, it is necessary for an aircraft to have a strong and heavy enough structure that can hold its weight in the air. The more an airplane weighs, the greater is its lift and climb capability.
Air Density: An airplane exploits the difference in air density below and above it. Airborne objects experience the same buoyant force that causes them to rise. By doing this, an aircraft can maintain a stable position and ascend or descend.
Airfoil Design: The shape of an aircraft’s airfoil is designed such that it allows for the efficient and effective generation of lift force. The shape, thickness and angle control the air flow over the wings of an aircraft.
Control Arm: The control bar controls the angle of attack, pitch and yaw control. By moving the bar, pilots can change and adjust these features of the aircraft.
Propulsion Systems: An airplane requires propulsion systems to provide the thrust needed for takeoff, climb and movement through the air. Engines such as piston, turbojet, diesel engine or rocket engines are commonly used. The combustion process in these systems produces heat, which provides thrust.
Radio Communication: Aircraft can communicate with air traffic control in real-time, allowing pilots and air traffic controllers to coordinate their actions. This communication is essential for safe and efficient air travel.
Go ahead and test your chatbot with different questions! It is a great way to test different LLM models and see how they behave.
Expose the Chatbot via API
If you want to expose the chatbot workflow via API or SDK, you can use Flowise for this as well. Flowise provides a REST
API for this purpose. Head in your workflow view to the top right corner and click the </> button. This will open a
new dialog with all the different methods you can use. This range from embedding the chatbot in your website to using to
directly call the REST API.
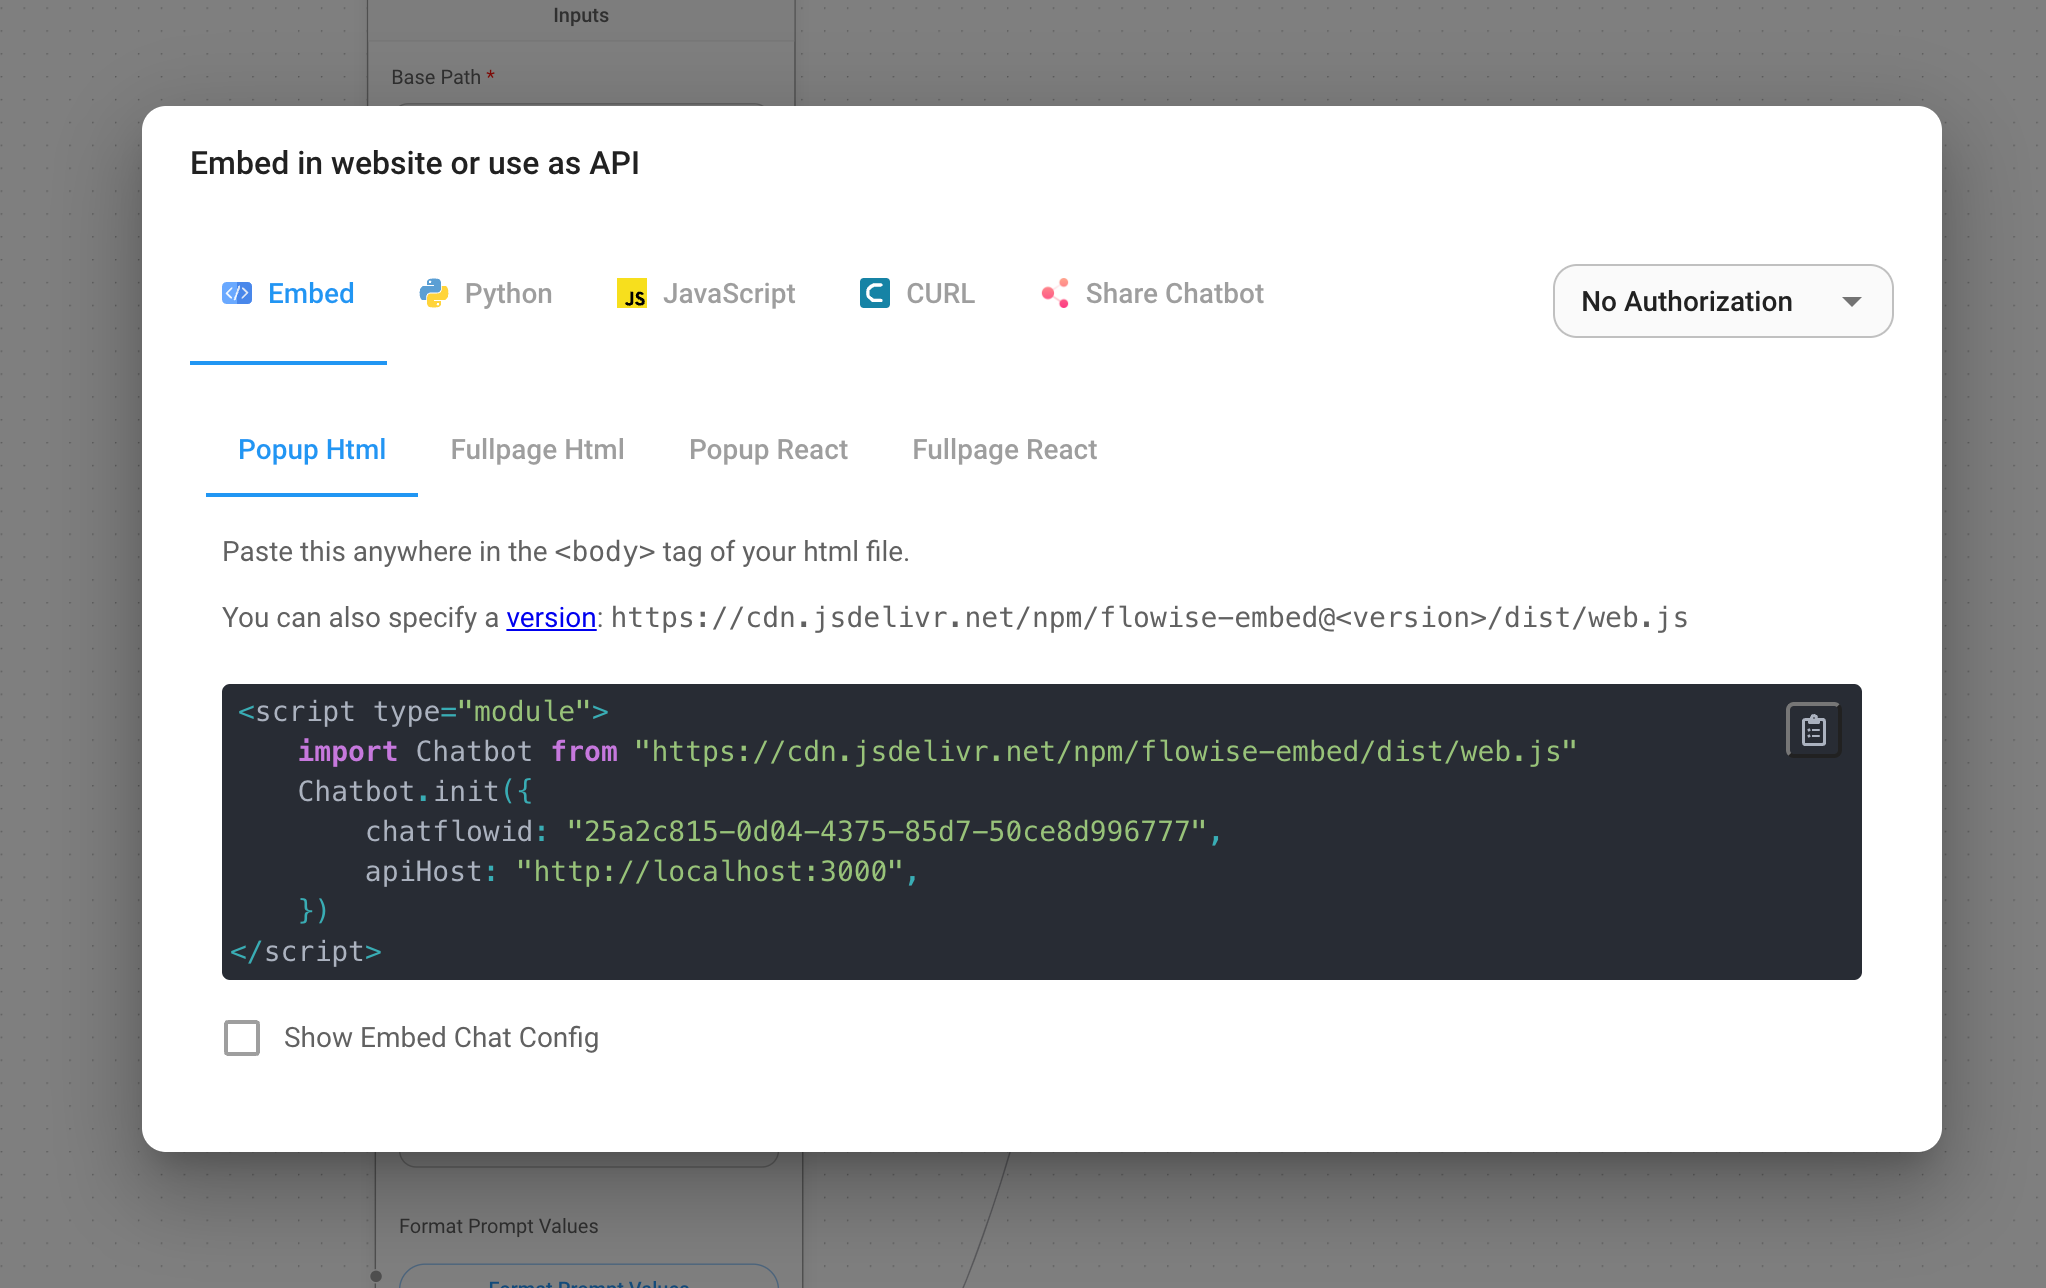
There is even the option to enable authorization for the REST API. This is a great way to secure your chatbot and only allow authorized users to access it.
Housekeeping
If you want to destroy the stack, you can use the following command:
pulumi destroy
The Pulumi CLI will ask you to confirm the changes, and if you are happy with the changes, you can confirm them by
typing yes and all the resources will be deleted.
In Conclusion
In this blog post, we have seen how easy it is to build a LLM application with Flowise and LocalAI without the need to use any code. This is a great way to quickly prototype and test different LLM models and workflows. We have also seen how easy it is to deploy the infrastructure with Pulumi and how easy it is to destroy the stack if we don’t need it anymore.
Want to get hands on with LangServe and walk through it live? We have two upcoming dates for a workshop focused on LangChain and LangServe!
- Deploying LangChain Applications on AWS with Pulumi on March 14, 2024
- Deploying LangChain Applications on AWS with Pulumi again on April 17, 2024
As always, we welcome your feedback and contributions in the Pulumi Community Slack, GitHub repository, and Pulumi Community Discussions.
New to Pulumi? Signing up is easy and free. Get started today!
Happy AI building!


