Debugging Pulumi providers
When developing or troubleshooting Pulumi providers, you may need to debug the provider code locally. This guide walks you through starting your provider in debug mode, setting breakpoints, and running tests.
Starting the provider in debug mode
To setup a process to debug, you will need to start the provider in debug mode through your local IDE. Upon startup, the provider should output a port number to the console (e.g., 12345), indicating it is ready for a debugger to attach. Here are two examples for GoLand and VS Code.
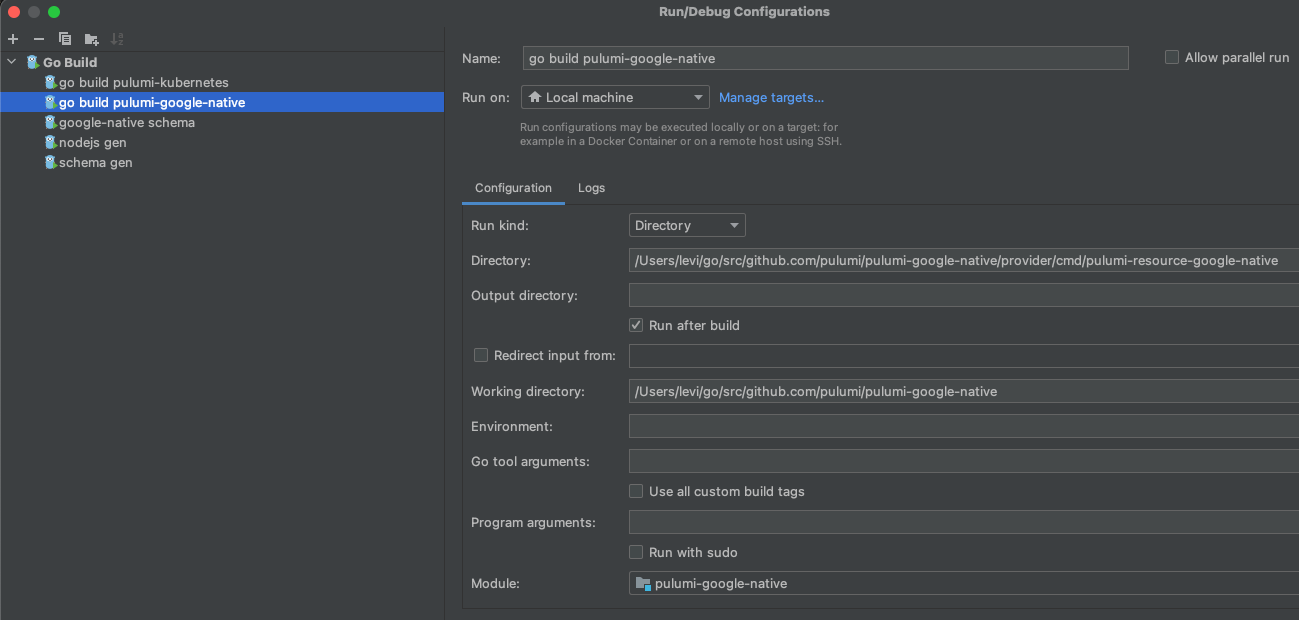
Example for GoLand
For GoLand you can follow these steps.
Configure the working directory to the program you are going to run to mirror how Pulumi would start the provider
Example for VS Code
For VS Code you can follow these steps.
Navigate to Run -> Add Configuration and add the Go: launch package configuration
Edit
"program": "${fileDirname}"to point tocmd/pulumi-resource-<PROVIDER>, e.g.,cmd/pulumi-resource-azure-nativefor the Azure Native provider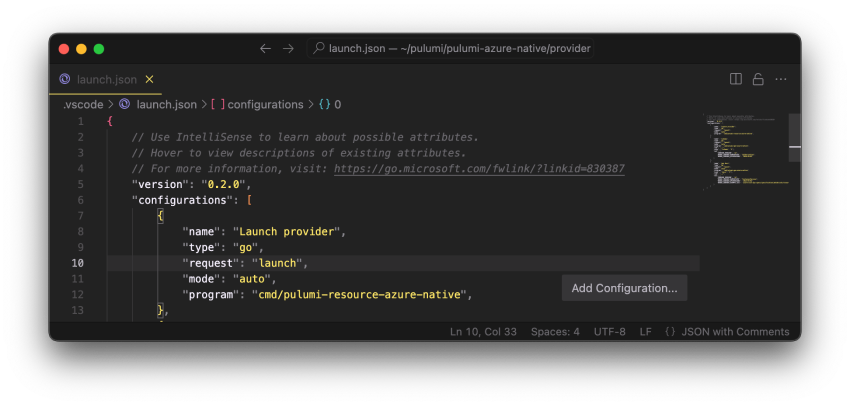
Edit “name”:
"Launch Package"to give it a descriptive nameLaunch package
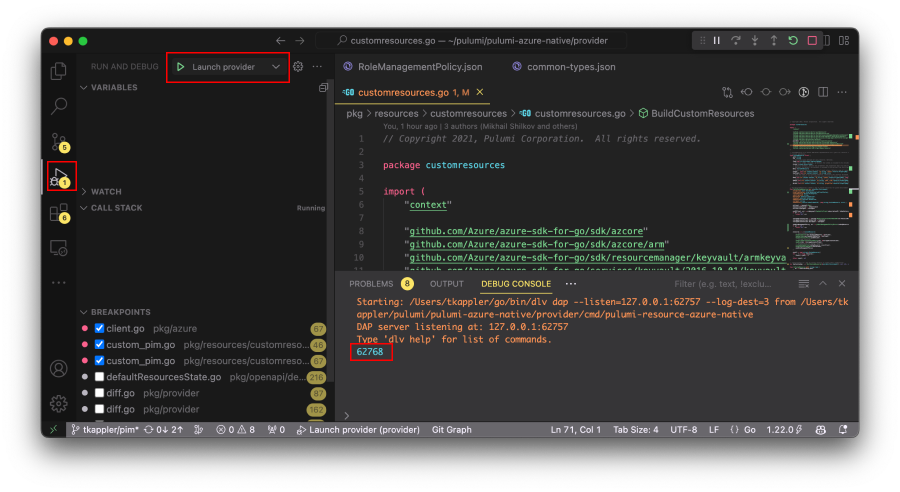
Setting breakpoints
With your IDE configured, set breakpoints within the provider code where you wish to pause execution during debugging.
Running Pulumi with debug providers
To attach the Pulumi CLI to your provider running in debug mode, use the PULUMI_DEBUG_PROVIDERS environment variable. Specify the provider and port number the debugger is listening on.
For example, to debug a deployment with the azure-native provider on port 12345, you would run:
PULUMI_DEBUG_PROVIDERS="azure-native:12345" pulumi up
Running tests
This approach also works for running tests, such as acceptance tests in a provider’s examples folder. For instance:
cd pulumi-wavefront/examples
PULUMI_DEBUG_PROVIDERS="wavefront:53766" go test -v -tags=python
Debugger attachment
Once Pulumi runs or tests are initiated with the PULUMI_DEBUG_PROVIDERS environment variable set, your IDE should automatically attach to the specified port and pause execution at your set breakpoints.
pulumi refresh will address this.Debugging Bridged Providers
Debugging tfgen
If you need to debug tfgen in one of the providers, you first have to start tfgen using dlv exec.
Install dlv
go install github.com/go-delve/delve/cmd/dlv@latest
Run tfgen with dlv exec
make debug_tfgen
Using local pulumi-terraform-bridge
If you want to use a local pulumi-terraform-bridge you can use go
workspaces to build the local provider
along with the local pulumi-terraform-bridge.
For example, if you had the following directory structure:
$ ls
pulumi-my-provider        # YOUR provider
pulumi-terraform-bridge   # github.com/pulumi/pulumi-terraform-bridge

$ cd pulumi-my-provider
Then you can run the following commands:
$ go work init
$ go work use -r ./provider
$ go work use -r ../pulumi-terraform-bridge
Then you can re-build tfgen to use the local bridge.
make tfgen_build_only
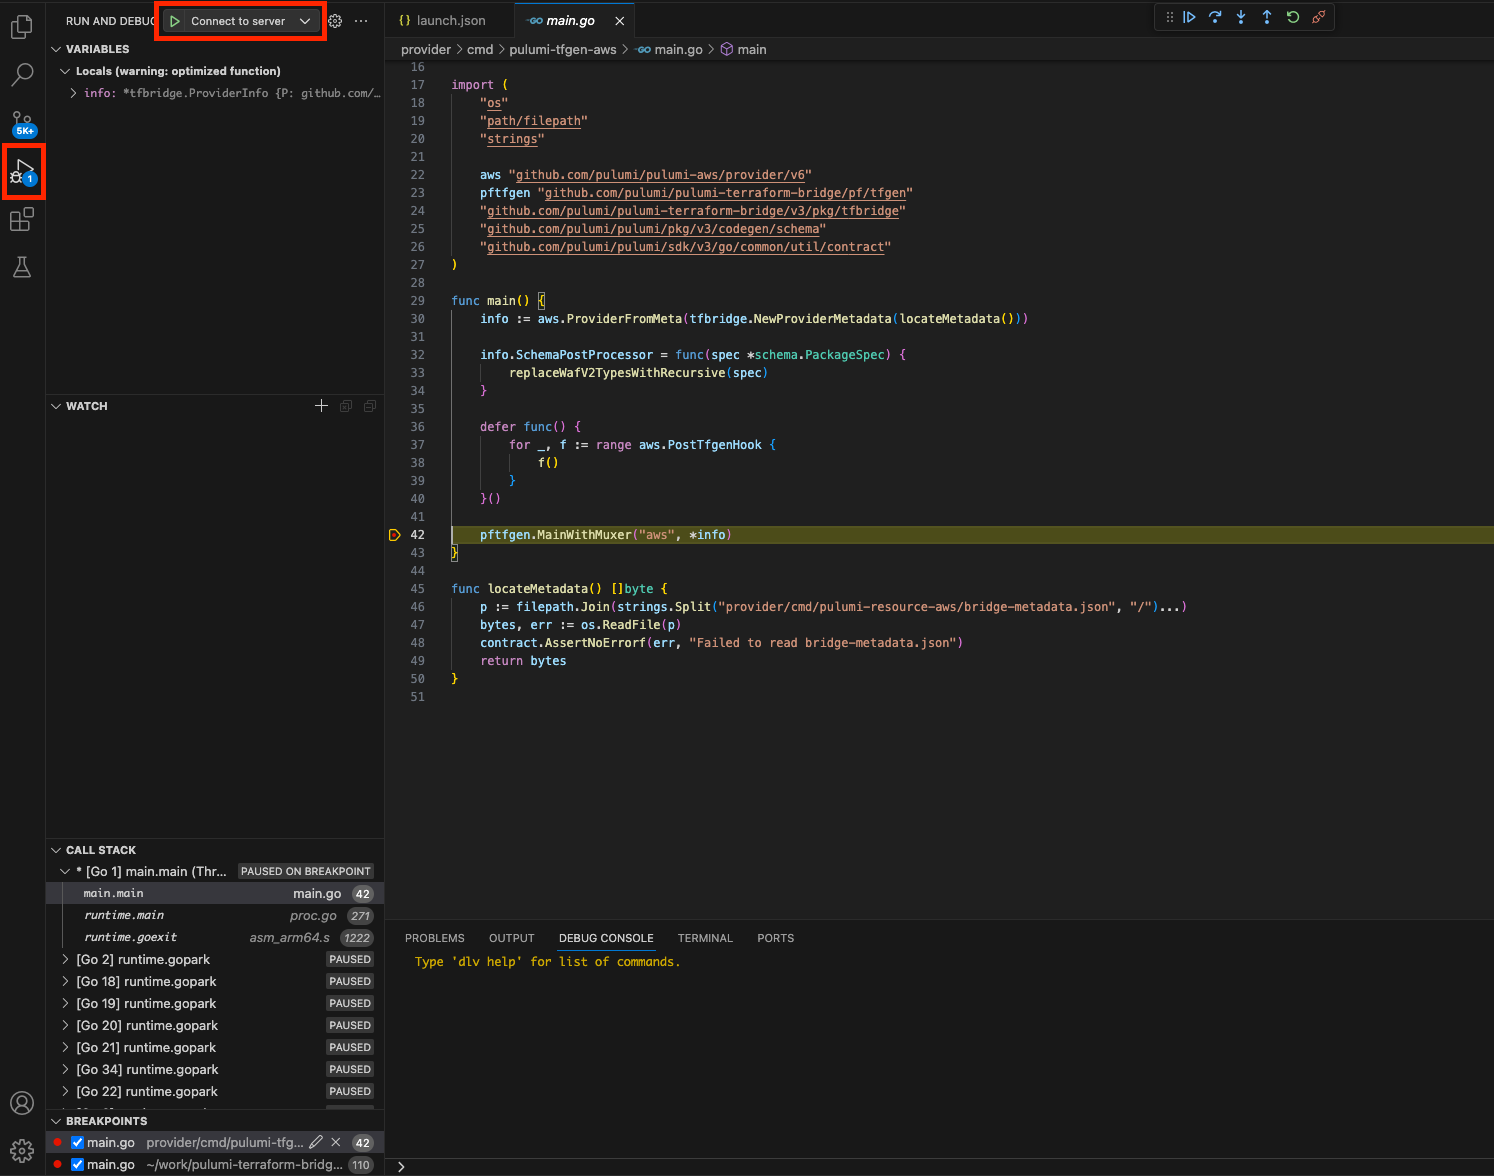
Attaching to the debugger in VS Code
For VS Code you can follow these steps to connect to the debugger.
Navigate to Run -> Add Configuration and add the Go: Connect to server configuration
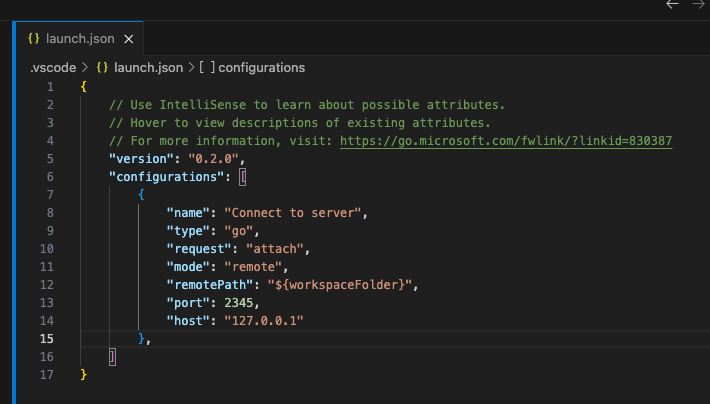
Edit “name”:
"Connect to server"to give it a descriptive nameConnect to server
Thank you for your feedback!
If you have a question about how to use Pulumi, reach out in Community Slack.
Open an issue on GitHub to report a problem or suggest an improvement.